Documenting storm damage the right way starts with confirming the property is safe before you step inside. Record the storm’s exact date, time, and weather conditions while details are fresh. Photograph damage from multiple angles, shoot video with narration, and inventory every damaged item with descriptions and values. Submit your claim promptly with organized evidence, and keep all records for years after repairs. Every step you take here directly shapes your claim’s outcome — and there’s a lot more to cover.
Key Takeaways
- Confirm structural safety before entering the property, checking for leaning walls, compromised foundations, and gas odors.
- Photograph damage from multiple angles using high resolution, including wide shots, close-ups, and overhead views of roofs.
- Create a detailed written inventory listing every damaged item with brand, model, age, condition, and replacement value.
- Contact your insurer promptly, request a claim number, and submit an organized package of photos, receipts, and descriptions.
- Retain all repair receipts, contractor estimates, and insurance correspondence, keeping records for at least seven years.
Make Sure the Property Is Safe Before You Document Anything
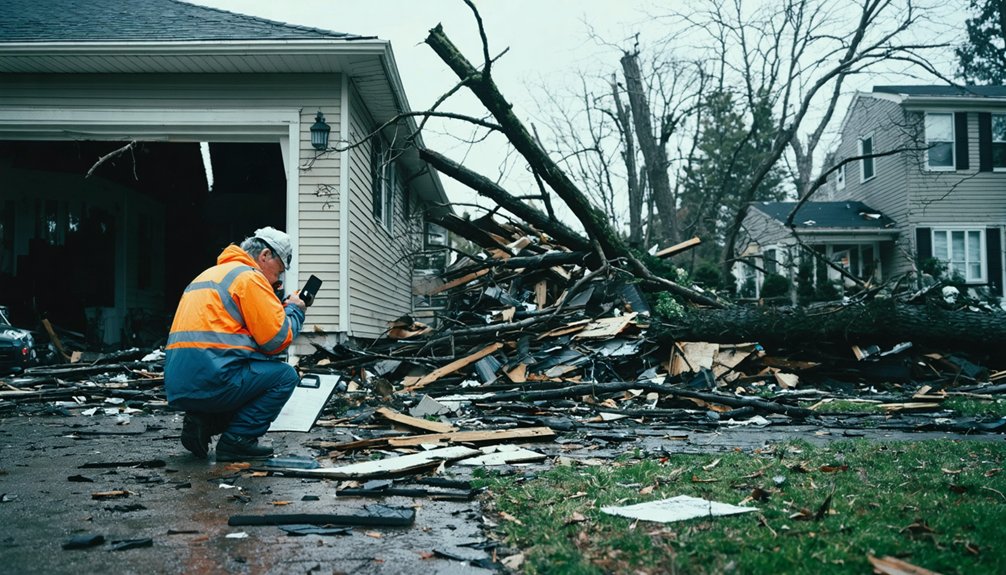
Before you photograph a single crack or broken window, make sure your property is structurally safe to enter. Conduct a quick safety assessment from the outside first. Look for leaning walls, compromised foundations, downed power lines, or gas odors.
Don’t assume property stability just because the structure is still standing.
A standing structure is not a safe structure. Stability must be confirmed, never assumed.
Once you’ve confirmed it’s safe to enter, do a careful walk-through. Note the date, time, and weather conditions. Record when you first spotted damage and who you contacted for emergency help.
If your roof is exposed, place tarps immediately to prevent further loss.
Your insurer expects thorough documentation, but not at the cost of your safety. Protect yourself first, then build your claim from a position of control and credibility.
Record the Storm Details Before Memory and Conditions Change
Memory fades fast after a storm, and so does the physical evidence. Locking in your storm timeline immediately protects your claim before details blur. Document these four critical elements right away:
- Date and exact time the storm hit and when you first noticed damage
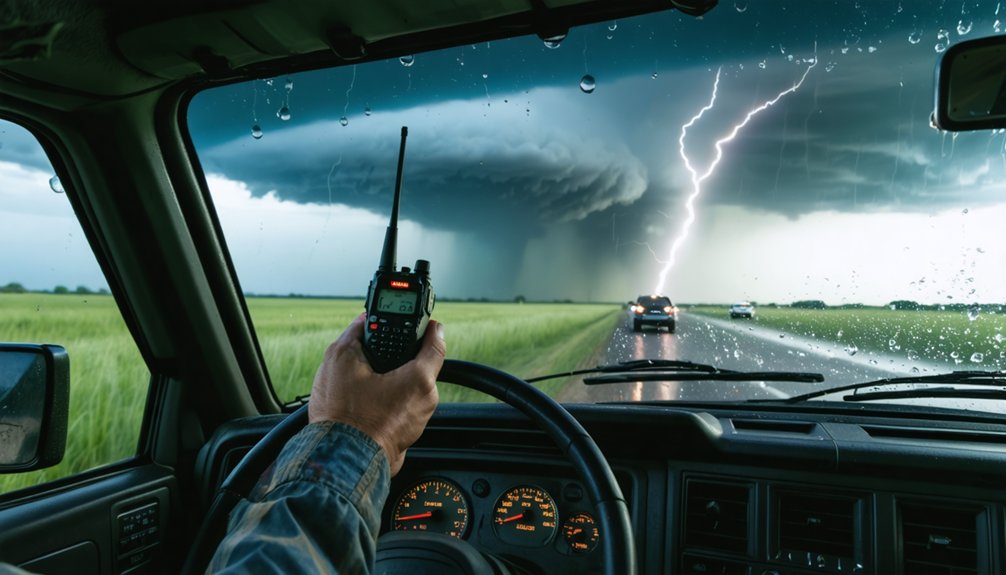
- Weather conditions during the storm — wind speed, hail size, rainfall intensity
- Your immediate actions — who you called, what you moved, what you covered
- Emergency contacts and responses — names, times, and what was said
Don’t rely on memory alone. Save official weather reports and news coverage to corroborate your account.
Insurance adjusters look for consistency between your documented storm timeline and verified weather conditions. Get it on record now, and you’ll have the evidence to back every claim you make.
Take Temporary Steps to Stop Further Storm Damage Now
Once you’ve locked in your storm documentation, your next priority is stopping additional damage before it compounds your losses.
Temporary repairs aren’t optional—they’re strategic. Insurers expect you to act reasonably to protect your property, and failing to do so can jeopardize your claim.
Cover exposed roof sections with tarps, board up broken windows, and redirect standing water away from your foundation.
Every action you take matters, so photograph and log it all. Document what you repaired, when you did it, and what materials you used.
Keep your emergency contacts accessible—contractors, water mitigation specialists, and your insurer’s claims line.
Move fast, but document faster. Your temporary efforts today protect both your property and your right to full compensation tomorrow.
How to Photograph Storm Damage the Right Way
Once you’ve secured the property, your next priority is capturing thorough photographic evidence before any cleanup begins.
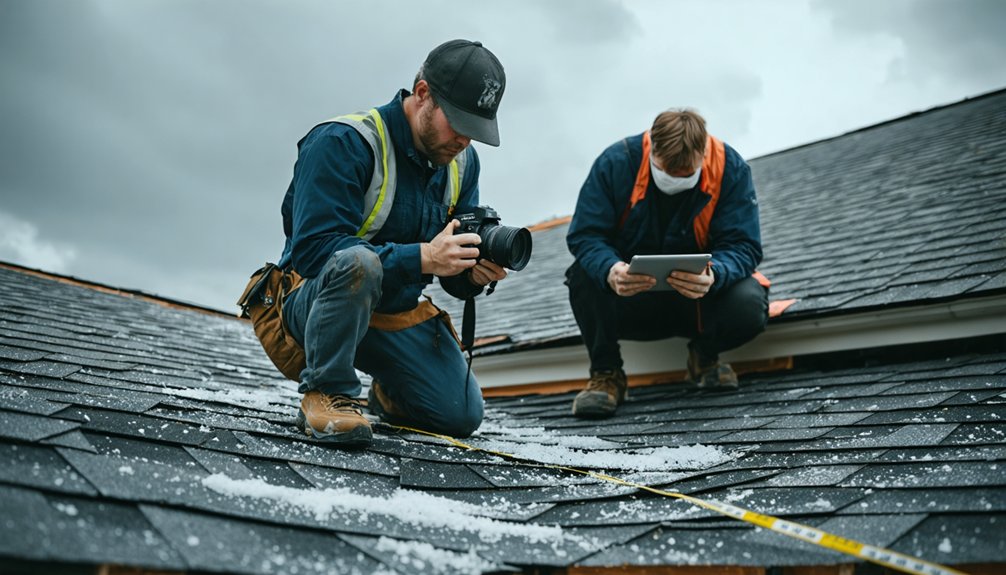
Use your camera or smartphone’s highest resolution setting and shoot every damaged area from multiple angles — wide shots for context, close-ups for detail.
Strong documentation means you’ve covered the roof, siding, windows, and interior spaces so your insurer can’t question the scope or origin of the damage.
Capture Every Angle
When storm damage strikes, your photos become the foundation of your insurance claim—so you need to capture every angle with intention. Angle variety strengthens your case by showing damage context insurers can’t dispute.
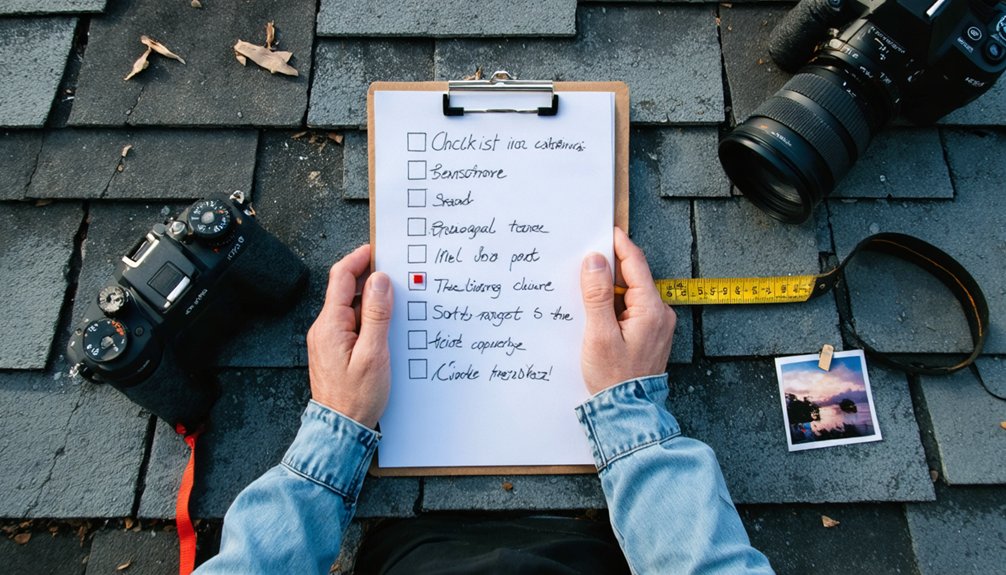
Follow this approach for every damaged area:
- Wide shots – Establish the full scope of damage from a distance.
- Mid-range shots – Show the damaged area within its surrounding structure.
- Close-ups – Capture specific cracks, breaks, or material failure clearly.
- Overhead or elevated shots – Reveal roof damage or pooling water insurers might otherwise miss.
Don’t move debris before shooting. Document everything in its post-storm condition.
Your goal is building an undeniable visual record that protects your claim and keeps you in control of your recovery.
Use High-Resolution Settings
Angle variety gets you the right shots—but image quality determines whether those shots actually hold up during the claims process. When you’re photographing storm damage, always switch your camera or smartphone to its highest resolution settings before you start shooting.
Image clarity isn’t optional—adjusters and legal teams scrutinize details that blurry or compressed images simply can’t deliver. High resolution settings preserve critical evidence: cracked shingles, fractured window seals, structural deformation.
These details directly influence how your claim gets evaluated. Avoid digital zoom, which degrades quality; instead, move physically closer to your subject. If lighting is poor, use a flashlight or wait for better natural light rather than risking unclear shots.
Every pixel counts when you’re protecting your property rights.
Document Before Cleanup
Before you touch a single piece of debris, photograph everything exactly as the storm left it. Disturbing the scene weakens your insurance claim tips strategy and hands adjusters reasons to dispute your payout.
Follow this sequence for storm damage prevention and claim accuracy:
- Shoot wide-angle shots first to establish full property context.
- Move closer for detailed shots exposing specific structural failures.
- Capture undisturbed debris, waterlines, and impact points precisely.
- Photograph timestamps visible in each frame to confirm timing.
Don’t let urgency push you into cleaning up before your documentation is complete. You control the narrative of what that storm did to your property.
Thorough pre-cleanup evidence protects your rights and maximizes your settlement potential.
Use Video to Capture Storm Damage That Photos Can’t Show
While photos capture individual moments, video documentation gives your insurance claim something far more powerful: continuous, contextual evidence of storm damage.
Walking through your property on camera lets you connect damaged areas, showing how one problem leads to another.
Use video narration to explain what you’re seeing in real time — describe when damage occurred, what caused it, and how it’s affecting your property’s function. This verbal context strengthens your claim considerably.
Visual storytelling through video also captures movement that photos can’t — water actively dripping, debris shifting, or structural instability.
Record your adjuster’s visit too, ensuring nothing gets overlooked during their assessment.
Combine your footage with photos for a complete evidence package. Together, they give you the strongest possible foundation for a fair settlement.
What to Include in Your Written Storm Damage Report
Your written storm damage report should include location-specific notes that identify exactly where each type of damage occurred, giving your insurer a clear and organized picture of the property’s condition.
Alongside these notes, you’ll want a thorough inventory of every damaged item, describing what it is, its condition before the storm, and the extent of the damage it sustained.
Round out your report with all relevant receipts, contractor estimates, and repair invoices, as these financial records directly support your claim’s valuation.
Damage Location-Specific Notes
When writing your storm damage report, location-specific notes are what transform a vague account into a compelling, claims-ready document.
Apply damage assessment techniques room by room, zone by zone. Detailed documentation strategies require pinpointing exactly where damage occurred so adjusters can’t dispute it.
For each affected area, record:
- Exact location – room name, exterior wall direction, GPS coordinates if applicable
- Damage type – structural, cosmetic, water intrusion, or mechanical failure
- Measurements – length, width, and depth of damage where possible
- Conditions observed – staining, cracking, warping, or mold indicators
Don’t generalize. “Roof damage” loses claims.
“Northeast roof slope, three missing shingles near ridge cap, 12-inch water stain on attic decking below” wins them. Specificity is your strongest asset.
Inventory Of Damaged Items
Location-specific notes anchor your report to the structure itself, but the contents inside matter just as much to your claim.
Create a line-by-line inventory of every damaged item, including damaged furniture, electronics, appliances, and personal belongings. For each item, record the name, brand, model, estimated age, pre-storm condition, and replacement value.
Don’t rely on memory alone — walk through each room systematically and document what you find.
Pair your written inventory with photos and purchase receipts when available. If receipts are gone, use bank statements or online order histories.
This inventory gives your insurer the hard data needed to process your claim accurately.
Incomplete records often lead to underpayment, so treat this list as a legal document protecting your financial recovery.
Receipts And Repair Estimates
Include these four essential financial documents:
- Emergency repair receipts — tarps, boards, and immediate mitigation materials you’ve purchased.
- Contractor estimates — get at least two written quotes detailing labor, materials, and scope.
- Invoice copies — retain originals from every hired professional who touched the property.
- Supplemental cost records — document temporary housing, equipment rentals, or storage fees.
Date-stamp everything and cross-reference each document with your written damage log.
This tight financial paper trail prevents insurers from undervaluing your losses.
How to Inventory Every Item Damaged by the Storm

Creating a thorough inventory of storm-damaged items is one of the most critical steps in securing a fair insurance settlement. Start by walking through every affected area and listing each damaged item systematically.
Use item categorization to organize losses by room, structure, or type — separating personal property from structural damage keeps your claim organized and credible.
Apply damage prioritization by addressing high-value or safety-critical items first, ensuring nothing significant gets overlooked. For each item, record its description, approximate age, original cost, and damage extent.
Include serial numbers and model information where available. Support every entry with corresponding photos and receipts.
A well-structured inventory prevents disputes, strengthens your negotiating position, and gives you complete control over your claim’s outcome.
How to Contact Your Insurer and File Your Storm Damage Claim
Once your documentation is in order, contact your insurer promptly to report the storm damage and request the necessary claim forms.
Submit all your evidence—photos, videos, written descriptions, and receipts—as a complete, organized package to support your claim.
Track every interaction with your insurer by logging names, dates, reference numbers, and follow-up emails to maintain a clear paper trail throughout the claims process.
Contacting Your Insurer Promptly
After the storm passes and you’ve secured your property, contact your insurer as soon as possible—delays can complicate your claim or raise questions about the timeline of damage.
Reaching out early keeps the claim process moving and protects your insurance coverage rights.
Follow these steps when making first contact:
- Call your insurer’s claims hotline and report the storm event immediately.
- Request your claim number and document the representative’s name.
- Ask specifically what your insurance coverage includes for storm-related losses.
- Confirm deadlines, required documentation, and next steps in the claim process.
Keep every interaction logged with dates, times, and reference numbers.
Following up by email creates a paper trail that supports your position if disputes arise later.
Submitting Your Claim Documentation
With your claim number secured and your insurer informed, your next move is pulling together everything you’ve documented and submitting it as a complete, organized package.
Follow these claim submission tips to strengthen your position: group photos and videos by damage location, attach your written inventory, and include all receipts and repair estimates.
Documentation organization matters here. Label every file clearly, sequence your evidence chronologically, and reference your communication log when submitting.
Most insurers accept digital uploads through an online portal, but confirm your carrier’s preferred method.
Submit everything simultaneously rather than in pieces to avoid delays. Keep copies of every document you send, and follow up by email immediately after submission to create a timestamped paper trail confirming receipt.
Tracking Claim Correspondence
Submitting your claim is only half the battle — tracking every conversation that follows is what keeps your claim moving forward. Every interaction with your insurer creates a record that protects your rights and accelerates resolution.
Stay organized with these claim follow-ups and documentation organization strategies:
- Log every call — record the date, time, representative’s name, and reference number immediately after each conversation.
- Follow up in writing — send emails confirming verbal agreements to create a paper trail.
- Track adjuster visits — document what was inspected, discussed, and promised.
- Store everything centrally — keep correspondence, photos, and receipts in one organized digital folder.
You control your claim’s momentum. Consistent tracking prevents disputes and guarantees nothing gets overlooked or conveniently forgotten.
How to Document Adjuster Visits and Dispute Any Discrepancies
When your insurance adjuster arrives, you’ll want to document every aspect of their visit to protect your claim. Record the adjuster’s name, contact details, and the visit’s date and time.
With permission, video the entire walkthrough, capturing every area they inspect and every comment they make. Strong adjuster communication starts here — take notes, ask clarifying questions, and confirm their findings in writing afterward.
If their assessment omits damage or undervalues losses, don’t accept it passively. Request a written copy of their report and compare it against your own documentation.
Discrepancy resolution often requires submitting supplemental evidence like contractor estimates or weather records. If disagreements persist, invoke your policy’s appraisal clause or consult a public adjuster to advocate on your behalf.
How Long to Keep Storm Damage Records After Repairs Are Done
Once your claim is settled and repairs are complete, your documentation work isn’t done. Smart record retention safeguards your financial freedom if problems resurface. Follow these guidelines:
- Keep all repair receipts and invoices for at least 7 years — future claims may reference prior damage.
- Retain your insurance correspondence indefinitely — disputes can resurface unexpectedly.
- Store photos and videos for the life of your ownership — they establish pre-existing versus new damage.
- Save weather reports and adjuster notes for a minimum of 5 years — they validate your original claim timeline.
Don’t let complacency cost you. Proper record retention guarantees you’re protected against future claims, contractor disputes, or recurring storm-related damage discoveries.
Frequently Asked Questions
Can Storm Damage Documentation Help Lower Future Insurance Premiums?
Thorough documentation doesn’t directly lower premiums, but it strengthens your insurance negotiation position and boosts claim accuracy. You’ll demonstrate responsible property management, potentially influencing your insurer’s risk assessment and keeping your long-term coverage costs competitive.
Should I Hire a Public Adjuster to Assist With My Storm Claim?
Studies show public adjusters can increase settlements by up to 747%. You’ll gain real public adjuster benefits by hiring one—they’ll navigate claim process tips, advocate for your freedom, and guarantee you’re not shortchanged during your storm claim.
Does Storm Damage Documentation Differ for Renters Versus Homeowners?
Yes, documentation differs. As a renter, you’ll focus on renter responsibilities like personal property losses. As a homeowner, you’ll exercise homeowner rights, documenting structural damage. Both should photograph everything and notify their respective insurers promptly.
Can Poor Documentation Result in a Denied or Reduced Insurance Claim?
Yes, poor documentation can get your claim denied or reduced. You’ll face claim disputes without documentation accuracy. Capture every detail, submit clear evidence, and you’ll protect your right to a full, fair settlement.
Are Digital Cloud Backups Acceptable for Storing Storm Damage Documentation?
Yes, digital storage through cloud backup solutions is absolutely acceptable. You’ll want to store your photos, videos, and written records securely online, ensuring you’ve got instant, accessible evidence ready when submitting or defending your insurance claim.
References
- https://www.selectadjusters.com/how-to-document-home-damage-after-a-storm-a-step‑by‑step-guide/
- https://cmslawgroup.com/how-to-document-storm-damage-at-your-home/
- https://palkerlaw.com/blog/top-tips-for-documenting-storm-damage-for-your-insurance-claim/
- https://mogollc.com/articles/how-to-document-damage-after-a-storm
- https://magicplan.app/blog/how-to-document-natural-disasters-restoration-contractors
- https://weatherscientific.com/blogs/weather-scientific-blogs/how-to-document-winter-storm-damage-for-insurance-claims
- https://nobleroofteam.com/what-storm-related-documentation-is-most-useful-for-insurance-review-and-approval/