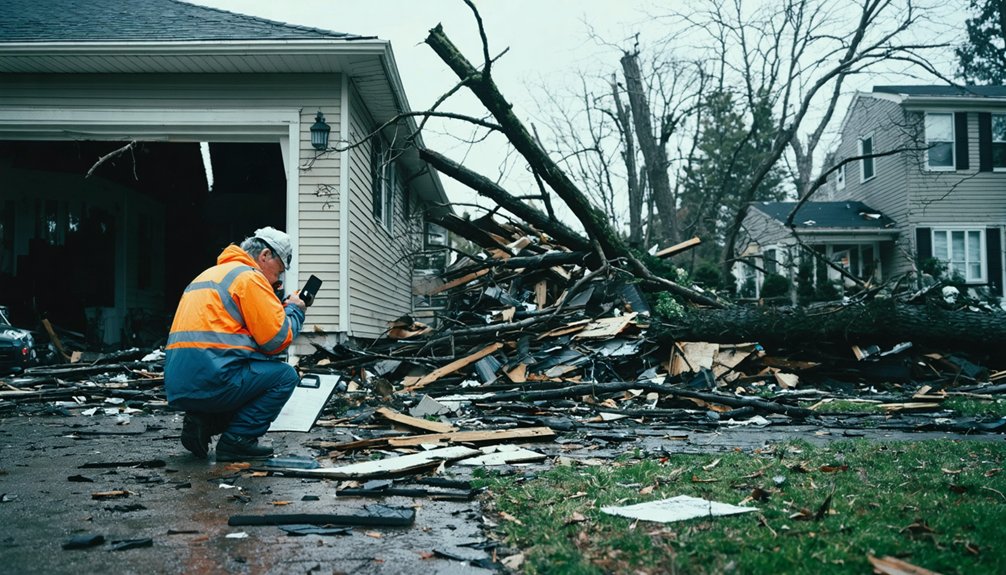
After the storm clears, you’ll need to document damage from ground level using binoculars and high-resolution photography. Capture timestamped images of missing shingles, granule loss, and water infiltration points while recording storm specifics including date, intensity, and duration. Deploy temporary protective measures like tarps, then contact your insurance carrier within 24-48 hours with detailed evidence including photos, measurements, and repair estimates. Licensed professionals should conduct thorough inspections to identify structural compromises that untrained eyes might miss, ensuring your claim documentation withstands adjuster scrutiny.
Key Takeaways
- Photograph and video all damage with clear, well-lit images showing missing shingles, granule loss, dented flashing, and water infiltration points.
- Document storm details including date, time, duration, and intensity to establish a direct timeline linking damage to the weather event.
- Record measurements of affected roof sections, damage patterns, and structural impairments with technical precision for insurance adjusters.
- Install temporary protective measures like tarps or flashing, then document materials used and maintain receipts for reimbursement claims.
- Contact your insurance carrier within 24-48 hours and submit organized evidence packages through their preferred communication channel.
Conduct a Safe Initial Assessment From Ground Level
Before stepping outside to survey storm damage, confirm the weather system has completely cleared your area and conditions are stable for safe observation. Scan your property perimeter for downed power lines and structural hazards before proceeding.
The NRCA recommends ground-level assessment only—never climb your roof, as hidden structural damage creates serious risk.
Circle your home’s entire exterior to avoid visual obstructions and capture detailed damage. Use binoculars to examine elevated roof sections, vents, and flashing without ascending. Document missing, curled, or torn shingles, plus any debris impacts. Check gutters, downspouts, and accessories for dents or separation.
Work systematically to minimize inspection time while maintaining thoroughness. If you spot major red flags or feel unsafe, contact roofing professionals immediately. Your safety takes priority over documentation speed.
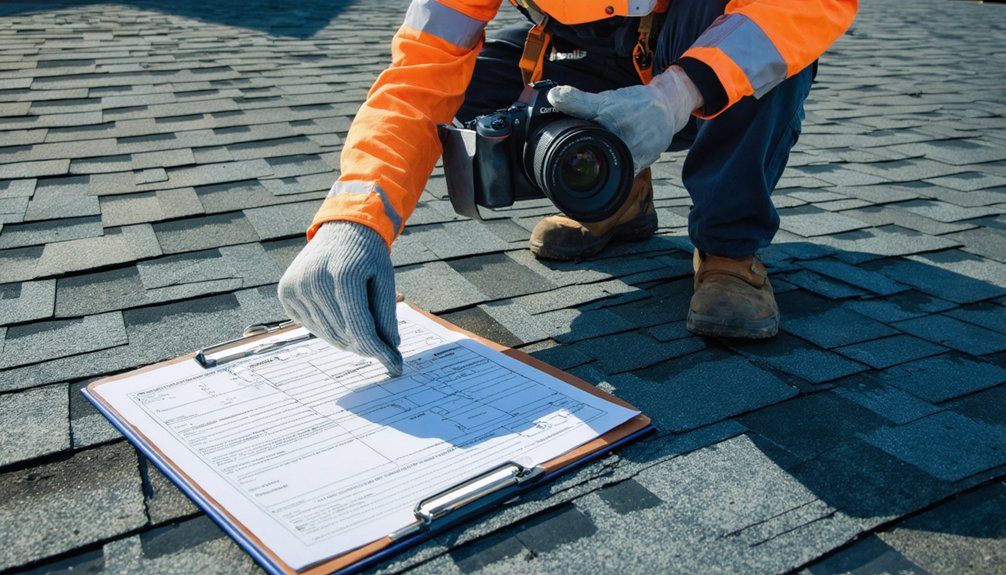
Capture Comprehensive Photographic and Video Evidence
Once you’ve completed your ground-level inspection, shift your focus to creating a detailed visual record that insurance adjusters and roofing contractors will use to assess storm damage severity and repair scope. Prioritize clear, well-lit images capturing granule loss, cracked shingles, and water infiltration points with rulers in-frame for scale reference.
Maintain consistent photo composition by documenting each damage location from multiple angles. Record high-resolution shots of missing shingles, dented flashing, and structural compromises. Film video sweeps of entire roof surfaces, hail impact dents, and interior attic spaces showing water stains or mold.
Apply timestamps and location labels to all media, organizing files with metadata including storm dates. Photograph ceiling leaks, damaged gutters, and debris accumulation. Supplement visuals with weather reports aligning damage to specific storm events.
Maintain Detailed Written Records of All Damage
While photographic evidence provides visual proof of storm damage, detailed written documentation creates the authoritative record that insurance adjusters and roofing contractors rely on to validate claims and scope repairs. You’ll need to log storm specifics—date, time, duration, type, and intensity—alongside precise damage observations.
Document measurements of affected sections, granule loss patterns, and structural impairment locations. Your detailed maintenance history proves responsible ownership: include inspection reports, repair invoices, and material warranties that establish baseline conditions before the event.
Record observed damage patterns with technical precision, noting whether impacts suggest hail strikes, wind uplift, or debris collision. Catalog interior water stains, infiltration points, and temporary mitigation measures you’ve implemented. This exhaustive written record substantiates your claim and expedites contractor assessments.
Implement Immediate Temporary Protective Measures
After documenting initial damage, you must implement emergency protective measures to prevent further deterioration while awaiting professional repairs. Your immediate priorities include securing exposed roof areas with tarping or sheeting, clearing debris from gutters and drainage systems, and photographing each temporary fix you install.
These protective interventions create a waterproof barrier against additional weather exposure and establish a documented timeline of your mitigation efforts for insurance claims.
Secure Exposed Roof Areas
When storm damage compromises your roof’s integrity, implementing immediate temporary protective measures becomes critical to prevent secondary water intrusion and interior damage escalation. You’ll need to act decisively to inspect integrity of roof structure and secure vulnerable areas before conditions worsen.
Deploy these proven protective solutions:
- Heavy-Duty Tarping: Position UV-resistant tarps extending 4+ feet beyond damaged zones, securing edges around 2×4 boards screwed into roof framing—avoid penetrating undamaged shingles.
- Polyethylene Film Systems: Heat-shrink Stormseal film over compromised areas with mechanical fixings every 1,500mm, creating wind- and hail-resistant barriers.
- Temporary Flashing: Apply elastomeric sealants and roofing cement to seal flashing gaps at chimneys, walls, and valleys.
Monitor temporary protection effectiveness through regular inspections, ensuring no gaps compromise your emergency barriers while awaiting professional repairs.
Clear Debris and Gutters
Before addressing structural repairs or coordinating insurance assessments, you must systematically remove all storm-generated debris from your roof surface and drainage systems to prevent compounding damage. Start with ground-level inspection using binoculars to identify unstable branches or limbs. Prioritize large debris extraction using telescoping rakes or grapplers before employing leaf blowers for lighter materials.
Direct airflow downward off edges—never upslope—to protect shingles. Clear gutters manually with thick gloves after roof cleanup, then rinse with low-pressure water to verify flow efficiency. Blocked drainage accelerates secondary water damage considerably.
Work during daylight on dry surfaces while wearing appropriate PPE. For extensive debris removal beyond your capability, engage licensed roofing contractors. Consider gutter guards installation post-cleanup to maintain long-term drainage integrity and minimize future maintenance interventions.
Document All Temporary Repairs
Execute these critical documentation steps:
- Photograph pre-repair conditions capturing damage patterns that distinguish storm impact from wear, then document each protective installation with timestamped images
- Record material specifications including tarp dimensions, UV-resistance ratings, fastener types, and installation methods extending 4 feet beyond compromised zones
- Maintain itemized receipts for tarps, lumber, roofing cement, emergency contractor labor, and water extraction services
Your detailed temporary repair documentation establishes causation timelines and validates reimbursement claims while proving compliance with policy mitigation obligations.
File Your Insurance Claim Promptly With Complete Documentation
Contact your insurance carrier within 24-48 hours of the storm event to initiate your claim and obtain a claim number for tracking purposes.
Prepare a detailed evidence package that includes timestamped photographs, professional inspection reports, official weather documentation from NOAA, and itemized repair estimates from licensed contractors.
Submit all materials through your insurer’s preferred channel—whether online portal, email, or mobile app—in a single, organized submission to expedite adjuster assignment and prevent processing delays.
Contact Insurer Within 24-48 Hours
When storm damage strikes your roof, filing your insurance claim within the first 24 to 48 hours establishes a critical timeline that protects your coverage rights and expedites the claims process. Your policy likely mandates “prompt notice” or specific notification windows ranging from 30 to 180 days, but immediate action prevents denial arguments based on delayed reporting.
Essential first-contact protocols:
- Document the exact storm date and time to create a detailed timeline linking damage to the weather event
- Photograph all visible damage before conditions change or secondary weather occurs
- Request your policy’s specific notification deadline to guarantee compliance with contractual requirements
Insurers respond more favorably to claims filed immediately after verifiable storm events. Consistent follow-up during the initial week demonstrates diligence and prevents your claim from languishing in processing queues alongside delayed filings that trigger automatic scrutiny.
Submit Organized Evidence Package
Your insurance claim’s success hinges on submitting a meticulously organized evidence package that eliminates adjuster doubt and accelerates approval timelines. Structure your documentation into clearly labeled digital folders: pre-storm baseline photos, post-storm damage evidence, professional inspection reports, weather data, and itemized inventories.
Submit evidence promptly—within 72 hours of initial notification—to prevent claim delays or denials. Include timestamped photos with scale references, detailed damage logs, emergency repair receipts, and secure contractor proposals with line-item estimates.
Attach supporting documents like National Weather Service reports confirming wind speeds exceeding 50 mph and hail diameter measurements. Cross-reference your inventory spreadsheet with visual evidence, ensuring every damaged component has photographic proof.
This thorough approach streamlines adjuster review, establishes causation, and maximizes your settlement while protecting your rights throughout the claims process.
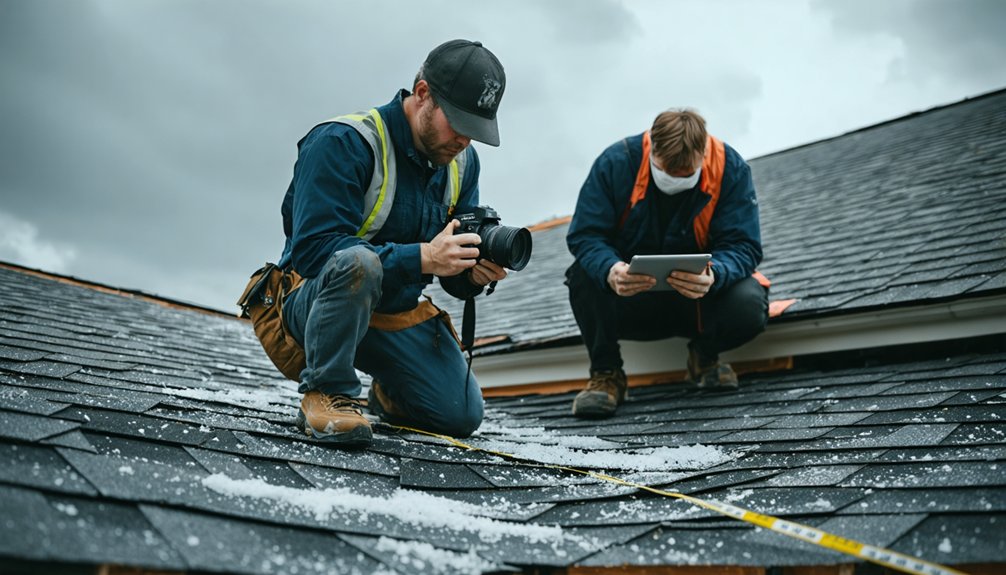
Engage Licensed Professionals for Thorough Inspection
After a storm passes through your area, engaging a licensed roofing professional guarantees you’ll capture critical damage evidence that determines claim success or failure. Certified inspectors deliver hands-on assessments that reveal hail bruising, compromised sealants, and structural vulnerabilities invisible from ground level.
Licensed roof inspectors uncover hidden storm damage that untrained eyes miss, providing documentation essential for successful insurance claims.
Their exhaustive photo documentation and detailed reports carry significant weight when you coordinate with insurance adjuster representatives.
Seek professionals with these essential qualifications:
- NRCIA certification demonstrating rigorous training in roof systems and ethical standards
- Active general liability and workers’ compensation insurance protecting you from accident liability
- State-specific licensing (like Texas engineering credentials for windstorm inspections) verifying code compliance expertise
Schedule inspections within 24–48 hours post-storm to preserve fresh evidence. Licensed adjusters help you understand policy coverage nuances, ensuring every claim-worthy issue gets documented according to your policy’s fine print requirements.
Organize All Documentation for Smooth Claims Processing
Professional inspections generate the raw evidence you need—but disorganized records sabotage even the strongest claims. You’ll want to organize repair cost details in a dedicated electronic spreadsheet or cloud drive, categorizing each expense by damage type, contractor, and date. Maintain documentation log tracking every communication: claim numbers, adjuster names, reference codes, and timestamps.
Separate your records into clear sections—photos, receipts, estimates, correspondence—so you’re not scrambling when insurers request specific documents. Store digital backups of everything: contractor reports, witness statements, itemized quotes, and proof-of-purchase records. This systematic approach eliminates delays, prevents disputes, and puts you in control.
When documentation flows logically, adjusters process claims faster, and you’ll receive your settlement without bureaucratic roadblocks slowing your recovery.
Frequently Asked Questions
What if My Insurance Company Denies My Storm Damage Claim?
Don’t accept defeat—you’ve got options. Challenge improper claim handling through your state’s insurance department or hire a public adjuster. For policy coverage disputes, document everything meticulously and consider legal action to secure what’s rightfully yours.
How Long Do I Have to File a Claim After Discovering Damage?
You’ll typically have 30-60 days from discovery, though policies vary. Contact your insurer immediately upon finding damage and document promptly with photos. Review your policy’s specific “notice of loss” deadline to preserve your claim rights.
Can I Choose My Own Contractor or Use the Insurer’s Preferred Vendor?
You’re legally entitled to select your own contractor—policies don’t mandate preferred vendors. However, obtaining independent estimates from your selecting preferred contractor guarantees quality control, manufacturer warranties, and thorough damage assessment versus insurer-influenced scopes prioritizing cost over complete restoration.
Does Homeowners Insurance Cover Gradual Wear Versus Sudden Storm Damage?
Your policy covers sudden storm damage within policy limits minus your deductible amounts, but excludes gradual wear and tear. You’ll need documentation proving storm-specific damage—not aging or maintenance issues—to secure coverage for your roof repairs.
What Happens if the Adjuster’s Estimate Is Lower Than the Contractor’s Quote?
A mountain of paperwork awaits you. You’ll negotiate a settlement by documenting every discrepancy, submitting a disputed estimate with photos and itemized breakdowns, then requesting reinspection. If unresolved, hire a public adjuster to maximize your payout and protect your investment.