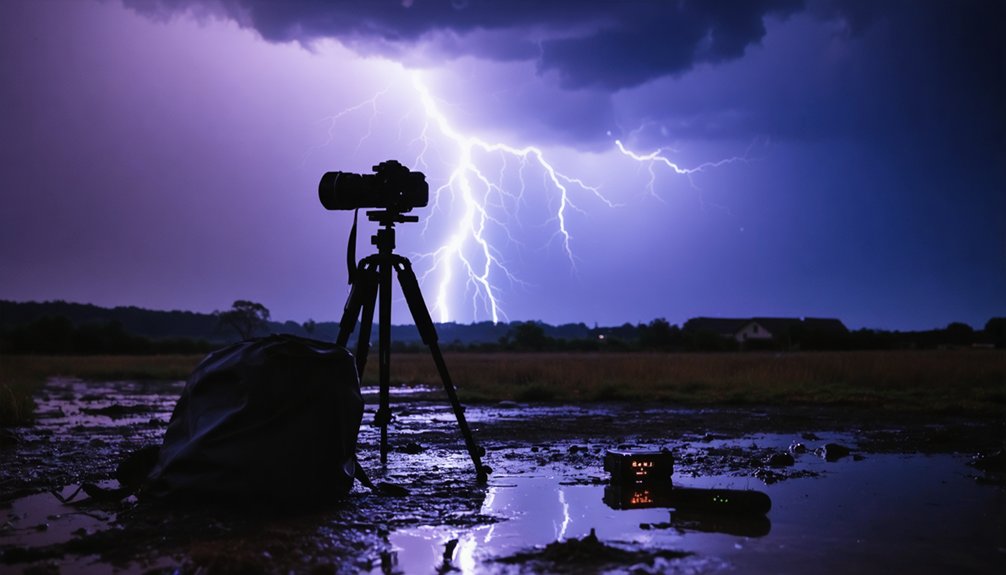
Master storm photography by committing to a locked composition on a sturdy tripod—you’ll capture decisive lightning moments without repositioning risks. Use 14-24mm wide-angle lenses at f/8-f/16 to frame complete storm architecture while positioning yourself midway between the cell and your escape route. Place foreground elements at rule-of-thirds intersections, keeping your camera low to exaggerate storm tower perspective and create dimensional separation. These techniques demand technical precision and patience, but they’ll transform chaotic weather into portfolio-defining images that reveal nature’s raw power.
Key Takeaways
- Lock your composition on a sturdy tripod to capture decisive lightning moments without missing opportunities from repositioning during storms.
- Use 14-24mm wide-angle lenses with f/8-f/16 apertures, focusing one-third into the scene to capture complete atmospheric architecture and maximize sharpness.
- Position foreground elements at rule-of-thirds intersections with high horizons to show storm scale and create dimensional separation through layered composition.
- Set 15-second exposures at f/11 with ISO 50-400, or use bulb mode for consistent exposure while capturing lightning strikes.
- Position yourself midpoint between storm core and escape route, switching to telephoto lenses for violent cells to maintain safe distance.
Fixed Composition and Waiting for the Perfect Moment
Storm photography demands split-second timing, and the difference between capturing a perfect lightning strike and missing it entirely often comes down to whether you’ve committed to a fixed composition. You’ll miss critical moments if you’re constantly repositioning.
Commitment to composition is everything—repositioning during a storm means sacrificing the decisive moment when lightning strikes.
Lock your frame on a sturdy tripod—handheld stabilization techniques won’t cut it in 50-60 mph gusts—and pre-focus manually on distant points to avoid autofocus hunting.
Position wind at your back to prevent lens spray, then wait. Use 15-second exposures or bulb mode at f/11 with ISO 50-400 for exposure consistency in varied lighting as storm conditions shift.
You’ll need multiple attempts until lightning strikes within your exposure window, but this patience-driven approach captures nature’s raw power without compromising your safety or technical precision.
Wide-Angle Storm Structure Capture
When capturing supercells and shelf clouds in their entirety, you’ll need a wide-angle lens—typically 14-24mm—to frame the complete atmospheric architecture from ground-level updraft base to the anvil spreading overhead. Position yourself with midpoint positioning between the storm’s core and escape route, allowing you to embrace the structure while maintaining exit options. For violent or fast-moving cells, switch to a 70-200mm to create a safety buffer.
Essential wide-angle storm techniques:
- Set your tripod low to exaggerate perspective, making the storm tower overhead with dramatic intensity
- Use f/8 to f/16 apertures with focus one-third into the scene for maximum sharpness throughout
- Keep horizons low to let turbulent skies dominate your frame, emphasizing the dynamic storm movement above
Using Foreground Elements to Show Scale
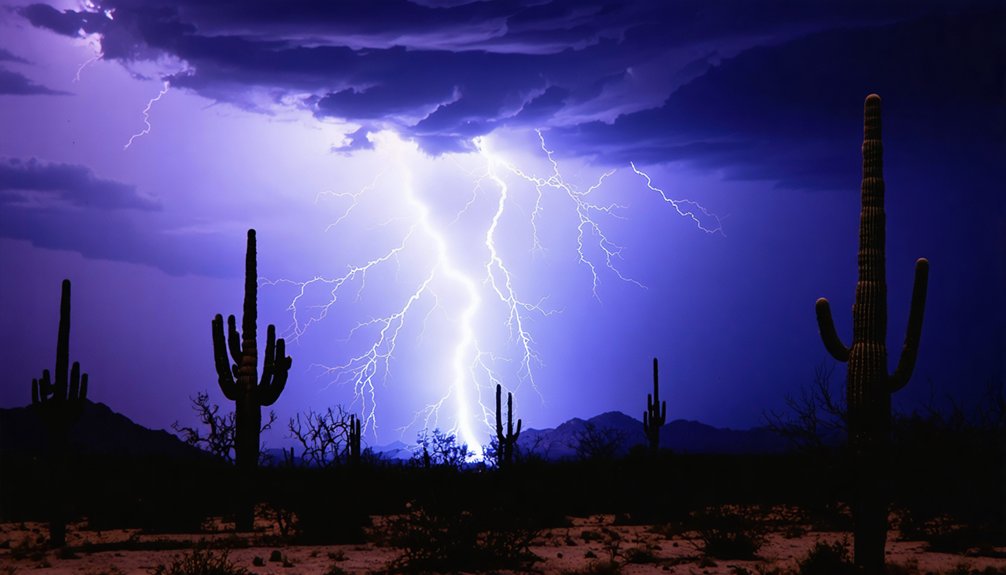
One of the most powerful compositional tools in storm photography is strategic foreground placement—it transforms flat, distant cloudscapes into immersive three-dimensional scenes that communicate a supercell’s true magnitude. You’ll achieve ideal framing balance by positioning your camera low—inches above ground—with wide-angle lenses between 15–35mm. This proximity exaggerates foreground elements like weathered fence posts, windswept grasses, or textured rock formations while capturing the storm system beyond.
Your brain processes images front-to-back, making foreground anchors essential for viewer engagement. Place natural subjects at rule-of-thirds intersection points for subject isolation that emphasizes scale relationships. A solitary tree dwarfed by rotating wall clouds instantly conveys storm severity.
Keep horizons high to maximize foreground detail while maintaining storm context—you’re creating dimensional separation that reveals nature’s raw power through layered composition.
Frequently Asked Questions
What Camera Settings Work Best for Capturing Lightning Strikes During Storms?
Like a patient hunter awaiting prey, you’ll need f/5.6-f/8 aperture, shutter speed settings of 5-30 seconds, and ISO adjustments between 100-400 at night—tighter apertures during daytime with ND filters for creative control.
How Do You Protect Camera Equipment From Rain and Hail Damage?
Use weatherproof camera housing with rain covers to shield your gear from direct precipitation. Store equipment in storm-resistant camera bags with silica gel packets. You’ll maintain shooting freedom while preventing moisture damage, hail impacts, and lens condensation during severe weather conditions.
What Are the Safest Distances to Maintain When Photographing Severe Storms?
Dark clouds tower ahead—you’ll want to maintain safe proximity of 2-3 miles from the storm’s edge. For core shots, keep 6+ miles distance. Smart storm proximity means respecting nature’s power while capturing its raw beauty from survivable distances.
Should You Use Filters When Shooting Storms in Different Lighting Conditions?
Yes, you’ll need neutral density filters for daytime storm shooting to slow your shutter speeds without overexposing. Polarizing filters enhance cloud contrast and manage bright skies, though they require 1.5 stops light compensation for proper exposure.
What Post-Processing Techniques Enhance Storm Photography While Maintaining Realism?
Your storm shots come alive through balanced HDR processing that recovers highlight and shadow detail without creating halos. Apply subtle color grading techniques—warming highlights, cooling shadows—while preserving natural storm atmosphere and maintaining authentic weather conditions throughout your editing workflow.