To capture stunning lightning strikes, you’ll need to master manual exposure settings—use f/8 to f/16, shutter speeds from 2-30 seconds depending on ambient light, and ISO 100 to prevent blown highlights. Mount your camera on a sturdy tripod with a remote shutter release to eliminate shake during long exposures. Frame wide compositions with environmental anchors, as lightning’s unpredictable. Focus manually at infinity and consider lightning triggers for automated capture. The techniques below reveal advanced methods for layering exposures and tracking storm movements safely.
Key Takeaways
- Use manual mode with aperture f/8-f/16, shutter speed 2-30 seconds depending on darkness, and ISO 100 for sharp strikes.
- Mount camera on sturdy tripod with remote shutter release to eliminate shake during long exposures exceeding 15 seconds.
- Focus manually at infinity and frame wide to capture unpredictable bolt locations with environmental anchors for context.
- Track storm movements using weather radar apps and position ahead of storms for optimal shooting angles and safety.
- Expose for highlight retention to prevent blown-out bolts and layer multiple exposures for dramatic composite images.
Master Your Camera Settings for Day and Night Lightning Photography
Successful lightning photography demands complete manual control over your camera’s exposure settings. You’ll need to abandon auto modes entirely—they’ll hunt for focus and botch your timing when shooting lightning bolts.
Start with f/8 to f/16 for sharp, properly exposed strikes. At dusk, use f/10-f/16 with 2-10 second exposures; after dark, open to f/5.6-f/8 and extend shutter speeds to 20-30 seconds. Keep ISO at 100 to prevent noise and blown-out highlights in bright bolts.
Manual focus to infinity prevents shutter delay—use live view on a distant object and lock it. Set white balance between 4000K-5000K for natural color rendition. Disable image stabilization on your tripod and experiment with camera angle adjustments to frame foreground elements with the storm’s path.
Choose the Right Equipment and Automated Triggers
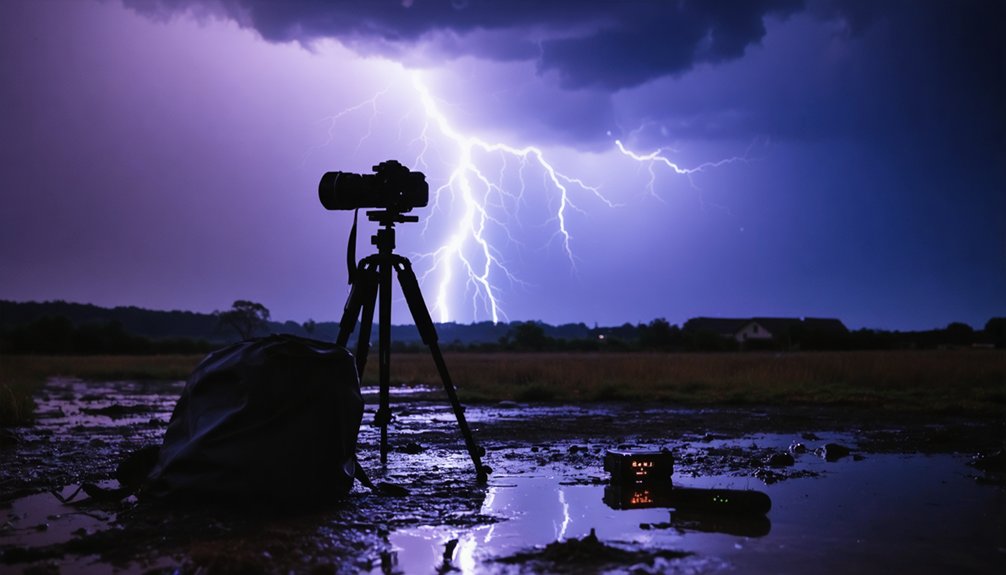
While camera settings matter, your equipment choices will determine whether you capture lightning or return home empty-handed. You’ll need a DSLR or mirrorless camera with manual controls and a sturdy tripod—no exceptions for exposures exceeding 15 seconds. A remote shutter release prevents camera shake during long sequences.
Manual camera controls and a solid tripod aren’t optional—they’re the baseline requirements for successful lightning photography.
Lightning triggers revolutionize your workflow by detecting strikes automatically. These hotshoe-mounted devices adjust sensitivity for distant bolts, firing your camera instantly. The Flex Bolt model excels in precision, though daylight conditions may cause false triggers.
Battery life management becomes critical during variable shoot duration sessions. Pack spare batteries since intervalometers and triggers drain power rapidly. Add weather radar apps for tracking storm movements and rain covers for protection.
Wide-angle lenses (14-35mm) maximize landscape coverage while maintaining sharp infinity focus.
Perfect Your Composition and Post-Processing Techniques
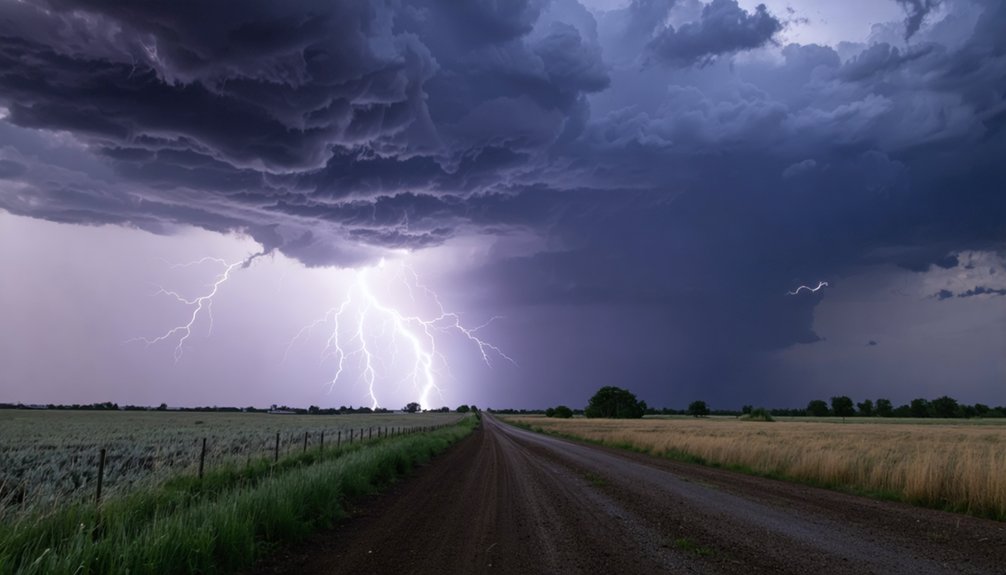
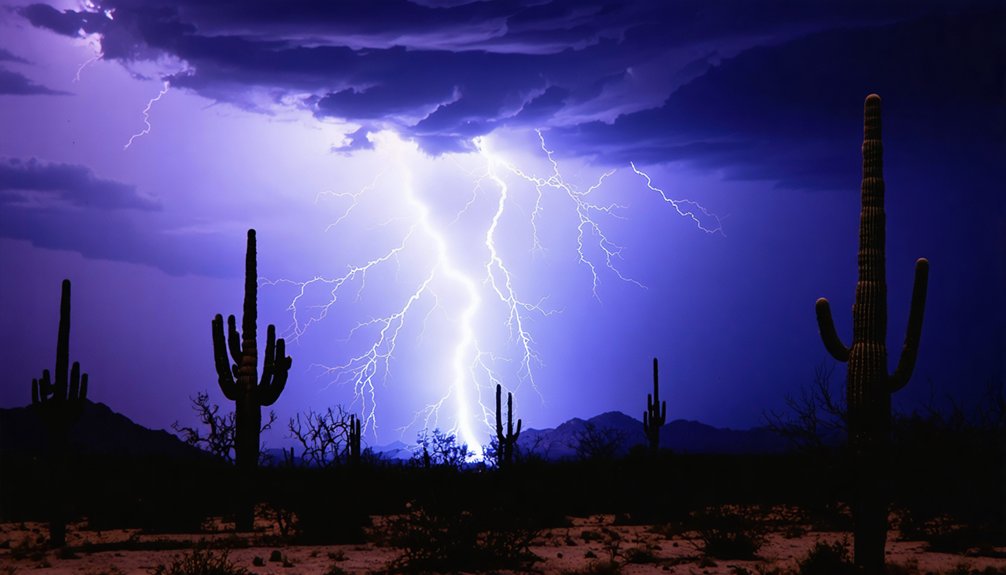
Once you’ve mastered your camera settings and triggers, composition separates memorable lightning photographs from forgettable snapshots. Consider framing techniques that position the sky as your main focal point while including environmental anchors—buildings, trees, roads—for scale and context. Shoot wide to capture unpredictable bolt locations, and experiment with perspective by positioning yourself ahead of storms to avoid rain-softened strikes.
Essential composition and processing strategies:
- Focus manually at infinity using Live View, or autofocus on distant city lights before switching to manual mode
- Layer multiple unmoved shots in post-production for dramatic stacked composites
- Use Lightroom’s gradient tool and clarity slider to enhance cloud details without over-darkening bolts
Expose for highlight retention, starting at f/10-f/16 during dusk and adjusting as storms approach. Crop strategically to bring distant strikes closer.
Frequently Asked Questions
How Far Away Should I Position Myself From an Active Lightning Storm?
You’d think chasing freedom means getting closer, but you’ll maintain safe distance of 6+ miles from the storm’s core. Avoid close proximity within 10 miles where strikes occur. Position yourself 2-4 kilometers outside the general storm area.
What Weather Conditions Produce the Most Photogenic Lightning Strikes?
You’ll capture the most dramatic lightning when dark clouds create intense electrical charge buildup during nighttime storms. Heavy cloud cover provides ideal contrast, while reduced ambient light lets you use longer exposures to freeze multiple strikes per frame.
Can I Photograph Lightning Safely From Inside My Vehicle?
Yes, you can shoot lightning from your vehicle’s internal car safety. Position your camera on a tripod outside, operate it remotely via wireless trigger, and use polarizing filters to reduce windshield glare while maintaining your protective metal cage shelter.
Which Smartphone Apps Help Track and Predict Lightning Storm Movements?
Like Zeus’s early warning system, you’ll want lightning forecast apps such as My Lightning Tracker and Blitzortung Lightning Monitor. These storm tracking services deliver real-time strike data, proximity alerts, and radar integration, giving you freedom to chase storms safely.
How Do I Protect My Camera Gear From Rain During Storms?
Use waterproof camera housing or rain covers to shield your gear while photographing lightning from sheltered locations like porches or vehicle interiors. You’ll maintain shooting freedom without risking expensive equipment damage from moisture infiltration during intense storms.