You’ll need weather-sealed camera bodies and protective rain covers to shield your equipment from residual moisture and debris. Switch to manual mode and shoot in RAW format, setting your aperture between f/8-f/16 while balancing ISO and shutter speed for high-contrast scenes. Always assess structural hazards before approaching, maintain safe distances with telephoto lenses, and inform someone of your location and expected return time. The sections below provide detailed specifications for gear selection, exposure techniques, and systematic documentation protocols.
Key Takeaways
- Use weather-sealed cameras and lenses with rain covers to protect gear while documenting damage in harsh conditions.
- Shoot in manual mode with RAW format, using f/8-f/16 aperture and adjustable ISO to capture high-contrast scenes.
- Maintain safe distances from hazards using telephoto lenses (70-300mm) while informing others of your location and plans.
- Adjust exposure settings in real-time to balance shadows and highlights, prioritizing detail preservation over perfect exposure.
- Establish systematic coverage of the scene from stable vantage points while monitoring weather conditions for safety.
Equip Yourself With Weather-Resistant Gear and Protective Accessories
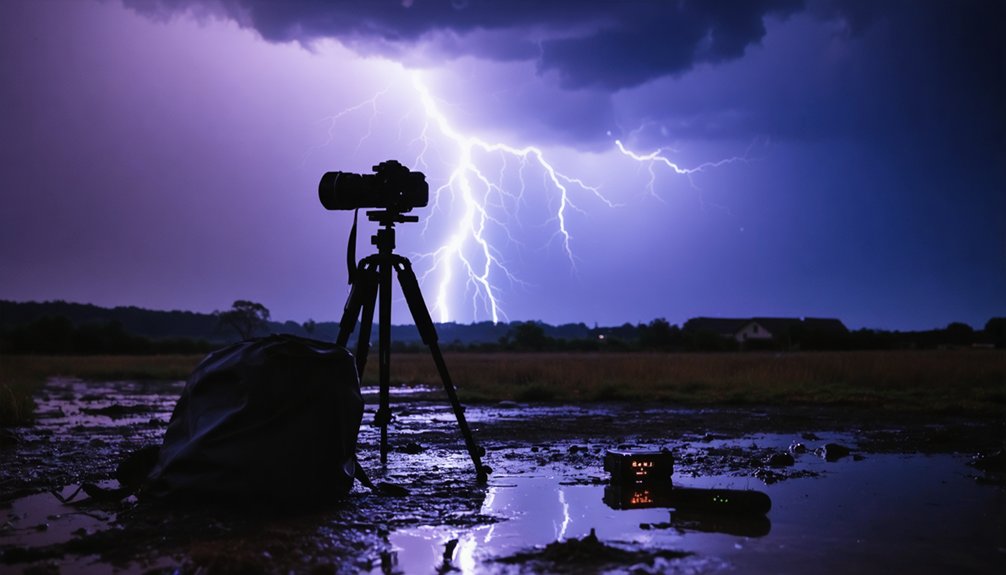
When documenting severe weather aftermath, your camera equipment faces immediate threats from residual moisture, airborne debris, and extreme temperatures. You’ll need weather-sealed bodies like the Fujifilm X-T3 or Pentax K-1 Mk II to capture extreme conditions without equipment failure. Pair these with sealed lenses maintaining IP54 ratings or higher to effectively withstand unpredictable elements.
Rain covers such as Think Tank Hydrophobia or Manfrotto Pro Light E-705 wrap around your setup during active precipitation. For transport and storage, Pelican iM2500 Storm Cases offer airtight, watertight protection with impact-resistant HPX resin construction.
Magnesium alloy bodies resist corrosion from rain and humidity, while cold weather covers maintain battery performance in sub-zero temperatures. This combination of sealed cameras, protective accessories, and durable cases guarantees you’ll document disaster scenes regardless of lingering weather hazards.
Master Manual Camera Settings for Challenging Environmental Conditions
Protected equipment means nothing if your camera settings can’t adapt to the volatile lighting conditions that follow severe weather events. Switch to manual mode for complete control over ISO, aperture, and shutter speed—enabling real time exposure adjustments as conditions shift.
Shoot in RAW format to preserve maximum dynamic range preservation for post-processing flexibility, particularly vital when documenting high-contrast storm damage scenes.
Start with ISO 100 as your baseline, adjusting upward only when necessary to maintain image quality. Set aperture between f/8-f/16 for sharp detail across the frame. For structural documentation, use 1/100s at ISO 400 and f/8. In darker conditions, you’ll need to balance slower shutter speeds with higher ISO values while avoiding camera shake.
These settings give you autonomous control over your documentation process.
Prioritize Safety While Composing Comprehensive Scene Documentation
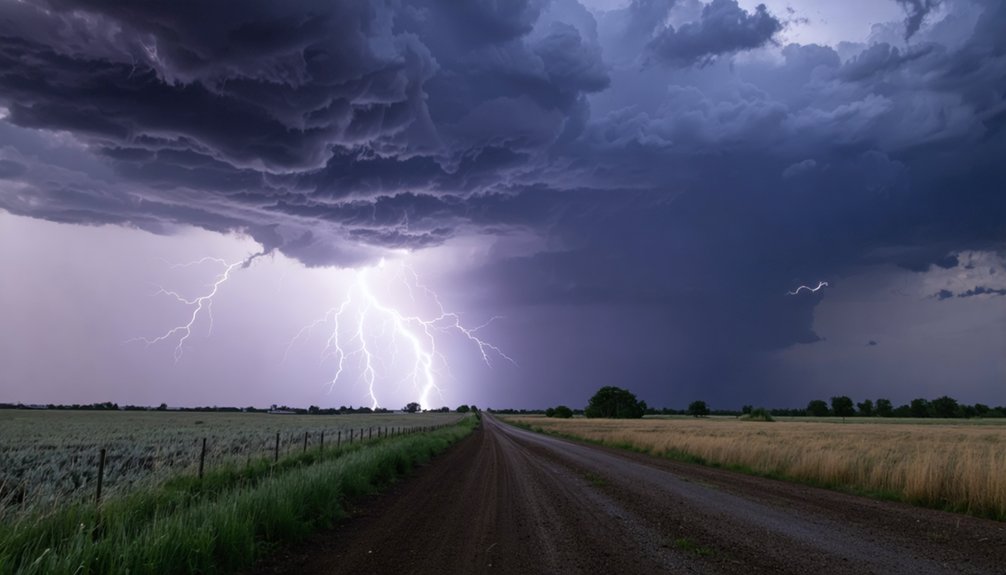
Before raising your camera to document storm damage, establish your physical safety baseline by evaluating structural stability, downed power lines, and active environmental hazards at the scene. Navigate environmental obstacles by maintaining safe distances from compromised structures and using telephoto lenses in the 70-300mm range for comprehensive documentation without physical exposure.
Inform someone of your location, start time, and expected return before beginning documentation work. Research escape routes and identify stable vantage points that allow rapid retreat if conditions deteriorate. Weather apps provide critical information about approaching systems and rapid condition changes.
Wear water-resistant outerwear and thermal layers to prevent cold-induced judgment impairment. Protect equipment with rain sleeves and UV filters while positioning yourself away from direct wind exposure for ideal lens protection and operational control.
Frequently Asked Questions
How Soon After a Severe Weather Event Should Documentation Photography Begin?
You’d think chasing drama trumps survival, but assess immediate safety first before grabbing your camera. Prioritize documentation only when residual dangers pass—typically within minutes post-storm—ensuring you’re alive to share those spectacular shots later.
What Legal Permissions Are Needed to Photograph Private Property After Disasters?
You’ll need property owner consent before entering private land to photograph disaster damage. From public streets, you’re free to document without permission. Always obtain express authorization for photograph preservation on private property to avoid trespass claims.
Should Damaged Photographs Be Edited or Kept in Original Unaltered Form?
You’ll want to retain original integrity of your disaster photographs by keeping them unaltered. Minimal post-processing is necessary—only basic adjustments like brightness. Unedited images preserve credibility for insurance claims, legal proceedings, and guarantee you’re documenting authentic evidence.
You’ll maximize impact by using sharing channels with officials like FEMA’s social media and coordinating with nonprofits through platforms like WeTransfer or Dropbox. Upload high-resolution images directly to organization portals, ensuring you’ve included proper metadata and consent documentation.
What Backup Methods Preserve Photographs if Primary Storage Becomes Damaged?
You’ll protect your images through cloud backup services like Backblaze, offsite hard drive storage at separate locations, and NAS systems with RAID redundancy. These methods guarantee you’re maintaining multiple copies across different media types and geographic locations.