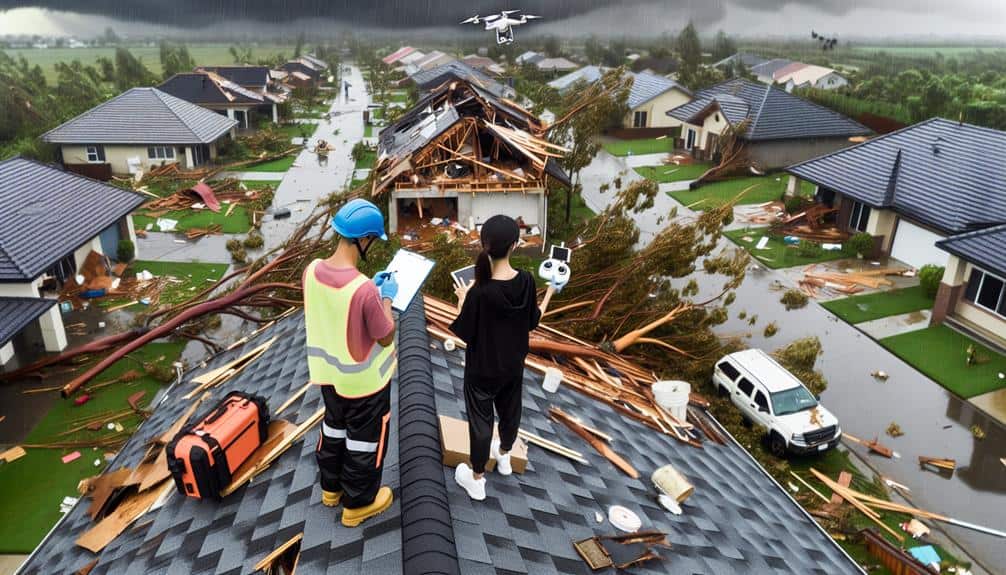
We've gathered 10 vital best practices for documenting storm damage. First, assess safety concerns and wear protective gear. Use high-quality cameras and drones, and capture wide-angle shots to document both exterior and interior damage. Concentrate on structural specifics and employ proper lighting for detailed close-ups. Verify images are timestamped and GPS coordinates recorded for precise data. Annotate findings thoroughly and systematically organize files, including proper labeling and secure backups, to streamline retrieval. Regularly maintain equipment to guarantee reliability. Following these steps will provide detailed documentation that's essential for accurate assessment and restoration. There's more to contemplate for thoroughly addressing storm damage.
Key Points
- Conduct thorough evaluations of the surroundings to identify and mitigate potential hazards before documenting storm damage.
- Use high-quality cameras and drones to capture detailed images and videos of the affected areas.
- Take wide-angle shots and close-up photos to provide both panoramic views and detailed documentation of structural damage.
- Record GPS coordinates and timestamps on all images for accurate mapping and incident verification.
Prioritize Safety First
Before documenting storm damage, we must make sure our safety by thoroughly evaluating our surroundings for potential hazards. This initial assessment is essential for preventing injuries and ensuring we can complete our task effectively.
Safety measures should include wearing appropriate protective gear such as helmets, gloves, and sturdy boots to shield against debris and unstable structures. We need to be vigilant about downed power lines, flooding, and compromised buildings that could pose significant risks.
In addition to personal protective equipment, our equipment selection is crucial. We should carry essentials like flashlights, first aid kits, and communication devices. These tools won't only aid in documenting damage but also help in emergency response scenarios.
Ensuring our gear is in good working condition before heading out can make a significant difference in our ability to navigate hazardous environments safely.
Preparedness also involves having a clear plan for hazard prevention. This means knowing evacuation routes and having a designated meeting point in case we get separated. By prioritizing these safety measures, we equip ourselves to handle unforeseen dangers effectively.
Let's remember, our well-being is paramount, and taking these precautions allows us to operate with the freedom and confidence needed to document storm damage accurately.
Use High-Quality Equipment
Having secured our safety, we must now focus on using high-quality equipment to document storm damage effectively. High-quality cameras and drones offer superior image clarity, which is vital for accurate damage assessment.
To choose devices capable of capturing fine details under various weather conditions, it's important to ensure our documentation remains precise and reliable.
Maintaining our equipment is equally significant. Regular equipment maintenance checks help guarantee optimal performance, especially after exposure to harsh weather conditions. We should clean lenses, check battery levels, and inspect for any physical damage before and after each use.
Keeping our equipment in top shape ensures the quality and longevity of our tools.
Data storage is another important factor. We need reliable storage solutions to safeguard our images and videos. High-capacity memory cards and cloud storage options are invaluable. They provide ample space and redundant backups, guaranteeing we never lose essential data.
Labeling and organizing our files systematically also aids in efficient retrieval and analysis.
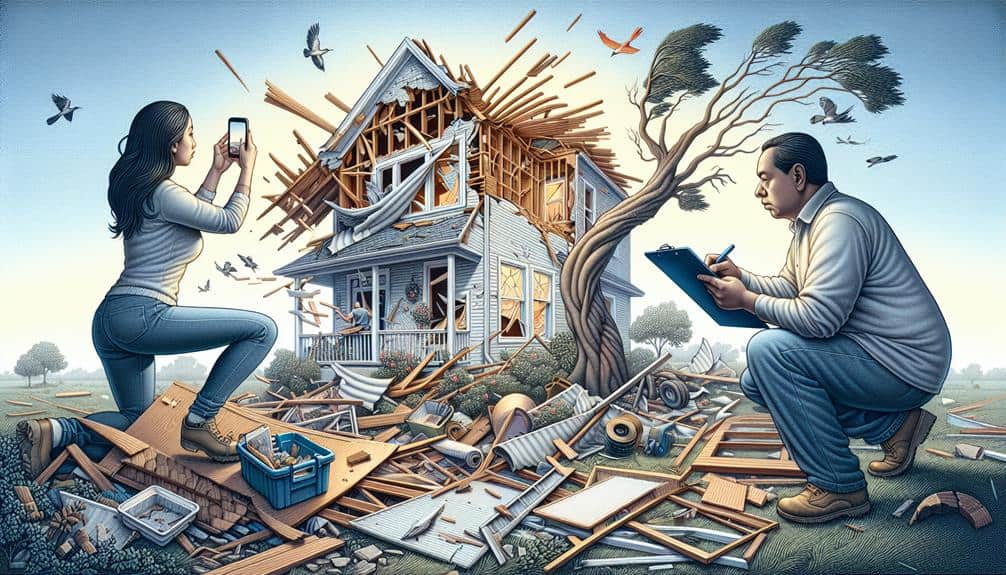
Capture Wide-Angle Shots
Capturing broad-angle shots gives us a panoramic view of the storm's impact, allowing for a thorough and detailed evaluation of the damage. By using wide-view lenses, we can document the extent of the destruction in a single frame, making it easier to convey the scope of the damage to insurance adjusters and repair teams. High image resolution is vital here, as it guarantees that every detail is captured clearly, providing a detailed visual record.
We should experiment with various camera angles to capture the most informative shots. Positioning our cameras at different heights and perspectives can reveal hidden damage and provide a more complete understanding of the affected area. For example, shooting from a higher vantage point can offer a bird's-eye view, highlighting the overall damage layout, while ground-level shots can capture finer details.
Broad-angle shots also allow us to document the relationship between damaged structures and their surroundings. This context can be crucial when evaluating the impact on neighboring properties or infrastructure.
Focus on Structural Damage
When documenting storm damage, we should thoroughly inspect the foundation and roof for any signs of compromise. It's important to photograph any visible cracks to provide clear evidence of structural issues.
Additionally, evaluating the integrity of the walls will help us identify potential safety hazards and necessary repairs.
Inspect Foundation and Roof
To secure the structural integrity of your home after a storm, we need to inspect both the foundation and the roof meticulously for any signs of damage. This initial step is important for a thorough structural assessment and accurate damage documentation.
During our roof inspection, we'll focus on identifying missing shingles, damaged flashing, and potential leaks. These issues can weaken the roof's ability to protect your home from future weather events.
For the foundation evaluation, we'll look for cracks, water intrusion, and any signs of shifting or settling. These issues can indicate significant structural damage that requires immediate attention.
Here's what we should focus on during our inspections:
- Roof inspection: Look for missing or damaged shingles, compromised flashing, and any signs of leaks or water damage.
- Foundation evaluation: Identify cracks, water damage, and signs of shifting or settling.
- Structural assessment: Confirm that both the roof and foundation are stable and not compromised by the storm.
Photograph Visible Cracks
Let's make sure we photograph all visible cracks meticulously, focusing on those that indicate structural damage. When documenting storm damage, capturing images of cracks in the walls, ceilings, and floors is important. These cracks can reveal how weather patterns have impacted the structure, providing essential evidence for insurance claims and professional assessments.
We should look for cracks that are wide, long, or appear to have shifted the alignment of structural elements. These indicators often suggest significant damage that could lead to costly repairs if not addressed promptly. High-quality photographs, taken from multiple angles, will offer a detailed view of the extent of the damage.
Make sure we include a scale reference, such as a ruler, to clearly demonstrate the size of the cracks.
Assess Wall Integrity
Inspecting the integrity of the walls will help us identify any structural damage that could jeopardize the building's safety. As we evaluate wall integrity, we should concentrate on both visible and hidden damages that could impact the building's overall stability. Structural damage not only poses immediate risks but also complicates repair solutions and insurance claims.
To thoroughly evaluate the walls, we should:
- Check for Cracks and Bulges: Look for any new or expanded cracks and any bulges that may indicate underlying issues.
- Examine the Foundation: Verify the foundation is level and free of any significant shifts or settling, which could affect wall stability.
- Inspect for Moisture Damage: Identify any signs of water infiltration, such as damp spots or mold, which can weaken walls over time.
Implementing these maintenance tips can streamline our assessment process. By focusing on preventive measures, we can mitigate future damage and improve our chances of a successful insurance claim.
Documenting all findings meticulously is essential for both repair solutions and negotiating with insurance providers. Our detailed inspection will make sure we address all potential issues promptly and effectively.
Document Interior Damage
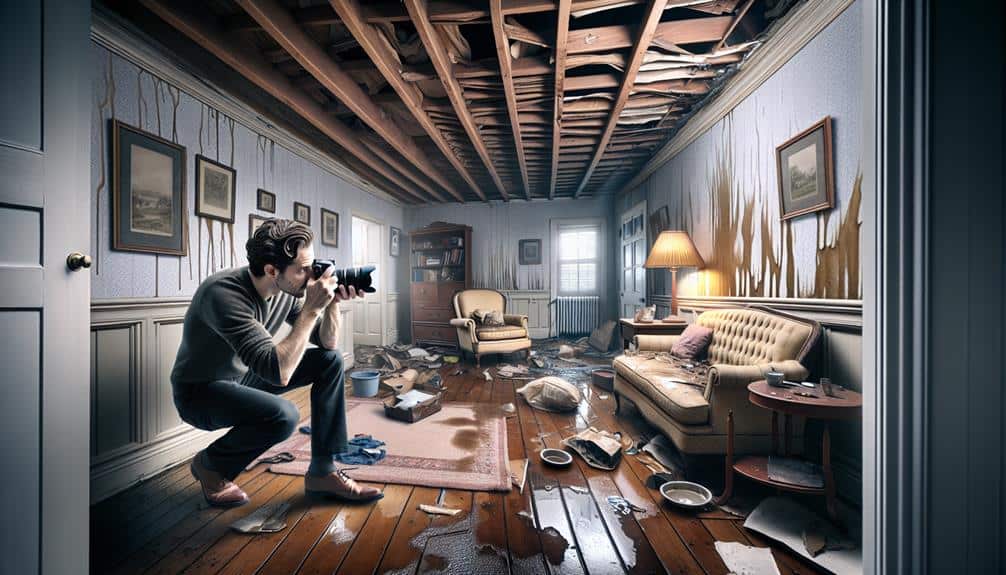
We should start by thoroughly photographing and noting any visible damage to walls, ceilings, and floors to guarantee a detailed record of the storm's impact on the interior. This step is essential for a thorough damage assessment and helps support insurance claims. We need to capture high-quality images of all affected areas, ensuring we document the extent of the damage accurately. Take wide shots to provide context and close shots to highlight specific issues.
It's also crucial to create a written inventory of damages. List everything, from water stains on the ceiling to cracked floor tiles. This documentation will be invaluable during the restoration process, allowing us to compare the before & after states of our home.
We should also check for hidden damage, like moisture behind walls or under floors, as these can lead to long-term issues if not addressed. Using moisture meters or other tools can help in identifying these less apparent problems.
Include Close-Up Photos
When documenting storm damage, we should include close-up photos to capture detailed damage and highlight specific issues effectively.
Ensuring proper lighting will help us produce clear, informative images that are essential for accurate assessments.
These photos will be invaluable for insurance claims and repair planning.
Capture Detailed Damage
Although documenting storm damage thoroughly is necessary, capturing detailed close-up photos ensures we don't miss any small but important issues. When evaluating hidden damage, post-storm photography becomes vital. These close-up shots allow us to document every scratch, crack, and dent, guaranteeing we've detailed evidence for identifying insurance coverage.
Here are some documentation tips to keep in mind:
- Focus on Damaged Areas: Make sure to photograph all affected areas closely. This helps in determining the extent of the damage.
- Use a Ruler or Object for Scale: Including an object of known size in close-up photos can help convey the magnitude of the damage.
- Capture Various Angles: Taking multiple photos from different perspectives provides a more complete picture of the damage.
Highlight Specific Issues
By zeroing in on specific issues through close-up photos, we can provide a clear and thorough record of the storm's impact. This detailed documentation is essential for ensuring that every aspect of the damage is accounted for when filing an insurance claim.
Close-up photos help us highlight specific issues like cracked shingles, water damage, or broken windows, making it easier for insurance adjusters to assess the extent of the damage accurately. This can streamline the insurance coverage process, ensuring we receive the appropriate compensation.
Additionally, these detailed images are invaluable when it comes to contractor selection. When we invite contractors to provide estimates, close-up photos can illustrate the precise areas needing repair, leading to more accurate repair costs. This level of detail helps contractors understand the scope of work required, preventing unexpected expenses and delays.
Moreover, presenting clear, detailed photos during the claim process can prevent disputes and expedite approval. By meticulously highlighting specific issues, we not only strengthen our claim but also facilitate a smoother, quicker repair process.
Ultimately, this approach empowers us to take control of the situation, ensuring a fair resolution and timely restoration of our property.
Use Proper Lighting
Using proper lighting is vital for capturing high-quality close-up photos that accurately depict storm damage. When documenting damage, we need to make sure that our photos are clear and detailed.
Let's break down some best practices:
- Utilize natural lighting: Whenever possible, take photos during daylight hours. Natural lighting provides the most detailed representation of the damage without the harsh shadows or color distortions that artificial lighting can introduce.
- Avoid direct sunlight: While natural lighting is ideal, direct sunlight can create glare and harsh shadows, obscuring details. Aim for overcast conditions or take photos during the early morning or late afternoon when the sun is lower in the sky.
- Experiment with editing techniques: Once we've captured our photos, we can use editing software to enhance visibility. Adjusting brightness, contrast, and sharpness can help highlight the damage more effectively without altering the true nature of the damage.
Record GPS Coordinates

To safeguard accurate documentation of storm damage, we should diligently record the GPS coordinates of all affected areas. By capturing precise locations, we can enhance our understanding of how weather patterns have influenced specific regions. This level of detail is vital for thorough data analysis, enabling us to identify trends and assess the extent of damage accurately.
When we input GPS coordinates, we create a reliable framework for geographic mapping. This allows us to visualize the spatial distribution of storm damage, making it easier to prioritize areas for immediate assistance. Accurate geographic mapping is essential for effective damage assessment, as it helps allocate resources efficiently and plan for recovery efforts.
Moreover, recording GPS coordinates ensures that our documentation is verifiable and consistent. It provides a solid foundation for cross-referencing with other data sources, such as satellite imagery and weather reports. This multi-faceted approach strengthens our overall analysis and supports informed decision-making.
In an era where technology plays a pivotal role in disaster management, utilizing GPS coordinates elevates the precision and reliability of our documentation efforts. By adopting this best practice, we empower ourselves to respond more effectively and rebuild more resiliently.
Use Timestamped Images
When documenting storm damage, we should always use timestamped images to capture the incident onsite accurately. This practice helps verify the exact date and time of the damage, providing essential evidence for reports and claims.
Capture Incident Onsite
Capturing incident onsite with timestamped images is essential for accurate documentation of storm damage. When we're on the scene, we need to be meticulous about our approach to gather thorough evidence. This enables us to conduct remote assessments later on and facilitates virtual collaboration with other experts.
Harnessing technology like drone documentation can enhance our efforts significantly. Drones provide aerial footage that offers a broader perspective of the damage, which is invaluable for detailed analysis. It's vital to take advantage of these tools to make sure we've a complete view of the situation.
When capturing images onsite, consider the following best practices:
- Take extensive photos and videos: Capture the damage from multiple angles and distances.
- Use high-quality cameras: This ensures clarity, allowing for detailed examination later.
- Incorporate objects for scale: Including familiar items like a ruler or a person can provide context.
Verify Date and Time
To guarantee the accuracy of our documentation, we must confirm the date and time by using timestamped images. Accurate timestamps serve as undeniable evidence when we compile data for weather patterns and engage in data verification.
When capturing storm damage, these timestamps allow us to provide precise chronological records, which are crucial for substantiating our observations.
Timestamped images play an important role in filing insurance claims and preparing legal documentation. Insurance companies require exact dates and times to process claims efficiently and without disputes. The presence of a timestamp on our photos helps expedite this process, reducing the likelihood of our claims being questioned or denied. This ensures that we get the compensation we rightfully deserve.
In the field of legal documentation, having verifiable timestamps lends credibility and weight to our reports. It transforms our images into trustworthy pieces of evidence that can hold up in court, should any disputes arise.
Given the unpredictable nature of weather patterns, it's vital to have solid, verifiable data to support our claims.
Annotate Your Findings

Let's carefully label each piece of evidence to ensure a clear and detailed record of the storm damage. This step is essential not just for our personal records, but also for analyzing trends in weather patterns and facilitating insurance claims. Proper annotation guarantees that every piece of evidence can be easily referenced and understood, minimizing legal implications and potential disputes.
First, we need to include the following details for each piece of evidence:
- Date and Time: Clearly mark when the evidence was collected.
- Location: Specify the exact location where the evidence was found.
- Description: Provide a brief but detailed description of the damage.
Organize Files Efficiently
While keeping detailed records is vital, we must organize files efficiently to secure prompt access and seamless retrieval of storm damage documentation. Effective file organization guarantees that both digital backups and physical documents are systematically arranged, minimizing the risk of losing essential information.
First, let's establish a clear and consistent naming convention for all digital files. This might include the date of the storm, the type of damage, and the location. By doing this, we make searching for specific documents much easier.
Equally important is the use of digital backups. Regularly back up your files to the cloud or other secure digital storage solutions to safeguard against data loss.
In addition to digital files, maintaining paper copies is crucial for thorough document storage. Store these in labeled folders within a dedicated filing cabinet. Ensure that these paper copies are organized in a manner that mirrors the digital system, allowing for easy cross-referencing.
Frequently Asked Questions
How Do I Report Storm Damage to My Insurance Company?
First, let's document the damage with photos and detailed notes. Then, contact our insurance company to start the insurance claim process. Providing clear documentation tips guarantees we present a strong case for our claim.
What Should I Do if My Equipment Gets Damaged During Documentation?
Just like Sherlock Holmes always being prepared, we should make sure our equipment replacement plan is ready. If our equipment gets damaged, prioritize data recovery, then contact the provider for replacements to continue documentation seamlessly.
Can I Use My Phone to Document Storm Damage?
Yes, we can use our phones to document storm damage. We must guarantee image quality is high for clear evidence. Additionally, we need to be mindful of privacy concerns, avoiding capturing private property without permission.
How Soon Should I Document the Damage After the Storm?
We should document the damage as soon as it's safe after the storm. For example, immediately after Hurricane Sandy, swift documentation guaranteed timeliness and accuracy. Always prioritize safety and wait for weather conditions to stabilize.
Are There Any Legal Considerations When Documenting Storm Damage?
When documenting storm damage, we must consider legal implications to guarantee our insurance coverage isn't compromised. Properly recording evidence can protect our rights and facilitate smoother claims, avoiding potential disputes with insurers over the extent of damage.