Photographing lightning in open fields is exhilarating but requires caution. Let's prioritize safety by choosing locations with immediate shelter access, avoiding isolated trees, and staying low. Using weather apps, we can track storm patterns and position ourselves on the storm's leading edge for dramatic shots. Essential gear includes a sturdy tripod, remote shutter release, and fully charged batteries. Camera settings should balance exposure and freeze lightning strikes; experiment with long exposures, bulb mode, and narrow apertures. Post-processing will enhance the vividness of our captures. For a detailed guide covering all these aspects and more, continue exploring.
Key Points
- Choose open fields with clear visibility and avoid standing near isolated trees or metal structures.
- Use weather apps to monitor storm developments and track lightning activity.
- Prioritize safety by staying low and having immediate access to shelter.
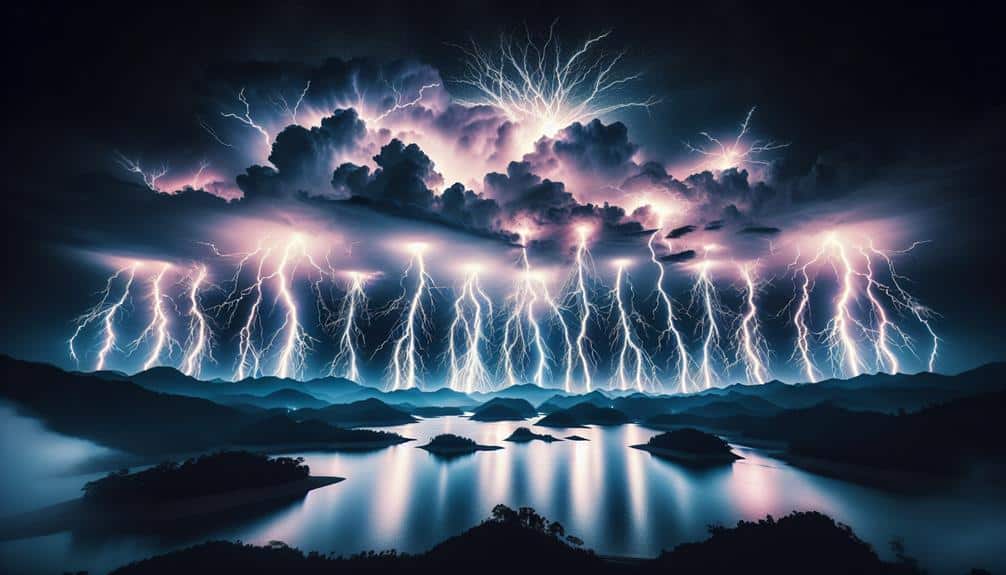
- Position yourself in the leading edge of the storm for dramatic lightning captures.
Understanding Lightning Risks
Photographing lightning can be exhilarating, but we must fully understand the inherent risks to guarantee our safety while capturing these electrifying displays. Lightning safety should be our top priority. We can't afford to underestimate the power of a storm. Conducting a thorough risk assessment is essential before heading into the field. This involves understanding how close the storm is and the likelihood of lightning strikes in our immediate area.
When we're out there, our choice of location matters immensely. Open fields are particularly risky due to the lack of taller objects around us, making us prime targets for lightning strikes. One of the best photography tips is to stay low and avoid high points or isolated trees. We should also look for safe structures or vehicles nearby where we can quickly take cover if the storm closes in.
Our photography techniques must also be adapted for safety. Using remote triggers can keep us at a safer distance from our camera setup. Remember, no shot is worth compromising our safety.
Checking Weather Forecasts
When we're preparing to capture the perfect lightning shot, checking weather forecasts is essential.
We monitor storm patterns to pinpoint the best times and locations for photography while ensuring our safety.
Monitor Storm Patterns
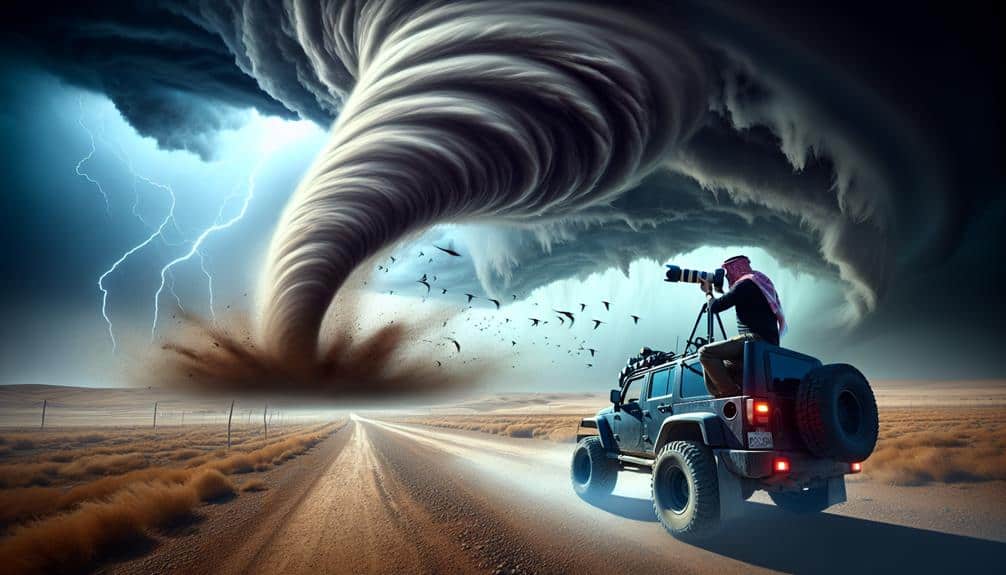
Understanding storm patterns is vital for capturing lightning in open fields, and accurate weather forecasts are our most dependable tool. To master lightning photography techniques, we need to explore storm chasing and study atmospheric conditions meticulously. This means monitoring weather radar apps, satellite imagery, and real-time thunderstorm tracking systems. These tools help us predict where lightning strike patterns are most likely to occur, giving us the best chance to be in the right place at the right time.
We should pay attention to the development of cumulonimbus clouds, as these are the breeding grounds for thunderstorms. Watching the movement of storm fronts and understanding wind patterns can also provide essential insights. When a storm is brewing, the air pressure drops, and humidity rises—indicators that it's time to prepare our gear. Lightning strikes often cluster around the leading edge of a storm front, so positioning ourselves in that area can yield dramatic results.
Identify Safe Locations
By leveraging detailed weather forecasts, we can pinpoint safe locations to set up our equipment and capture electrifying lightning shots in open fields. Identifying safe spots begins with understanding storm trajectories and potential lightning dangers. We need to examine weather patterns meticulously, focusing on storm cells' predicted paths and their intensity levels.
When choosing a location, we should prioritize areas that offer both a clear view of the sky and immediate access to shelter. Open fields are ideal for visibility but can be risky if we don't have a plan. We must make sure that our safe spot isn't the highest point in the vicinity, as lightning tends to strike tall objects. Avoid standing near isolated trees, poles, or metal fences.
Additionally, we should always have a quick exit strategy. Knowing the nearest building or vehicle to retreat to is essential. Lightning can strike unexpectedly, and our safety relies on our ability to move swiftly to a protected area.
By combining artistic ambition with technical prowess, we can craft stunning photographs without compromising our well-being.
As we embrace the thrill of capturing nature's raw power, let's remain vigilant and prioritize our safety above all.
Use Weather Apps
Leveraging weather apps, we can accurately monitor storm developments and enhance our chances of capturing stunning lightning photos while staying safe. The real-time updates and predictive capabilities of these apps are indispensable for lightning photography. We need to choose weather apps that offer detailed radar maps, lightning strike data, and storm tracking features. Some top choices include My Lightning Tracker, WeatherBug, and Storm Radar.
By using weather apps, we gain significant photography advantages. These apps allow us to pinpoint when and where storms are most likely to occur, enabling us to plan our photography sessions more effectively. For instance, radar maps reveal storm intensity and movement, helping us select the best vantage points in open fields. The lightning strike data provides precise information on recent lightning activity, ensuring we're in the right place at the right time.
Moreover, the app benefits extend to safety, which is paramount. Weather alerts notify us of severe conditions, allowing us to take necessary precautions or postpone our shoot if the risk is too high.
Essentially, weather apps empower us to balance artistic pursuits with personal safety, making them essential tools for any lightning photographer.
Choosing Safe Locations

When selecting safe locations to photograph lightning, we must prioritize areas that offer both clear visibility and adequate shelter. Lightning safety is paramount; it's crucial to scout locations that balance the thrill of capturing dramatic skies with the assurance of personal safety.
Here are three crucial tips for safe location scouting:
1. Find Elevated Terrain:
Elevated spots, like hills or ridges, offer expansive views of the skyline, ensuring that no vital lightning strikes are missed. But be cautious—ensure there's a sturdy shelter nearby, such as a car or building, to retreat into if the storm gets too close.
2. Avoid Isolated Trees:
While trees can frame your shot beautifully, they're lightning magnets. Instead, look for open fields with multiple smaller objects that could attract lightning, redistributing the risk and enhancing safety.
3. Near Water Bodies:
Lakes and ponds can provide stunning reflections of lightning, amplifying the visual impact. However, avoid being the highest point near water; stay in your car or find a nearby shelter to protect yourself.
Using the Right Equipment
To capture the electrifying beauty of lightning, we need to equip ourselves with the right gear, ensuring both precision and protection. A sturdy tripod is our foundation; it keeps the camera stable, especially during long exposures. We should also carry a remote shutter release to avoid camera shake.
For lens choices, a wide-angle lens helps frame the expansive sky, while a telephoto can zero in on the lightning bolts.
Gear preparation is vital. Guarantee our camera batteries are fully charged and bring spares—lightning shoots can last hours. Keep memory cards ready and formatted. Equipment maintenance is essential; a clean lens ensures sharp images, so pack lens cloths and air blowers.
Weather analysis can't be overlooked. Use weather apps to track storms and understand their patterns. This not only helps with timing our shoot but also keeps us safe.
Lighting techniques in lightning photography involve understanding the ambient light conditions. A lightning trigger can be a game-changer, capturing bolts even when our reflexes can't. And always remember, safety first—carry a weatherproof bag to protect our gear from sudden rain, and never shoot during an active storm directly overhead.
Camera Settings for Lightning
To capture the raw power of lightning, we need to master our camera settings.
Let's explore the best shutter speed settings, aperture, ISO, and focus techniques that will help us freeze those electrifying moments.
Shutter Speed Settings
Capturing the perfect lightning shot demands precise control over shutter speed to balance exposure and freeze the fleeting moment of a strike. We need to take into account the following to master this art:
- Long Exposure: For capturing lightning patterns, a longer shutter speed, typically between 10 to 30 seconds, allows us to catch multiple strikes in a single shot. This technique is especially effective during active storms.
- Bulb Mode: Utilizing bulb mode gives us the flexibility to manually control the exposure duration. By holding down the shutter until the lightning strikes, we make sure we capture the exact moment without overexposing the image.
- Interval Timing: Setting our camera to take continuous shots at set intervals can increase our chances of capturing a strike. This works well when we're uncertain of the exact timing of the lightning.
When adjusting our exposure settings, remember that ambient light plays a significant role. During nighttime, longer exposures are ideal, but in twilight or dawn scenarios, we might need to shorten the duration to avoid overexposure. The goal is to balance capturing the brilliance of the lightning while maintaining enough detail in the surroundings.
Always keep experimenting with different shutter speeds to find that sweet spot for each unique situation.
Aperture and ISO
By carefully adjusting our aperture and ISO settings, we can enhance the clarity and depth of our lightning photographs, ensuring each strike is captured with stunning detail and minimal noise. Let's start with aperture. For lightning, we usually aim for a narrower aperture, around f/8 to f/11. This range helps in achieving a balanced exposure, ensuring that both the lightning and the landscape are well-defined. It also extends our depth of field, which is essential when composing shots with varied elements.
Next, let's talk ISO. Typically, we want to keep our ISO as low as possible, usually around 100 to 200. This minimizes noise, which is particularly important in night photography. Higher ISO settings can introduce unwanted grain, detracting from the crispness of the lightning bolts.
Exposure settings are vital in capturing the dramatic lighting effects of a storm. By combining our aperture and ISO choices with creative angles, we can produce compelling compositions that highlight the raw power and beauty of lightning.
Experimenting with different composition techniques, such as framing the lightning with foreground elements or using a wider lens for expansive sky views, can lead to breathtaking results.
Focus Techniques
After mastering our aperture and ISO settings, let's focus on achieving sharp and clear lightning shots by honing our focus techniques.
Capturing the electrifying beauty of lightning requires precision and a keen eye for detail. Here are our top focus techniques to make sure every bolt is crisp and mesmerizing.
- Manual Focus: Switch to manual focus to take control. Autofocus often struggles in low light, leading to missed opportunities. Set your lens to infinity and make minor adjustments to make sure the lightning is sharp.
- Use Live View: Activate your camera's live view mode. This lets us zoom in on distant objects and fine-tune the focus. It's invaluable for those intense moments when lightning is imminent, helping us lock in on the perfect spot.
- Hyperfocal Distance: This technique guarantees maximum sharpness for both foreground and background elements. Calculate the hyperfocal distance for your chosen aperture, then focus at this distance to keep the lightning and surrounding landscape in crisp detail.
Capturing Lightning Shots
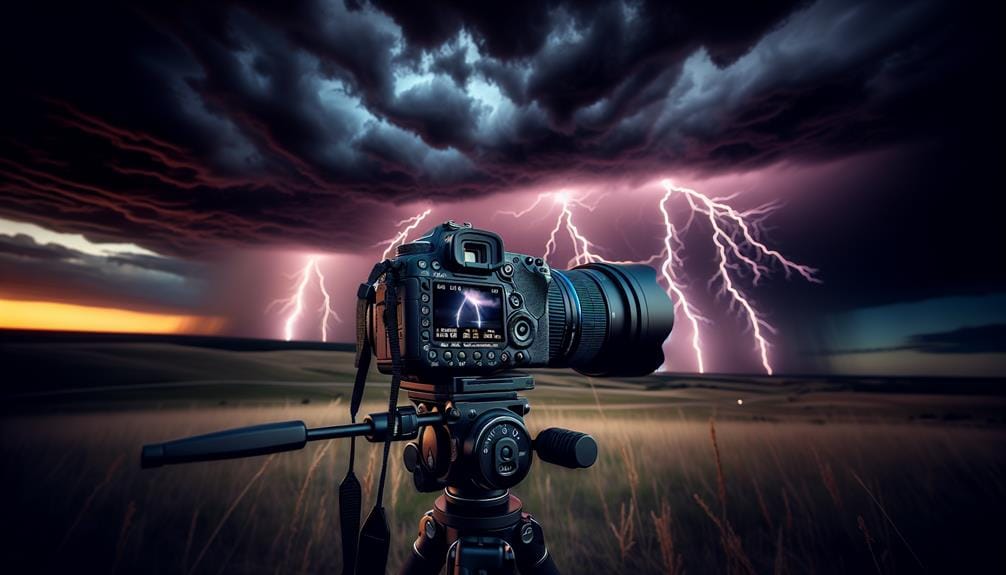
To achieve striking lightning shots, we must carefully select our camera settings and position ourselves in a location with an unobstructed view of the open sky. First, using a sturdy tripod is essential for stability. We set our camera to manual mode, adjusting the ISO to 100 or 200 to minimize noise. A small aperture (f/8 to f/16) helps capture sharp details, while a long exposure (ranging from 5 to 30 seconds) allows us to catch multiple lightning strikes in one shot.
In terms of lightning photography techniques, paying attention to composition is pivotal. We should aim to include interesting foreground elements like trees or buildings, which add depth and scale to our images. Aligning the horizon in the lower third of the frame often enhances the dramatic effect of the sky.
Once we've captured our shots, creative editing and photo retouching techniques can elevate them further. Tweaking the contrast and brightness will highlight the lightning's intensity, while carefully adjusting color balance can enhance the mood.
Post-Processing Your Photos

Post-processing transforms our raw lightning shots into breathtaking images that truly capture the storm's intensity and drama. By refining our photos, we can enhance their visual impact and convey the electrifying atmosphere we experienced in the field.
Here's a guide to elevate our lightning photography through meticulous post-processing:
- Color Correction: We start by adjusting the colors to reflect the true essence of the scene. Lightning can cast various hues; tweaking the white balance reassures the colors are vivid yet natural. Tools like Lightroom and Photoshop offer precise color correction controls, helping us bring out the storm's vibrant energy.
- Cropping Techniques: Proper cropping can dramatically improve composition. We isolate the most striking elements, like the lightning bolt itself, and eliminate distractions. By following the rule of thirds, we secure our focal points are positioned to draw viewers' eyes naturally across the scene. This technique not only refines the image but also intensifies its visual narrative.
- Noise Reduction and Sharpness: High ISO settings needed for nighttime shots often introduce noise. Using noise reduction filters can clean up our image, while sharpening tools help to accentuate the lightning bolt's crisp edges. Balancing these adjustments is crucial to maintaining detail without over-processing.
Frequently Asked Questions
How Can I Stay Updated With Real-Time Weather Changes During a Shoot?
We can stay updated with real-time weather changes by using weather alerts and updates from reliable apps. For lightning strike notifications, we should enable push notifications and keep an eye on live radar and storm-tracking tools.
What Are the Best Apps for Tracking Lightning Activity?
Tracking lightning activity is like sailing through a stormy sea. We recommend MyRadar and Lightning Pro for lightning alerts and lightning maps. For lightning prediction and storm tracking, Storm Radar and WeatherBug offer detailed guidance and technical expertise.
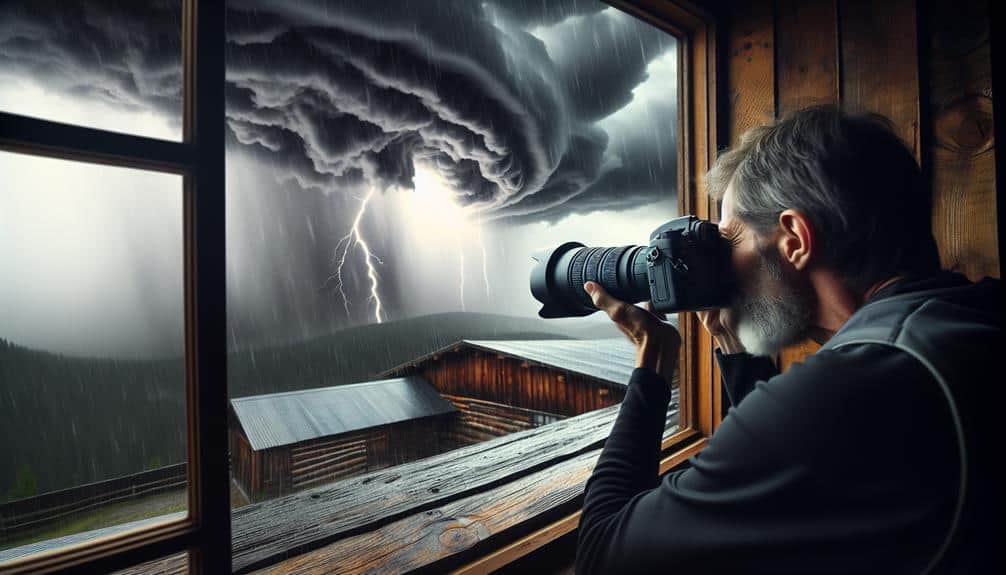
How Do I Protect My Camera Gear From Sudden Weather Changes?
We safeguard our gear's safety by using weatherproofing equipment and always having an emergency shelter nearby. This allows us to adapt quickly to sudden weather changes while capturing breathtaking shots without compromising our creative freedom.
Can I Use a Smartphone for Lightning Photography Effectively?
Can we effectively capture lightning with a smartphone? Yes, but let's remember the smartphone limitations. While quick and convenient, alternative equipment options like DSLR cameras offer better control and quality, enhancing our creative freedom.
What Are Some Creative Composition Ideas for Lightning Shots?
For unique angles, let's try capturing silhouette shots against the lightning. Using long exposure, we can highlight the color contrast of the lightning bolts against a dark sky, creating a dramatic and artistic composition.