By employing high-magnification macro lenses and advanced photographic techniques, we capture snowflakes' intricate crystalline structures with scientific precision. Utilizing proper lighting, specifically diffused natural light, combined with reflective surfaces, we highlight the geometric beauty without overexposure. Stabilization through sturdy tripods and image stabilization technology guarantees sharp, detailed images. We fine-tune camera settings to balance aperture, shutter speed, and ISO for minimal noise and maximum clarity. Post-processing techniques, like noise reduction and contrast adjustments, further enhance the fine details. Exploring these methods allows us to document and appreciate the ephemeral and unique patterns found in every snowflake. Discover all these techniques and more.
Key Points
- Use macro lenses with 1:1 magnification to capture detailed crystalline structures.
- Employ focus stacking to enhance depth of field and sharpness.
- Utilize diffused lighting to highlight intricate patterns without harsh shadows.
- Stabilize your camera with a tripod to prevent shake and ensure clear images.
Capturing Snowflakes in Macro
To capture snowflakes in macro, we need to utilize high-magnification lenses and advanced photographic techniques to reveal their intricate crystalline structures. By employing these methods, we can document the unique patterns that each snowflake exhibits, transforming fleeting moments into lasting images.
Our process begins with snowflake preservation. By carefully collecting snowflakes on dark, cold surfaces, we guarantee their delicate forms remain intact. Quick handling and minimal exposure to warmth are essential.
We then position our high-magnification lenses to focus sharply on the snowflakes. This approach allows us to magnify their minute details, uncovering the complexity within their seemingly simple forms.
Once captured, these images become more than scientific data—they evolve into artistic displays. Showcasing the myriad shapes and symmetries found in a winter wonderland, we highlight the uniqueness of each snowflake. By emphasizing the natural beauty of these crystalline structures, we create a visual narrative that celebrates both science and art.
Our dedication to preserving and capturing these ephemeral wonders offers a glimpse into the hidden world of snowflakes. Through our lens, we invite others to appreciate the intricate designs that make winter's frozen precipitation a marvel of nature.
Equipment for Close-Up Shots
To achieve the best close-up shots of snowflakes, we must prioritize macro lens selection, lighting techniques mastery, and stabilization tools essentials.
A high-quality macro lens with a 1:1 magnification ratio enables us to capture intricate details, while controlled lighting minimizes shadows and highlights crystalline structures.
Additionally, stabilization tools such as tripods and remote shutters are critical for reducing motion blur and enhancing image clarity.
Macro Lens Selection
Selecting the best macro lens is vital for capturing the intricate details of snowflakes, as it ensures high magnification and exceptional image clarity. In our pursuit for accuracy, we should consider lenses with a magnification ratio of at least 1:1. This ratio guarantees that the tiny, complex structures of snowflakes are rendered in full detail. High-quality optics minimize aberrations and enhance sharpness, which is essential when working at such close distances.
Lens filter options play a significant role in our setup. A polarizing filter can help reduce glare and enhance contrast, making the minute patterns of snowflakes stand out more clearly. Additionally, ultraviolet (UV) filters protect the lens front element from environmental factors without affecting image quality.
Focusing tips are indispensable for achieving the best results. We should use manual focus to gain precise control over the focal plane. Given the shallow depth of field at high magnifications, employing focus stacking—capturing multiple images at different focus points and merging them—can produce images with greater depth and detail.
Lighting Techniques Mastery
Mastering lighting techniques for close-up snowflake photography requires a meticulous understanding of equipment that can efficiently illuminate the delicate structures without causing melting or glare. To achieve this, we should first consider the benefits of natural light. It's inherently soft and diffused, minimizing the risk of overheating and melting the snowflakes. Utilizing reflective surfaces, such as white foam boards, allows us to direct natural light onto the subject without harsh shadows.
For those of us preferring a controlled environment, a studio setup offers precision and repeatability. Small LED ring lights with adjustable intensity provide a steady and cool light source, ideal for close-up snowflake photography. Using a light tent can diffuse light evenly, reducing unwanted reflections and glare. Combining multiple light sources at low intensity from various angles ensures that we capture the intricate details without overexposure.
We should employ light modifiers like diffusers and softboxes to further control our lighting environment. These tools help maintain a balance between illumination and preserving the ephemeral nature of snowflakes. By mastering these lighting techniques, we ensure the freedom to explore and document the exquisite beauty of snowflakes in their full, intricate glory.
Stabilization Tools Essentials
While adept lighting techniques illuminate the intricate structures of snowflakes, using stabilization tools guarantees that our close-up shots stay sharp and in focus. Tripod stability is paramount; a robust tripod minimizes vibrations and movements that can blur our images. For the most precise results, we employ tripods with adjustable legs and heads, allowing us to fine-tune the camera's position relative to the snowflake.
In addition to tripods, incorporating image stabilization technology is essential. Modern cameras and lenses often feature built-in image stabilization, which compensates for minor hand movements. This technology is particularly beneficial when shooting handheld or in windy conditions, where even a slight tremor can compromise the clarity of our macro shots.
Balancing our lighting sources properly is another vital aspect. Ensuring the correct white balance helps us capture the snowflake's true colors and details. We often use LED ring lights or portable light panels to provide consistent, controllable illumination. These tools not only highlight the snowflake's delicate features but also reduce shadows that could obscure essential details.
Techniques for Sharp Images
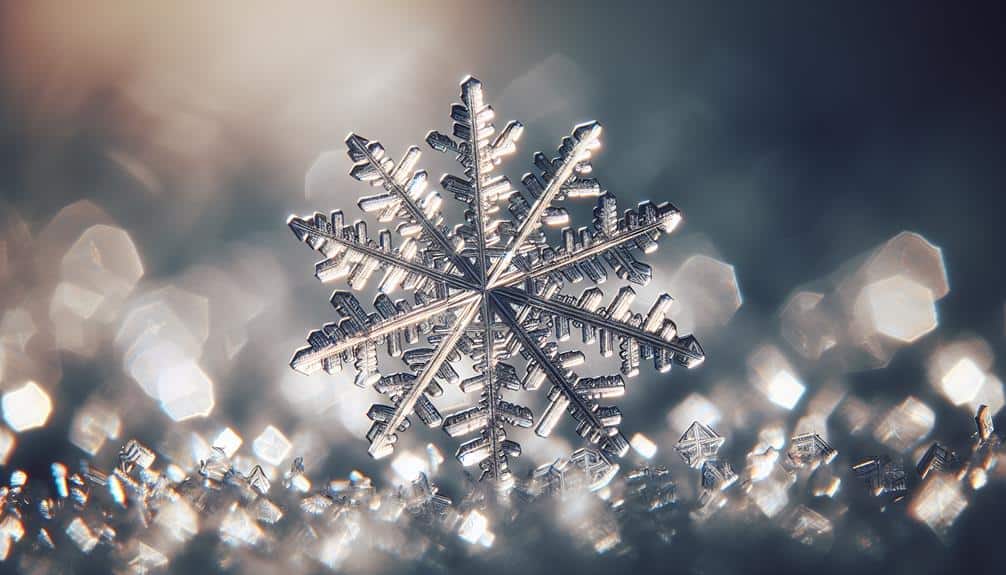
To capture the intricate details of snowflakes, we must optimize our camera settings and utilize a high-quality macro lens.
We'll focus on achieving the correct aperture, shutter speed, and ISO to guarantee maximum sharpness.
These techniques, combined with precise macro lens application, will yield high-resolution images that reveal the snowflakes' complex structures.
Proper Camera Settings
Using the correct camera settings is vital for capturing the intricate details of snowflakes with sharpness and precision. To effectively document the unique snowflake composition, we must consider three primary settings: aperture, shutter speed, and ISO.
For starters, using a small aperture (f/8 to f/16) ensures a greater depth of field, allowing us to capture the complexity of each snowflake's structure in our winter wonderland.
Next, an appropriate shutter speed is essential. Given the often windy conditions in a winter wonderland, a fast shutter speed (1/200 to 1/1000 seconds) is necessary to freeze the motion of falling snowflakes and avoid blur. However, we should balance this with adequate lighting; natural light can be scarce in snowy environments.
ISO settings play a pivotal role too. A lower ISO (100-400) minimizes noise, preserving the fine details of the snowflake composition. Using higher ISO values can introduce graininess, detracting from the clarity of our images.
Additionally, employing a tripod can further stabilize our shots, enhancing sharpness and precision.
Macro Lens Use
Employing a macro lens enables us to magnify the intricate crystalline structures of snowflakes, ensuring unparalleled sharpness and detail in our images. This technique is crucial in capturing the essence of snowflake crystallography, revealing the geometric precision and artistic perspectives embedded within each flake.
By meticulously focusing on these minute structures, we explore a winter wonderland teeming with intricate details.
To achieve best results, we adhere to the following technical guidelines:
- Aperture Settings: Utilizing a small aperture (f/16 or smaller) maximizes depth of field, ensuring sharpness across the entire snowflake.
- Focus Stacking: Combining multiple images taken at different focus points mitigates the limitations of shallow depth of field inherent in macro photography.
- Lighting: Employing diffused light sources prevents harsh shadows and highlights, preserving the delicate details of the snowflakes.
- Stabilization: Using a sturdy tripod and remote shutter release reduces camera shake, resulting in crisp, clear images.
Lighting and Background Tips
Achieving best lighting and background conditions is crucial for capturing the intricate details of snowflakes with precision. When selecting creative backdrops, we must consider the interplay of natural light to enhance the minute features of each snowflake.
A dark, textured surface—such as black felt or velvet—can provide a stark contrast against the delicate ice crystals, ensuring each facet is clearly defined. Natural light, particularly diffuse sunlight, minimizes harsh shadows and highlights, offering an even illumination that accentuates the snowflake's symmetrical beauty.
In the debate of indoor vs. outdoor settings, each has its merits. Outdoor environments provide access to natural light, which consistently delivers superior color accuracy and detail. However, uncontrolled variables like wind and temperature fluctuations can pose challenges.
Indoor setups, on the other hand, allow for precise manipulation of artificial light sources. Using LED ring lights or softboxes, we can achieve consistent lighting conditions that mimic natural light while offering greater control over intensity and direction.
For best results, combining artificial light with reflective surfaces or diffusers can reduce glare and enhance clarity. By meticulously adjusting our lighting and background, we harness the freedom to reveal the snowflake's complex, ephemeral beauty in stunning detail.
Post-Processing Snowflake Photos

Post-processing snowflake photos demands meticulous attention to detail and a solid understanding of image editing techniques to enhance the intricate patterns and structures captured during the shoot. We need to utilize advanced software options and incorporate creative filters and enhancement tools to bring out the best in our images.
First, let's focus on the pivotal steps in our editing workflow:
- Noise Reduction: Snowflake photos often suffer from noise due to high ISO settings. We should employ noise reduction tools in software like Adobe Lightroom or Topaz DeNoise AI to retain detail while minimizing grain.
- Contrast and Clarity Adjustments: Enhancing contrast and clarity helps highlight the snowflake's complex geometry. Using Lightroom's clarity slider or Photoshop's high-pass filter can make the intricate structures pop.
- Selective Color Adjustments: Adjusting the color balance can bring out subtle hues in the snowflake. We might use selective color adjustments to enhance blues and whites, ensuring the snowflake stands out against the background.
- Sharpening: Final sharpening is essential for accentuating fine details. Software like Adobe Photoshop's Unsharp Mask or the Smart Sharpen tool can help refine the edges without introducing artifacts.
Showcasing Your Snowflake Collection
After meticulously editing our snowflake photos, we can now turn our attention to effectively showcasing the collection to highlight their exquisite details and intricate patterns. Effective snowflake preservation is vital for maintaining the integrity of our images. We should consider using high-quality archival materials to prevent degradation over time.
For display options, shadow boxes offer a controlled environment that minimizes exposure to light and air, preserving the photographs' clarity. Additionally, UV-filtered glass can be employed to protect against harmful ultraviolet rays.
When it comes to snowflake photography, composition ideas are essential. Arranging photos by size, shape, or symmetry can create visually appealing narratives. Utilizing a black or dark blue background enhances the contrast, making the intricate structures of each snowflake more prominent.
Data-driven decisions underline the importance of humidity control in display environments to avoid condensation and potential damage to the prints. By leveraging scientific terminology and precise techniques, we guarantee our collection not only captivates but also educates.
Ultimately, these methods provide us the freedom to explore and present the natural beauty of snowflakes in a manner that respects both their fragility and our artistic vision.
Frequently Asked Questions
How Do Snowflakes Form in the Atmosphere?
How do snowflakes form in the atmosphere? Ice crystals develop under specific atmospheric conditions, where water vapor condenses onto particles. As temperatures fluctuate, these crystals grow in complexity, creating unique structures through branching and aggregation.
Why Are No Two Snowflakes Exactly Alike?
Did you know there are more possible snowflake designs than atoms in the universe? Each snowflake's unique molecular structure and crystal growth result from varying atmospheric conditions, ensuring no two snowflakes are ever identical.
What Scientific Principles Explain the Symmetry of Snowflakes?
We grasp snowflake symmetry through crystal formation principles and molecular bonding. Water molecules align in hexagonal patterns due to hydrogen bonds, leading to symmetrical, six-sided structures. This natural order emerges consistently, ensuring snowflakes' unique, yet symmetrical forms.
How Do Temperature and Humidity Affect Snowflake Shapes?
Much like the unpredictability of chaos theory, temperature and humidity dictate snowflake shapes through crystal growth. Variations in weather patterns cause distinct formations, with colder, drier conditions yielding intricate patterns, and warmer, humid environments producing simpler structures.
Can Snowflakes Tell Us Anything About Climate Conditions?
Yes, snowflake research can reveal climate patterns. By analyzing snowflake shapes and formation, we can infer temperature and humidity levels, helping us understand historical and current climate conditions with technical precision and data-driven insights.
