To nail lightning strike photography angles, you’ll want to start with a wide-angle lens to maximize sky coverage and boost your chances of capturing unpredictable strikes. Scout locations beforehand to identify strong foreground elements that add depth and visual impact. Use the rule of thirds to anticipate strike zones, and switch to a zoom lens once you’ve identified a reliable strike location. Keep exploring to sharpen every technical edge of your lightning photography game.
Key Takeaways
- Use wide-angle lenses to maximize sky coverage, increasing your chances of capturing unpredictable lightning strikes within the frame.
- Scout locations beforehand to identify compelling foreground elements that add depth and visual impact to your compositions.
- Prioritize placing foreground interest deliberately, using the rule of thirds to create balanced, dynamic lightning strike images.
- Anticipate recurring strike zones during storms and reposition your camera angle to frame lightning in stronger compositional thirds.
- Switch to zoom lenses as your skills improve, allowing tighter, more deliberate compositions once strike locations become predictable.
Essential Gear for Lightning Strike Photography
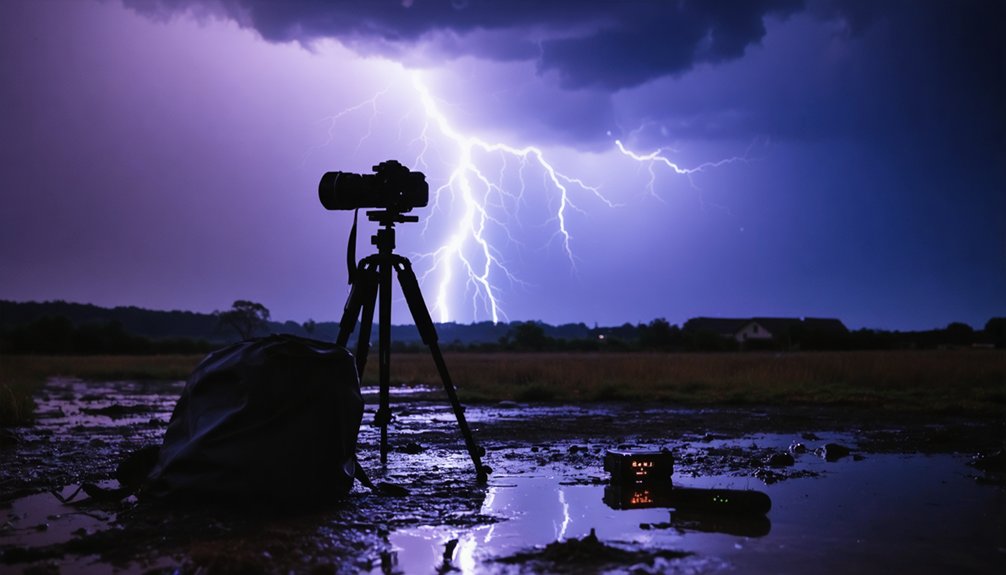
Capturing lightning demands the right gear—a sturdy tripod is non-negotiable for the long exposures required to freeze a bolt mid-strike.
Tripod stability eliminates camera shake, ensuring crisp images during 10-30 second exposures. Pair it with a cable release or remote triggers, like the MIOPS Smart+ in Lightning mode at 95% sensitivity, to fire your shutter without physical contact.
A stable tripod and remote trigger are your ticket to sharp, shake-free lightning shots every time.
Your camera body should support remote control capability—DSLRs and mirrorless systems both work well.
Don’t overlook a rain cover; storms are unpredictable, and protecting your gear keeps you shooting longer. Remote triggers not only reduce vibration but also automate captures, freeing you to monitor conditions rather than babysit the shutter.
Invest in these essentials, and you’ll dramatically increase your keeper rate in the field.
Wide-Angle vs. Zoom Lenses for Lightning Shots
When it comes to lens choice, 2 distinct options define your approach: wide-angle or zoom. Wide angle benefits beginners by capturing expansive sky sections, maximizing your chances of catching a strike.
Once you’re comfortable, zoom creativity reveals tighter, more deliberate compositions.
Key considerations for each option:
- Wide-angle lenses cover substantial sky portions, making them ideal for unpredictable storm conditions where strike location is unknown.
- Standard primes like 30mm (APS-C) or 50mm (full-frame) deliver sharp, frame-filling results with minimal distortion.
- Mid-range zooms like 24-105mm give you flexible focal lengths, letting you adapt quickly to shifting storm positions.
Your lens choice directly controls how much creative freedom you exercise. Start wide, capture confidently, then compress your perspective with zoom as your skills advance.
Aperture and Shutter Speed Settings for Lightning Photography
Aperture and shutter speed work together as your two primary controls for exposing lightning correctly.
Start your aperture range at f/8, then adjust based on conditions. Close down to f/11–f/22 when lightning’s bright or ambient light is excessive. Open up to f/5.6–f/2 for distant, dim strikes that need more light. Your sweet spot for close, vivid bolts sits around f/13.
For shutter speed, shoot 10–30 seconds after dark to capture multiple strikes in one frame. At sunset, drop to 1–2 seconds to balance existing light.
Daytime shooting demands the slowest possible shutter speed combined with f/16–f/22 and an ND filter. Dialing in both controls precisely gives you full command over every exposure, letting lightning define the shot on your terms.
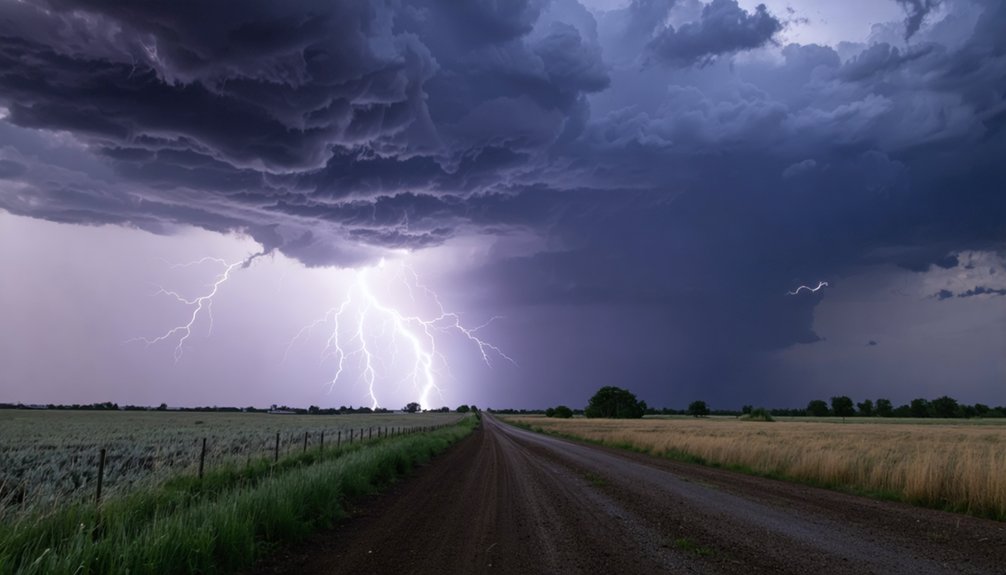
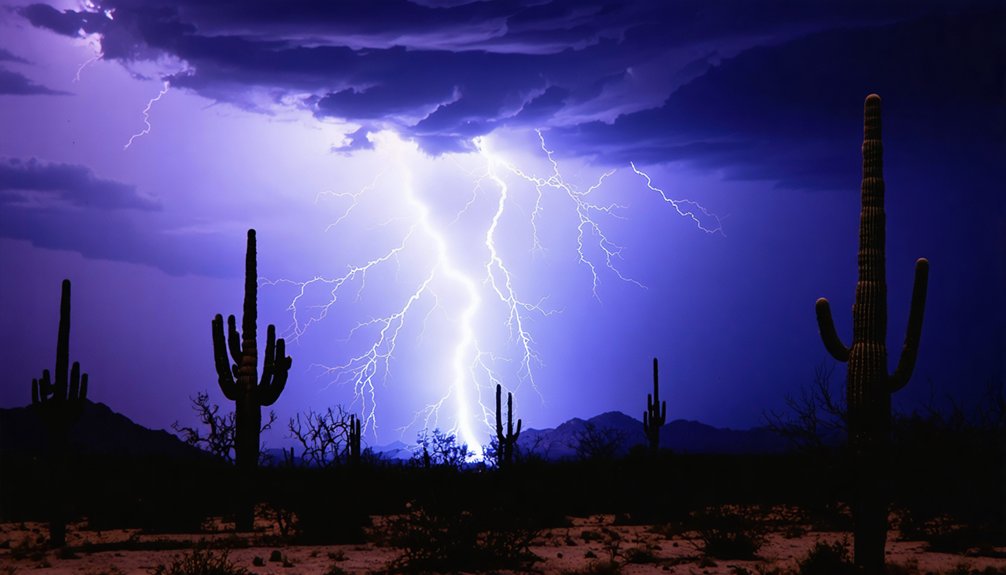
Best Angles and Compositions for Lightning Strikes
Wide-angle lenses give you the best starting point for lightning compositions, covering enough sky to maximize your chances of capturing a strike in the frame.
Location scouting before the storm lets you identify compelling foreground elements like cityscapes or water reflections that elevate your shot beyond a simple bolt.
Key composition strategies to apply:
- Prioritize foreground interest during location scouting to create depth and visual impact
- Use timing techniques to anticipate strike zones, positioning active storm cells within your frame’s strongest thirds
- Switch to zoom lenses once you’re comfortable, tightening compositions around recurring strike locations
Balancing sky coverage with intentional framing transforms reactive shooting into deliberate, technically sharp captures that fully exploit the storm’s dramatic potential.
How to Focus Sharply on Distant Lightning Strikes
Sharp focus on distant lightning demands a deliberate approach before the storm arrives. You can’t rely on autofocus once darkness settles in, so master your focusing techniques early.
Use Live View to manually focus on distant city lights, the moon, or horizon landmarks before the storm hits. These reference points give you tack-sharp results when lightning finally fires.
Before the storm rolls in, lock focus on city lights or the moon—your lightning shots will thank you.
Switch your lens to manual focus and lock it down—don’t touch it once it’s set. Narrower apertures between f/11 and f/16 naturally extend your depth of field, compensating for minor manual adjustments and keeping distant bolts sharp.
If you’re using a lightning trigger like the MIOPS Smart+, manual focus is non-negotiable. Autofocus hunts in darkness and costs you critical shots.
Frequently Asked Questions
How Do I Stay Safe While Photographing Lightning Storms Outdoors?
Stay safe by prioritizing storm awareness—monitor weather patterns, maintain distance from active cells, and use safety gear like rain covers. You’ll want to shoot from enclosed structures, never expose yourself under open skies during active strikes.
What Post-Processing Techniques Enhance Lightning Strike Photos After Shooting?
Boost your lightning shots by applying color correction to enhance bolt hues and using contrast adjustment to make strikes pop against dark skies. You’ll also want to reduce noise, sharpen details, and selectively dodge highlights for maximum impact.
Can I Photograph Lightning Strikes Effectively From Inside a Building?
You can effectively photograph lightning strikes indoors by positioning your camera near an open window. Apply indoor techniques with ideal camera settings: f/8 aperture, ISO 200, and 10-30 second exposures to capture stunning, sharp bolts.
How Do I Predict Where Lightning Will Strike for Better Positioning?
You can’t control lightning, but you can predict it. Study storm tracking apps to anticipate lightning behavior, position yourself near tall isolated structures, and use wide-angle lenses to maximize your capture zone effectively.
What Legal Permits Are Required for Lightning Photography in Restricted Areas?
You’ll need to research local permit requirements and photography regulations specific to your location, as restricted areas vary. Contact managing authorities directly—national parks, private lands, or government zones each enforce distinct rules you must follow.
References
- https://www.nickulivieriphotography.com/blog/lightning/
- https://digital-photography-school.com/how-to-photograph-lightning-the-ultimate-guide/
- https://www.miops.com/blogs/news/how-to-take-the-extraordinary-lightning-photos
- https://www.youtube.com/watch?v=uvDQKMQTJMw
- https://www.slrphotographyguide.com/how-to-photograph-lightning-and-storms/
- https://alphauniverse.com/stories/the-secret-to-daytime-lightning-photography/
- https://iso.500px.com/tutorial-a-beginners-guide-to-photographing-lightning/