Position yourself 2-3 miles from the storm’s core on the southeastern flank, where you’ll capture dramatic structure while avoiding hail exceeding 1 inch in diameter. Use telephoto lenses from inside your vehicle to eliminate windshield exposure, and deploy weatherproof covers like LensCoat RainCoats within 15 seconds of precipitation onset. Monitor radar for hook echoes and establish retreat thresholds at 0.75-inch hail or 35 mph winds. Strategic positioning techniques and emergency protocols below guarantee you’ll document nature’s fury without compromising your safety.
Key Takeaways
- Maintain 2-3 miles distance from hailstorm cores and position on the storm’s southeastern flank for safety and visibility.
- Deploy weatherproof covers like LensCoat RainCoats within 15 seconds when precipitation begins to shield camera equipment.
- Abort shooting when hailstones reach 0.75 inches or winds exceed 35 mph to prevent equipment damage.
- Monitor radar for hook echoes and velocity data to track storm movement and anticipate directional shifts.
- Use your camera bag as an overhead shield against hail and establish accessible escape routes beforehand.
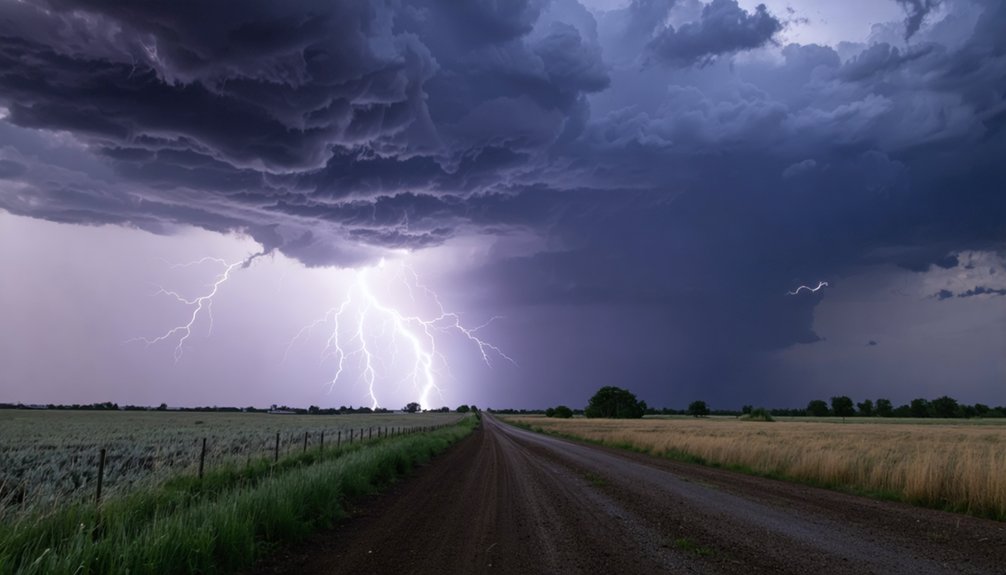
Understanding Hailstorm Behavior and Safety Distances
When photographing severe weather, you’ll need to maintain a minimum distance of 2-3 miles from hailstorm cores where stones exceed 1 inch in diameter. Hailstones form in updrafts with velocities reaching 100+ mph, creating unpredictable trajectories as they fall. Your observation timing must account for shifting wind patterns that can redirect hail paths without warning.
Effective storm chasing techniques require monitoring radar data for hook echoes and bounded weak echo regions—these indicate severe hail potential. You’ll want to position yourself on the storm’s southeastern flank, where visibility remains optimal and escape routes stay accessible. Terminal velocities for large hailstones reach 90 mph, capable of penetrating vehicle windshields. Calculate your distance using the storm’s movement speed and your vehicle’s acceleration capabilities to facilitate rapid repositioning when conditions deteriorate.
Essential Camera Gear for Severe Weather Photography
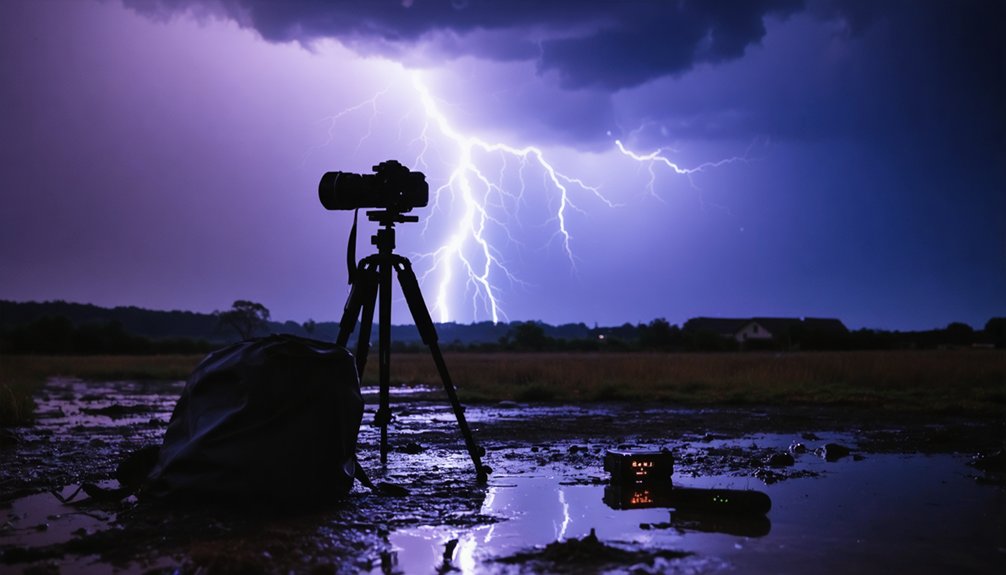
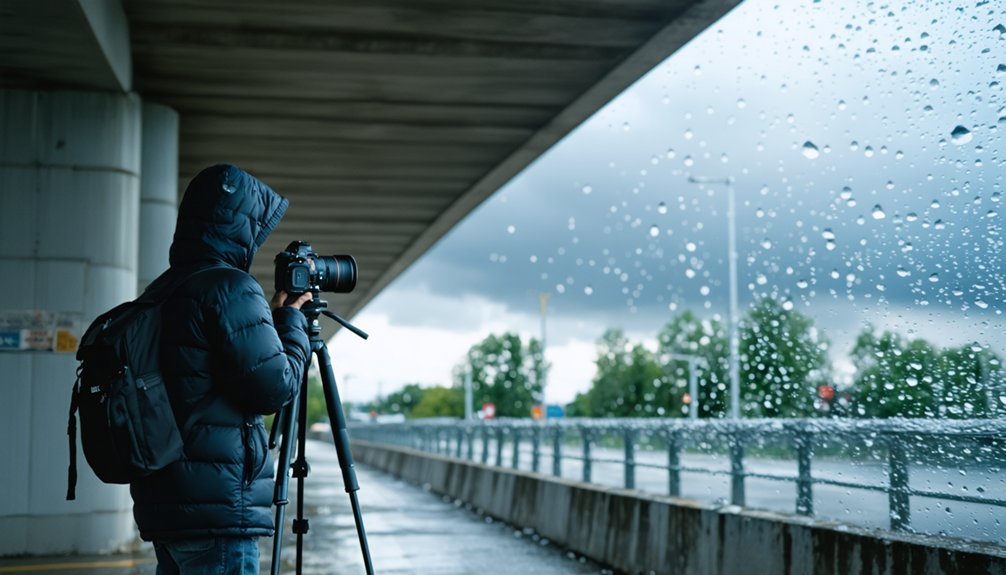
While your vehicle provides mobility for storm positioning, your camera system determines whether you’ll capture publication-quality imagery or return with unusable footage. Full-frame bodies like the Nikon D750 or Canon 6D deliver superior low-light performance when photographing dark-based supercells. Pair these with ultra-wide glass—Tamron 15-30mm f/2.8 or Rokinon 14mm f/2.8—to frame expansive storm structures from safe distances.
Camera stabilization methods become critical as wind gusts intensify. Deploy a Manfrotto 190 or carbon fiber MT055CXPRO3 tripod to eliminate shake during long exposures. You’ll need polarizer filters to cut windshield glare and enhance mammatus definition.
Pack extra batteries and Pelican-case protection for your gear. Maintain lightning hazard awareness by monitoring discharge rates—never extend tripods skyward during active CG strikes within two miles.
Protecting Your Equipment From Hail Damage
Your camera bag functions as an immediate shield when hail diameter exceeds 0.25 inches, providing instant overhead protection that prevents direct impacts to exposed equipment.
Deploy weatherproof covers with drawstring closures within 15 seconds of initial precipitation to create a sealed barrier against moisture ingress and kinetic damage from ice pellets.
Establish clear retreat thresholds before entering storm zones—when hail size reaches 0.75 inches or winds exceed 35 mph, you’ll need to abort shooting and secure gear in waterproof storage within 60 seconds to prevent catastrophic lens or sensor damage.
Camera Bag as Shield
Hailstones traveling at terminal velocities between 20-50 mph can shatter lens elements and crack camera housings within seconds of impact. Your camera bag becomes critical protective gear when you’re caught exposed during a storm.
Position your reinforced bag as an overhead barrier between falling ice and your equipment. Modern bags with EVA foam padding or hard-shell construction offer superior hail impact resistance compared to standard textile models.
Deploy your bag strategically: hold it above your camera while shooting, then immediately shelter gear inside during intense bombardment. You’ll need quick accessibility—choose bags with single-handed opening mechanisms.
Test your bag’s protective capability beforehand; quality padding should compress without transferring force to contents. Remember, your freedom to shoot depends on equipment survival—don’t compromise on protective infrastructure.
Weatherproof Covers and Wraps
When storm conditions escalate beyond manageable risk thresholds, dedicated weatherproof covers provide your final equipment defense layer. LensCoat RainCoats shield DSLRs with waterproof poly tricot and tape-sealed seams, while RainCaps secure lens fronts against hail impact. Think Tank’s Hydrophobia V3.0 series enables camera angle optimization through maintained control access during deployment. Peak Design Shell offers ultralight transit protection, though it’s unsuitable for active shooting.
For permanent installations, OHWOAI’s ABS-constructed covers deliver UV and hail resistance with rubber gasket sealing. Adjustable Velcro straps and hot shoe mounts prevent wind displacement during critical lighting considerations.
Combine multiple protection layers—RainCoat with RainCap—for extreme conditions requiring full-lens coverage. Pre-install covers on lens hoods for seconds-fast deployment when conditions deteriorate. These systems maintain your operational freedom while establishing all-encompassing environmental barriers against hail damage.
Rapid Retreat Timing Strategy
Although weatherproof covers provide critical equipment protection, they won’t shield you from lightning strikes—making retreat timing your most essential safety protocol. Apply the 30-30 rule with vigilant awareness: count seconds between flash and thunder. Less than 30 seconds means you’re within striking distance and must retreat immediately.
Lightning extends 10 miles from storm cores, so hearing thunder demands decisive response—seek vehicle shelter without hesitation.
Monitor radar apps like RadarScope to track supercell development and hail potential. Watch for sudden wind shifts and darkening cloud turbulence signaling intensification. You’ll maximize both safety and shooting opportunities by triggering your camera remotely from inside your vehicle, which functions as a Faraday cage.
Wait 30 minutes post-thunder before resuming activity. No photograph justifies risking your life.
Strategic Positioning and Storm Tracking Techniques
Strategic positioning begins with understanding storm morphology on radar displays. You’ll identify hook echoes marking the storm base, then calculate intercept points 3-10 miles southeast of northeast-moving systems. This buffer distance enables telephoto isolation while maintaining your escape corridor.
Wind direction analysis determines your shooting location—position with wind at your back to prevent lens contamination from precipitation. Monitor mesocyclone rotation patterns through real-time radar updates, adjusting your storm repositioning strategies as cells evolve.
Track velocity data to anticipate directional shifts in wind-shear environments. You’ll position in clear air ahead of the supercell’s rotating updraft, ensuring road access for rapid retreat. Select routes leading away from the core path while maintaining visual contact with the storm’s structure for ideal documentation opportunities.
Selecting the Right Lenses for Safe Distance Shooting
Your lens selection directly impacts both image quality and personal safety during hailstorm documentation. Telephoto lens selection becomes critical when maintaining safe distance from dangerous precipitation cores. The Sigma 70-200mm F2.8 DG OS HSM Sports delivers constant F2.8 aperture for darkened storm conditions while keeping you away from hazards.
Wide angle lens quality matters equally for capturing massive storm structures—the Sigma 14-24mm F2.8 DG HSM Art provides superior weather sealing against wind-driven rain and hail. Its robust construction prevents flare and chromatic aberration during active precipitation.
You’ll achieve ideal results by pairing telephoto reach with fast apertures: F2.8 enables handheld shooting when skies darken to night levels. Carbon fiber tripods outperform metal alternatives near lightning activity. Always protect front elements with lens hoods and UV filters during hailstone impacts.
Camera Settings for Capturing Hail in Motion
To freeze hailstones mid-flight, you’ll need a shutter speed of at least 1/500th second—starting at 1/640th for supreme sharpness with small, rapid objects. Fast-moving hail requires speeds up to 1/1000th second in variable storm light to eliminate motion blur completely.
Engage continuous burst mode to capture multiple frames per second, greatly increasing your odds of obtaining sharp images while maintaining safe distance from the hailstorm.
Fast Shutter Freezes Hailstones
When hailstones plummet from storm clouds at speeds exceeding 100 mph, you’ll need a minimum shutter speed of 1/250 second to freeze their motion—though fast-moving hail often demands 1/1000 second or faster. Your motion capture accuracy depends heavily on hail trajectory: lateral movement across your frame requires faster speeds than stones falling toward your position.
For close-up shots, increase shutter speed beyond baseline requirements to eliminate blur. You’ll achieve ideal handheld techniques by pairing fast shutters with wide apertures (f/4.0-f/5.6), allowing proper exposure during dark storm conditions. Review test shots using your camera’s zoom function to verify sharpness—fuzzy edges indicate insufficient speed. Adjust settings between bursts until you’ve locked in crisp detail.
In brighter conditions, compensate with ISO 200-400 while maintaining your freedom to shoot without tripod constraints.
Burst Mode Captures Action
Burst mode transforms hailstorm photography from chance snapshots into calculated sequences that multiply your odds of capturing perfect impact moments. You’ll want high-speed continuous shooting for fast-falling hail, typically 5-6 frames per second. Enable it through your camera’s drive mode button before the storm intensifies.
Timing your burst mode requires strategic preparation:
- Lock your exposure settings (ISO, aperture, shutter speed) before hail accelerates
- Apply focus control techniques by pre-focusing on your target zone and switching to single-shot AF
- Fire controlled bursts only when hailstones enter your frame—restraint prevents buffer overflow
Half-press your shutter to lock focus, then fully depress when action materializes. After capturing sequences, review thumbnails to select the perfect frame showing hail mid-flight or impact, then delete unnecessary bursts immediately.
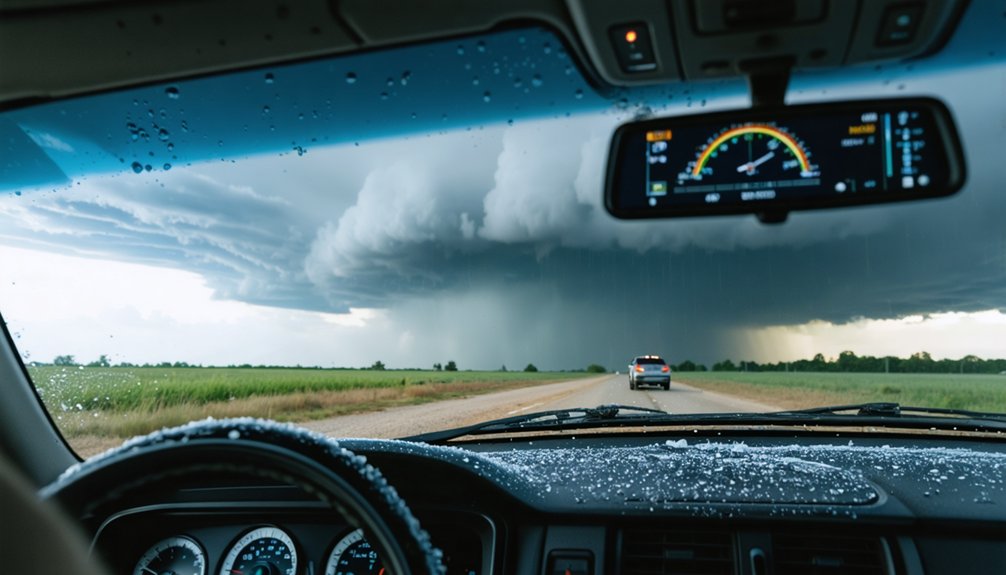
Using Your Vehicle as a Protected Shooting Platform
Your vehicle serves as an effective mobile photography station during hailstorms, providing both equipment protection and personal safety while maintaining visual access to the storm. Position your car under sturdy overhangs or gas station canopies to shield against direct impacts while shooting through windows.
Vehicle insulation techniques include placing thick blankets over the windshield and hood, securing them tightly to prevent wind displacement. Shoot from slightly cracked windows or through clean glass using polarizing filters to reduce reflections.
Modern storm impact detection sensors can alert you to severe conditions, giving you 30+ minutes to relocate. Avoid parking near trees, power lines, or debris-prone areas that compromise your safety perimeter. Stay inside throughout the event—your vehicle’s structure protects both you and your gear while maintaining unrestricted documentation access.
Timing Your Shots Between Storm Cycles
Understanding storm cycle patterns transforms hailstorm photography from random shooting to strategic capture, maximizing both image quality and personal safety. Hailstorms exhibit predictable cycles—you’ll notice six or more distinct hail bursts throughout a single event, separated by calmer intervals. These safe windows let you reposition and shoot without constant bombardment.
Monitor your first few cycles to establish rhythm:
- Track burst duration: Most hail episodes last 3-5 minutes with 5-15 minute breaks between
- Count intervals: Note the pattern—typically 15-30 seconds between intensity peaks within each burst
- Watch cloud rotation: Wall clouds and rotating formations signal incoming intensification
Position yourself during lulls, then execute rapid shooting sequences when conditions cooperate. You’ll capture dramatic moments while maintaining vehicle proximity for quick retreat when cycles shift.
Weatherproofing Methods for Rain and Hail Protection
While hailstorms produce dramatic imagery, they’ll destroy unprotected camera gear in seconds—ice pellets traveling 40-70 mph crack lens elements, dent camera bodies, and force moisture past standard seals. Deploy hardshell rain covers with reinforced vinyl over weather-sealed cameras like the Nikon Z7ii. Position lens hoods and UV filters as first-line defenses against impact damage.
Store backup equipment using vapor barrier packing—sealable bags with recharged silica gel packs create moisture-free zones inside your pack. Moisture resistant coatings on professional gear won’t withstand direct hail strikes; seek physical shelter under overhangs or vehicle coverage between shooting windows. Keep microfiber cloths accessible for rapid lens cleaning. If condensation forms, seal gear with fresh desiccants and allow gradual temperature equalization—never apply direct heat.
Emergency Protocols and Escape Planning
When atmospheric conditions deteriorate beyond safe shooting parameters, your survival takes absolute precedence over capturing imagery—hailstorms escalate from minor precipitation to life-threatening events within 3-5 minutes as updraft velocities intensify. Your emergency preparedness training should establish predetermined home evacuation routes leading to interior rooms, basements, or reinforced structures away from windows.
When conditions turn deadly, abandon your shot—survival outweighs any photograph as storms transform from manageable to lethal in minutes.
Position yourself with maximum wall barriers between you and external wind velocities.
Critical extraction protocols include:
- Vehicle abandonment procedures: Pull completely off roadways to covered positions; avoid overpasses where wind acceleration and flash flooding create compound hazards
- Shelter hierarchy assessment: Prioritize sturdy buildings over vehicles, vehicles over exposed terrain near trees or tall structures
- Post-storm hazard mitigation: Delay equipment retrieval until hail cessation; wear protective gear when traversing debris fields and downed electrical infrastructure
Frequently Asked Questions
What Insurance Coverage Protects Camera Equipment Damaged During Hailstorm Photography?
Equipment insurance coverage protects your gear from hailstorm damage through all-risk policies covering wind, water, and impact perils. You’ll need dedicated camera insurance, not homeowners policies. Follow camera maintenance recommendations post-storm to document any damage claims immediately.
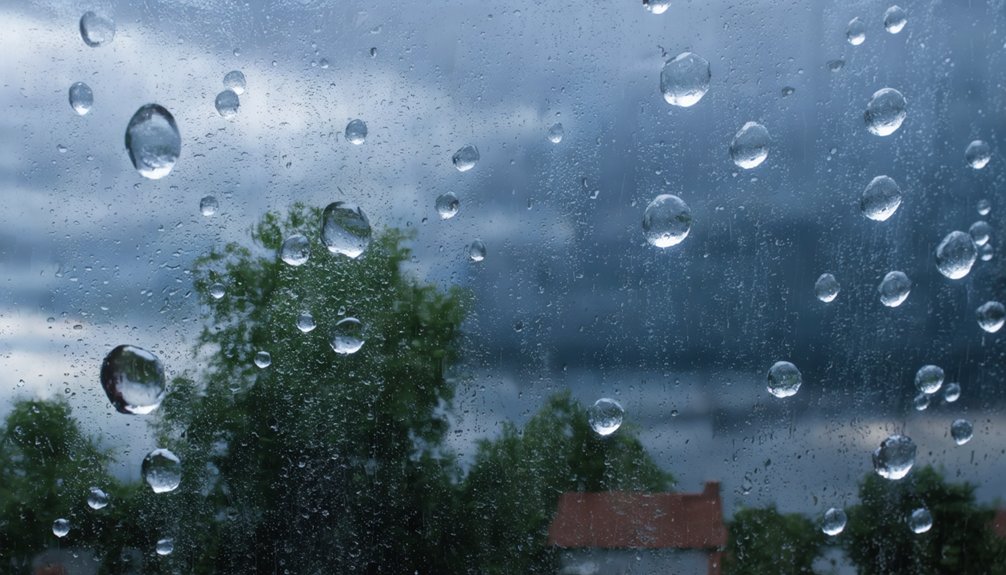
Can I Shoot Hailstorms Safely From Inside My Home or Building?
Lightning strikes without warning—but you’re completely safe shooting hailstorms from inside buildings. Protected locations with proper viewing angles through windows eliminate all exposure risks while you capture dramatic storm imagery with total freedom and security.
How Do I Edit Hailstorm Photos to Enhance Visibility of Hailstones?
You’ll boost hailstone visibility using image editing techniques like increased clarity, contrast adjustments, and targeted sharpening. Enhance definition for accurate hailstone size measurements by applying local dodging, dehaze filters, and strategic exposure lifting to reveal vital storm documentation details.
What First Aid Supplies Should I Carry for Hailstorm Photography Expeditions?
Pack gauze pads, adhesive bandages, trauma shears, and latex gloves—but don’t forget protective eyewear and proper clothing layers are your primary defense. Studies show 73% of hailstorm injuries stem from inadequate protection, not medical supply shortages.
Are There Legal Restrictions on Photographing Severe Weather Near Public Roads?
You can photograph severe weather from public roads following public property guidelines. Storm chaser regulations require you to avoid obstructing traffic, maintain safe distances from infrastructure, and immediately comply with law enforcement directives during emergency conditions.