Before documenting storm aftermath, you’ll need to confirm the area is structurally safe and free of hazards like gas leaks or downed power lines. Start outside, photographing all sides with wide, medium, and close shots. Log storm details, then move room by room inside, capturing hidden damage too. Record every damaged item, collect repair estimates, and back up all files across multiple locations. There’s much more to get right.
Key Takeaways
- Confirm structural stability and check for gas leaks, electrical hazards, and downed power lines before beginning any documentation.
- Photograph exterior damage systematically using wide, medium, and close shots, capturing roofing, siding, foundation, and windows.
- Document interior damage room by room, recording narrated video walkthroughs linking specific damage to its location and cause.
- Create a detailed inventory of damaged items, including make, model, repair costs, and corresponding photo references.
- Organize all photos, videos, receipts, and contractor estimates into a claim file backed up across multiple storage locations.
Make Sure It’s Safe Before You Document Anything
Before you grab your phone or camera, confirm the property is actually safe to enter. Check for structural instability, gas leaks, and live electrical hazards first. Don’t bypass this step — it’s your first line of defense against compounding an already difficult situation.
Run a full hazard assessment before setting foot inside. Avoid downed power lines, standing floodwater, and visibly compromised walls or ceilings. If officials haven’t cleared the area yet, wait for that authorization.
Follow established safety protocols throughout your documentation process. If cleanup or repairs are underway and creating new risks, stop and reassess before continuing. You can always return to complete missing sections once conditions improve.
Document only what you can safely access — thoroughness means nothing if you’re injured doing it.
Start Outside: Document Exterior Storm Damage First
Once the property’s cleared and you’ve confirmed it’s safe to enter, start your documentation outside. The exterior tells the full story of what the storm delivered, so capture it systematically before anything gets disturbed.
Walk the entire perimeter and photograph every side of the structure. Shoot wide angles first to establish context, then move to medium and close shots for specific damage points. Document roofing, siding, gutters, windows, and foundation areas from multiple angles. Include tree damage where fallen limbs or uprooted trees contacted structures or blocked access. Record flooded landscaping to show water direction, pooling depth, and drainage paths.
Label each photo by location—north wall, rear roofline, driveway entrance. Use a measuring tape for close-ups when size or depth matters. This exterior record anchors everything you’ll document inside.
Log Storm Details and Conditions Before You Forget Them
While your memory is sharp and the storm is recent, write down every detail you can recall about what happened. Record the storm’s date, time, and type, whether it involved high winds, heavy rain, hail, or flooding.
Document every storm detail while memory is fresh — date, time, type, and whether it brought wind, rain, hail, or flooding.
Note when you first observed damage and what conditions made storm safety a concern during your initial damage assessment.
Label every photo and video by room, exterior side, or roof section so each image connects directly to a specific location.
Save official weather records from NOAA or the National Weather Service to corroborate your account.
Keep a chronological incident log that tracks discovery, inspection, and any mitigation steps you took.
These details strengthen your claim and protect your right to a fair, accurate settlement.
Shoot Wide, Medium, and Close for Every Damaged Area
After you’ve logged storm details and confirmed it’s safe to enter, start capturing photo and video evidence of every damaged area using three distinct shooting distances: wide, medium, and close.
Wide shots establish context, showing where tree damage occurred relative to your structure or how far floodwater effects spread across a room or yard.
Medium shots narrow the focus to a specific wall section, window frame, or flooring zone.
Close shots capture fine detail like cracks, staining, waterlines, or splintered wood.
Apply this three-distance method consistently to every affected area, both interior and exterior.
Label each image by location as you go.
This structured approach keeps your documentation organized, eliminates guesswork later, and gives adjusters a clear, complete picture of the full damage scope.
Document Interior Storm Damage Room by Room, Including Hidden Areas
Once you’ve covered the exterior, move inside and work through each room in a fixed order so nothing gets missed.
Open every closet, check inside cabinets, and inspect areas where water may have entered through walls, ceilings, or flooring seams.
As you move through each space, record a narrated video walkthrough that identifies the room, describes what you’re seeing, and connects the visible damage to a likely entry point or cause.
Room-By-Room Photo Strategy
When documenting interior storm damage, move through your home room by room so nothing gets overlooked and every loss ties back to a specific location. Start at one end of the structure and work systematically toward the other.
In each room, shoot wide angles first to capture the overall condition, then move to medium shots showing specific damage zones, and finish with close-ups of critical details.
Clear storm debris carefully before repositioning, but photograph it in place first. Flag safety hazards immediately and avoid stepping into compromised areas.
Open every closet, cabinet, and storage space. Check ceilings, baseboards, and window frames for water intrusion.
Label each photo with the room name and affected surface so your documentation stays organized and directly supports your claim.
Capturing Hidden Damage Areas
Hidden damage areas are often where storm losses go undetected longest, so you’ll need to push beyond what’s immediately visible in each room. Concealed issues inside walls, floors, and overhead spaces can quietly escalate into costly structural or mold-related problems if you miss them now.
Check these three locations for hidden damage:
- Cabinets and closets — Open every door and photograph interior walls, floors, and ceilings for moisture intrusion or staining.
- Under sinks and around plumbing access panels — Water entry frequently follows pipes, so inspect and document any discoloration or swelling.
- Attic and crawl space entry points — Capture insulation displacement, wet framing, and any visible daylight penetrating roofing material.
Label each photo by exact location so your documentation stays organized and actionable.
Narrating Interior Video Walkthroughs
A narrated video walkthrough gives your claim file something photos alone can’t: a continuous, spoken record that connects damage to location, sequence, and visible cause.
Move room by room, starting at the entry point and working systematically through each space.
Use audio narration to state the room name, the direction you’re facing, and what you’re observing as you film. Describe water stains, structural shifts, broken glass, and damaged contents in real time. Don’t skip closets, utility areas, or ceiling corners.
Maximize interior lighting by opening blinds, using portable work lights, or carrying a flashlight to eliminate shadows that obscure damage detail.
Keep your pace steady and your camera stable. A clear, well-narrated walkthrough gives adjusters immediate context that static images simply can’t replicate.
Build a Room-by-Room Storm Damage Inventory Insurers Can’t Dispute
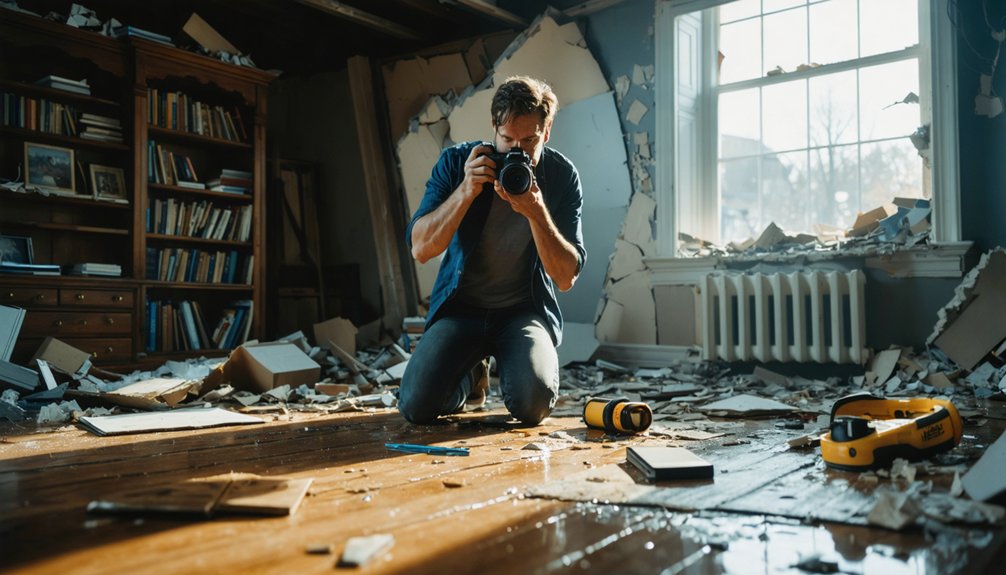
Once you’ve photographed the damage, convert those images into a working inventory by listing every damaged item with its make, model, serial number, estimated replacement cost, and current condition.
Assign each inventory entry a corresponding photo or video file name so the insurer can move directly from the written record to the visual evidence without gaps.
Room-by-room organization keeps this linkage tight, connecting structural damage and contents loss to a specific location rather than leaving adjusters to guess where each item belongs.
Itemizing Damaged Contents Precisely
When storm damage spreads across multiple rooms, a disorganized inventory gives insurers room to dispute, delay, or underpay your claim. Precise itemization keeps you in control.
For each damaged item, record:
- Item description, make, model, and serial number — especially for appliances, electronics, and furniture exposed to water damage.
- Estimated replacement and repair costs — include current market pricing and note observable condition at the time of discovery.
- Room location and corresponding photo or video reference — connect every entry directly to your visual evidence.
Flag items requiring immediate attention for mold prevention, particularly porous materials like carpet, upholstery, and drywall. Retain physical samples where possible.
Your inventory should leave no item unaccounted for and no insurer with legitimate grounds to challenge your loss.
Linking Photos To Inventory
Every photo you take becomes evidence only when it’s tied directly to a line item in your inventory. Label each image with the room, item name, and photo number, then reference that same number beside the corresponding entry in your inventory list. This cross-referencing system eliminates ambiguity and gives adjusters a clear, traceable record.
During storm damage cleanup, photograph items before moving or discarding them, even when safety hazards demand fast action. That sequence proves condition at discovery, not after handling.
Use a simple spreadsheet with columns for item description, location, photo reference numbers, and estimated value. Attach photos digitally to each row when possible. A linked, organized file tells the full damage story without leaving gaps an insurer can challenge.
Save These Financial Records and Repair Estimates From Day One
From the moment the storm passes, you’ll want to start collecting and preserving every financial record tied to the damage. Smart financial planning begins immediately, not after the adjuster calls.
Smart financial planning starts the moment the storm passes—not when the adjuster finally calls.
- Keep all receipts for emergency purchases, temporary repairs, and cleanup supplies from day one—these support your repair budgeting and strengthen your claim.
- Request written estimates from licensed contractors as soon as safely possible, documenting scope, materials, and projected costs clearly.
- Photograph temporary fixes before and after each action, pairing those images with corresponding invoices and contracts.
Store copies in multiple locations—cloud storage, a hard drive, and physical folders. Don’t sign any repair agreements before confirming requirements with your insurer.
Every record you save protects your financial position and your freedom to recover fully.
Document Every Temporary Repair Before and After You Make It
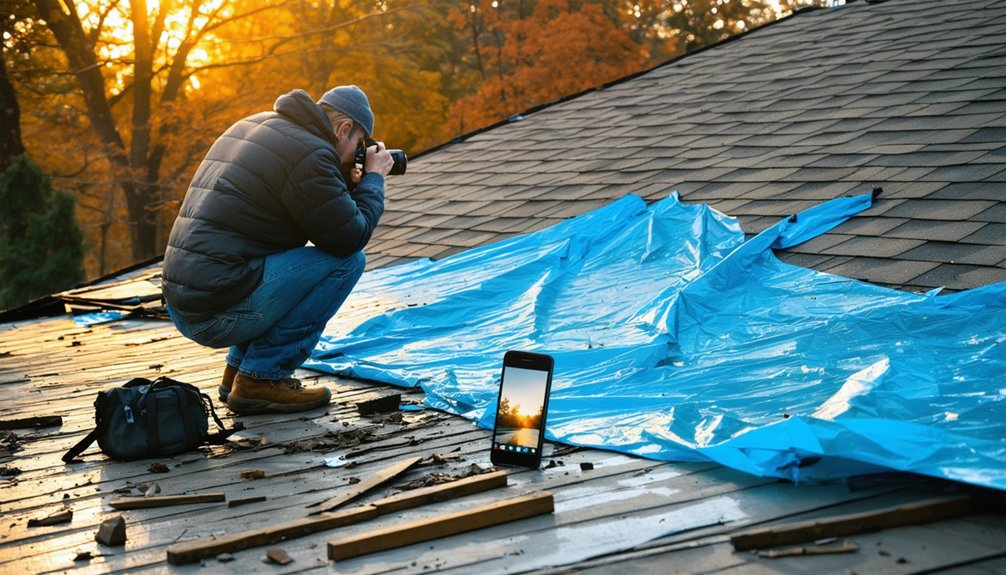
Saving receipts and estimates builds your financial foundation, but those records only tell part of the story—you also need visual proof of every temporary repair you make along the way.
Before you patch, tarp, or board anything, photograph the damage in its original condition. Then document each damage mitigation step as you complete it, capturing before and after shots from consistent angles. Label each photo with the date, time, and location.
If you’re covering a roof section or sealing a broken window, photograph the materials used and the finished result. These records prove you acted responsibly to limit further loss without altering the original damage.
Skipping this step can leave your insurer questioning whether pre-existing conditions or your own actions caused additional harm.
Assemble Your Complete Storm Damage Claim File Before Calling Your Insurer
Before you call your insurer, pull everything together into a single, organized claim file. This protects your freedom to negotiate from a position of documented strength rather than scrambling reactively.
Before you call your insurer, organize everything into a single claim file — negotiate from documented strength, not desperation.
Include these three components at minimum:
- Photo and video evidence — organized by location, covering exterior, interior, and any roof inspection findings with scale references.
- Chronological incident log — storm date, weather safety conditions noted, damage discovery timeline, and all temporary repair records with before-and-after photos.
- Financial documentation — itemized damage inventory, contractor estimates, emergency purchase receipts, and material samples where applicable.
Store copies in at least two locations — cloud and physical. When you finally call your insurer, you’ll present a clear, complete, and defensible claim file.
Back Up Every Photo, Video, and Record in Multiple Locations
Once your claim file is assembled, protecting it becomes the next immediate priority. Don’t rely on a single device or location to store your photos, videos, weather data, and insurance claims documentation. Instead, distribute copies across at least three independent locations.
Upload everything to a secure cloud service, save copies to an external hard drive, and email critical files to yourself or a trusted contact. Store physical printouts of key records offsite, such as at a relative’s home or a safe deposit box.
Label every file clearly by date, location, and damage type so retrieval stays fast and organized. Redundant storage guarantees that no single point of failure—a lost phone, a flooded home, a corrupted drive—can erase your evidence or delay your claim.
Frequently Asked Questions
Can I Document Storm Damage if I’m Renting, Not Owning?
Like a homeowner, you can absolutely document storm damage as a renter. Your renting rights protect you, and tenant responsibilities require you to photograph, log, and report all damage promptly to your landlord and insurer.
How Long Should I Keep Storm Damage Records After a Claim?
Keep your storm damage records for at least seven years after settling a claim. Insurance requirements vary, but strong record retention protects you if disputes arise, audits occur, or you need to reference past damage for future claims.
Will Documenting Damage Affect My Insurance Premium Rates?
Documenting damage doesn’t directly raise your premium rates. Insurance claims themselves influence rate adjustments. You’ll protect your rights by recording everything accurately, letting your insurer assess the loss fairly without fearing documentation hurts your standing.
Should I Document Damage Caused by Neighbors’ Fallen Trees?
Who’s liable? Document all neighbor liability thoroughly. Conduct a tree damage assessment, photographing wide, medium, and close angles. You’ll capture the tree’s origin, point of impact, and structural harm, building your strongest, most independent claim evidence.
Can Smartphone Photos Replace Professional Damage Assessment Documentation?
Smartphone photos can’t replace professional damage assessment, but they’re essential for documentation timing—capture high photo quality evidence immediately, then secure licensed contractor reports and inspection records to build a complete, claim-ready file.
References
- https://cmslawgroup.com/how-to-document-storm-damage-at-your-home/
- https://www.fema.gov/press-release/20250416/how-document-damages-after-severe-weather-events
- https://charlestonhomeinspection.com/blog/insurance/document-storm-damage/
- https://www.youtube.com/watch?v=O5q7Smm8uhY
- https://nationalstormrepair.com/storm-damage-documentation-best-practices
- https://www.greenhomesolutions.com/asheville-nc/assessing-and-documenting-storm-damage-a-step-by-step-guide/
- https://rmlfs.co.uk/4308-2/
- https://midweststormtracker.com/documenting-storm-damage-a-step-by-step-photo-and-video-guide/
- https://crazystormchasers.com/best-techniques-for-accurate-storm-damage-documentation/