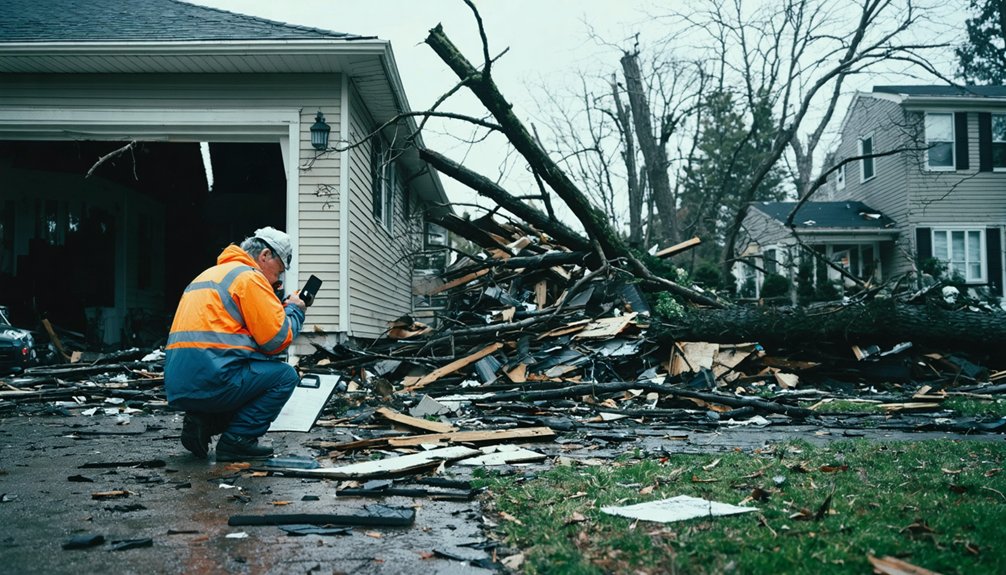
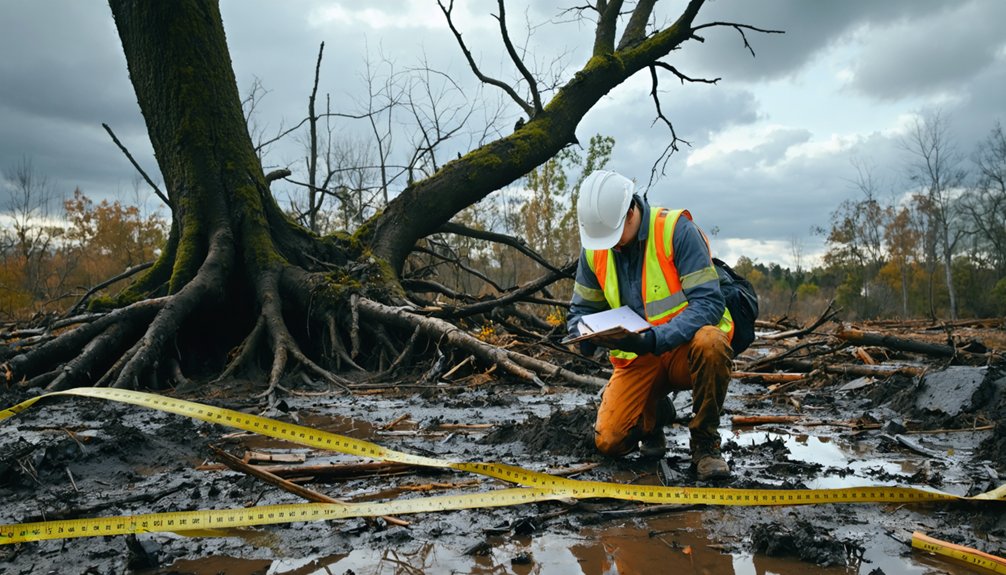
To document storm damage for an environmental assessment, you’ll need to start with a safety check before anything else. Photograph and video all affected areas using wide-angle and close-up shots with timestamps. Measure moisture levels using calibrated meters and record baseline readings in undamaged areas for comparison. Note contamination indicators like mold, staining, and odors. Organize everything into logical categories, including receipts and contractor records. Keep exploring to build a complete, defensible documentation strategy.
Key Takeaways
- Conduct a hazard assessment before documenting, checking for unstable structures, electrical hazards, and flooded zones to ensure safe access.
- Use time-stamped photos, walkthrough videos, and wide-angle shots to capture comprehensive interior and exterior storm damage evidence.
- Employ moisture meters and thermal imaging cameras to detect and quantify visible and hidden moisture in building materials.
- Document contamination indicators including mold growth, staining patterns, odors, and sediment, cross-referencing findings with moisture baseline data.
- Organize evidence into logical folders containing photos, moisture readings, receipts, and invoices to support accurate, dispute-free claim reviews.
What to Do Before You Start Documenting Storm Damage
Before you begin documenting storm damage, you need to confirm that the site is safe to enter. Conduct a hazard assessment to identify exposed electrical lines, unstable structures, and compromised roofing before approaching any damaged area.
Evacuate flooded zones if standing water poses an electrocution or contamination risk.
Once you’ve addressed immediate dangers, apply only the temporary repairs necessary to prevent further loss — tarping, board-up, or water diversion.
Document every emergency mitigation action first: record what changed, when it occurred, and why it was required.
Following these safety precautions preserves the integrity of your environmental evidence.
Undisturbed damage conditions produce more accurate documentation, which directly strengthens your assessment report and supports a reliable, defensible record of storm impact.
How to Document Temporary Repairs After a Storm
Once temporary repairs are in place, you’ll need to document them thoroughly before any further restoration work begins.
Temporary repair documentation should capture what was changed, when the work occurred, and why each action was necessary. Photograph all emergency mitigation strategies before, during, and after implementation—including tarping, board-ups, and water diversion measures.
Record the following for each repair:
- Date and time the work was completed
- Materials used, including quantities and costs
- Specific damage addressed by each mitigation action
- Contractor or individual who performed the work
Retain all receipts and invoices.
Written logs should accompany photographic evidence to create a complete, verifiable record. This sequencing protects your claim by demonstrating that temporary actions prevented further loss without disturbing pre-existing damage conditions.
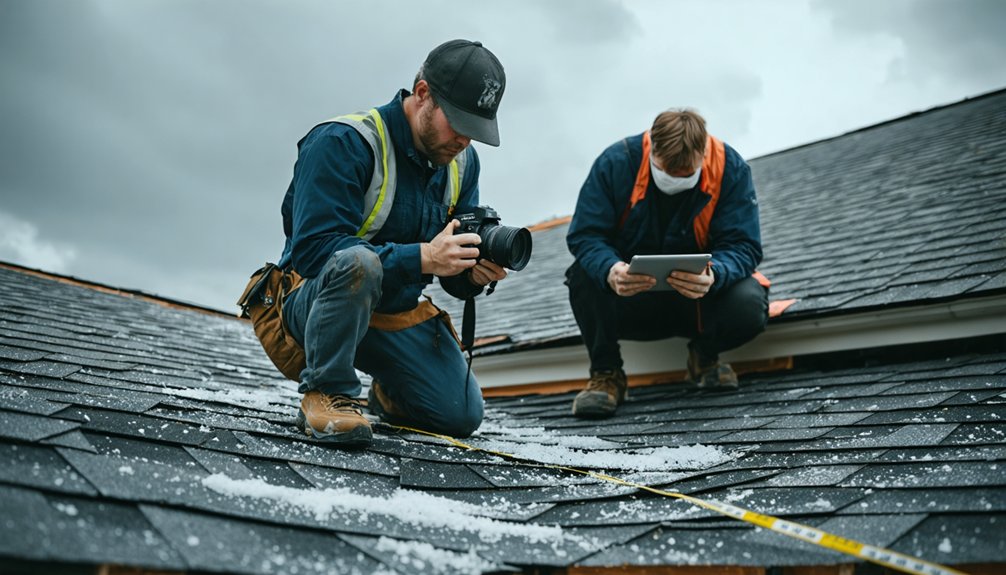
Which Photos and Videos to Take After Storm Damage
With your temporary repair records complete, the next step is building a strong visual evidence file. Time-stamped photos and videos document pre-restoration conditions accurately, protecting your claim from disputes.
Time-stamped photos and videos lock in pre-restoration conditions, giving your claim solid ground to stand on.
Apply these photo angles and video techniques systematically:
- Wide-angle shots — Capture full room context, showing structural damage, water intrusion paths, and debris distribution relative to the building layout.
- Close-up detail shots — Record specific impact points, including staining, discoloration, sediment deposits, and material saturation from multiple photo angles.
- Continuous walkthrough video — Use steady video techniques to document connected damage zones, narrating visible hazards, affected systems, and environmental contamination indicators as you move through each space.
Cover both interior and exterior areas thoroughly. Your visual file becomes the foundation for every subsequent assessment decision.
How to Measure and Record Moisture Damage Accurately
After capturing visual evidence, you’ll need to shift your focus to measuring and recording moisture damage with specialized tools.
You can use a moisture meter to probe walls, floors, ceilings, and cabinetry, generating quantitative readings that establish how deeply water has penetrated building materials.
Thermal imaging cameras complement this process by detecting temperature differentials that reveal trapped moisture in concealed cavities that a meter alone can’t easily reach.
Moisture Meter Measurement Techniques
Moisture meters give you two primary measurement modes to work with: pin-type and pinless. Pin-type meters penetrate surfaces to measure conductivity, while pinless models scan beneath materials without causing damage.
Selecting the right moisture assessment tools depends on material type and depth of suspected saturation. Follow these moisture meter calibration techniques for accurate readings:
- Calibrate your meter before each session using the manufacturer’s reference standard to guarantee measurement integrity.
- Record baseline readings in undamaged areas first, establishing a comparison point for affected zones.
- Take multiple readings across each surface at consistent intervals, logging exact locations alongside values.
Cross-referencing pin and pinless readings increases data reliability.
Always document meter model, calibration status, and measurement date within your assessment records to support environmental reporting.
Thermal Imaging For Hidden Moisture
Thermal imaging extends your documentation capability beyond what moisture meters alone can detect. A thermal camera identifies temperature differentials across surfaces, revealing hidden moisture detection opportunities inside walls, ceilings, and floors that remain visually dry.
You’ll capture heat anomalies caused by evaporative cooling or insulation displacement—both reliable indicators of trapped water migration.
To maximize thermal imaging benefits, conduct scans during moderate interior-to-exterior temperature differences, typically early morning or evening.
Scan systematically across each room, moving in overlapping horizontal passes. Flag any cold spots or irregular temperature gradients and photograph them with both thermal and standard cameras for cross-reference.
Record the scan time, ambient temperature, and equipment used alongside each thermal image. This data strengthens your environmental assessment report and supports accurate restoration decisions.
Mold, Staining, and Other Contamination Signs to Document
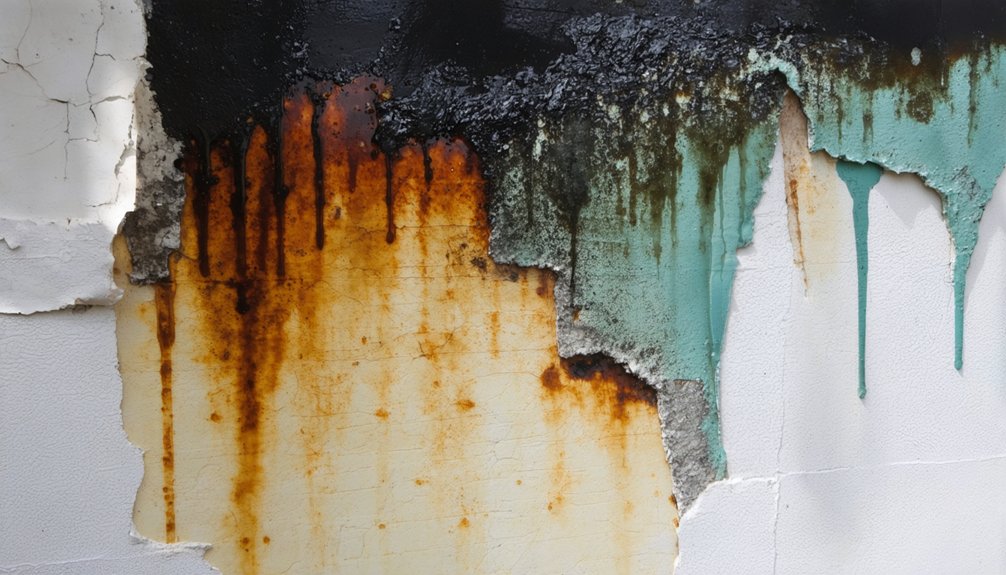
When documenting storm damage, you’ll want to record contamination indicators with the same rigor you apply to structural and moisture data. Mold growth, staining patterns, and contamination sources directly affect health risks and restoration scope.
Capture the following with precision:
- Mold growth – Photograph visible colonies on walls, ceilings, and porous materials. Note color, texture, and spread area.
- Staining patterns – Document discoloration on drywall, flooring, and upholstery, indicating water migration paths and potential contamination sources.
- Odor, sediment, and debris – Record written observations of musty smells, silt deposits, and foreign material intrusion that signal secondary biological or chemical hazards.
Cross-reference these findings with your moisture baseline data. This comparison strengthens your environmental assessment report and supports accurate restoration decisions.
How to Build a Storm Damage Inventory for Your Claim
Once you’ve captured contamination indicators and cross-referenced them against your moisture data, the next step is converting all of that field evidence into a structured damage inventory.
List every item affected by storm impact, including description, estimated age, replacement value, and available receipts. Assign damage estimation figures using current market data and contractor quotes to anchor your repair costs to verifiable benchmarks.
Flag environmental hazards separately so adjusters can evaluate them within proper insurance processes. Apply consistent documentation techniques across categories—structural, mechanical, and contents—to support accurate claim timelines and recovery strategies.
Record serial numbers for major appliances and retain all service invoices. A methodical inventory removes ambiguity, strengthens your position during claim review, and gives restoration teams a clear scope before any repair work begins.
What Goes Into a Storm Damage Assessment Report?
After completing your damage inventory, the next step is compiling all field evidence into a structured assessment report that communicates findings clearly to adjusters, restoration teams, and recovery agencies.
Your damage assessment report organizes raw documentation into a coherent record that supports claim validation and environmental impact evaluation.
Your damage assessment report transforms raw field documentation into a structured record built for claim validation and environmental impact evaluation.
Include these three core components:
- Written descriptions — Summarize cause, location, and scope of each damage category with precise, factual language.
- Annotated photographs and measurements — Match visual evidence to specific locations using diagrams, timestamps, and moisture data.
- Contamination and hazard notes — Record odors, discoloration, sediment, or microbial indicators that suggest broader environmental impact.
A well-structured report reduces disputes, accelerates restoration decisions, and gives you verifiable control over your recovery process.
How to Use Storm Damage Documentation to Support an Insurance Claim
Once you’ve completed your storm damage assessment, you’ll need to organize your evidence file so that photographs, moisture readings, written descriptions, and inventory records are accessible and logically grouped by damage type or location.
You should connect each documented loss directly to a specific claim item, using timestamps, annotated images, and measurement data to establish cause and extent.
Supporting your claim with receipts, contractor invoices, and serial numbers strengthens your position and reduces the likelihood of disputes during adjuster review.
Organizing Your Evidence File
Pulling your storm damage documentation together into a structured evidence file is one of the most practical steps you can take before contacting your insurer.
Strong evidence organization and file management reduce delays and disputes during claim review.
Structure your file using these three components:
- Visual evidence folder — Store time-stamped photos and videos organized by location, such as roof, interior, and exterior zones.
- Measurement and assessment records — Include moisture readings, thermal imaging results, and any air quality or contamination findings with corresponding dates.
- Inventory and receipts folder — Compile item descriptions, serial numbers, repair invoices, and temporary mitigation costs with supporting documentation.
Keep digital and physical copies of everything.
A well-organized file gives you control over the claims process and protects your documented evidence from being overlooked.
Connecting Damage To Claims
When your evidence file is complete, the next step is translating that documentation into a coherent claim narrative that adjusters can evaluate efficiently. Align your photographs, moisture readings, contamination indicators, and inventory records with each specific loss category your policy covers.
Among the most effective claim strategies is cross-referencing annotated images with written damage descriptions so adjusters can verify conditions without ambiguity. Documentation tips worth applying include attaching receipts to corresponding inventory entries, noting measurement dates, and sequencing evidence chronologically.
Present temporary repair records alongside the original damage they addressed. A structured report that connects cause, location, and measured impact reduces disputes and accelerates review.
Clear, organized documentation gives you control over how your loss is understood and evaluated.
Validating Loss With Records
Organizing your evidence into a connected claim narrative is only part of the process—that documentation must also be validated through supporting records that confirm the existence, condition, and value of each loss.
Loss verification depends on records you’ve maintained independently of the storm event itself.
Prioritize these three record categories for document retention:
- Purchase records — receipts, invoices, or warranties establishing item value and age
- Serial numbers — recorded identifiers for appliances and equipment that confirm specific asset ownership
- Service records — prior maintenance or repair invoices that establish pre-storm condition
Each record category strengthens a different dimension of your claim.
Without them, adjusters can’t independently confirm losses, which slows review and increases dispute risk.
Frequently Asked Questions
Can Storm Damage Documentation Be Used in Legal Disputes or Court Proceedings?
Yes, you can use storm damage documentation in legal disputes. It’s essential that you meet evidence standards by ensuring time-stamped photos, moisture readings, and reports uphold legal implications for court admissibility.
How Long Should You Retain Storm Damage Documentation After a Claim Is Settled?
Insurers recommend a 7-year retention period post-claim settlements—you’ll want to keep all storm damage documentation, as statutes of limitations vary by state and disputes can resurface long after you’ve considered matters resolved.
Does Documenting Storm Damage Affect Your Future Insurance Premium Rates?
Documenting storm damage doesn’t directly raise your insurance premium, but your insurer may use your damage assessment history to evaluate risk. You’ll want accurate records to support fair underwriting decisions rather than inflated rate adjustments.
Are There Professional Certifiers Who Can Validate Your Storm Damage Assessment Report?
Like a seal of approval stamped on your work, yes, professional certifiers can validate your report. You’ll find experts whose qualifications anchor the certification process, strengthening your assessment’s credibility with insurers and independent reviewers.
Can Storm Damage Documentation Support Tax Deduction Claims for Property Losses?
Yes, your storm damage documentation can support tax deduction claims. You’ll strengthen your case by providing evidence of property valuation losses, helping you capture available tax benefits through accurate, detailed records of verified damage.
References
- https://advanceddri.com/professional-storm-damage-assessment-guide
- https://www.disasterkleen.com/how-do-you-assess-storm-damage/
- https://www.umass.edu/urbantree/icestorm/pages/StormAssessProtocol.html
- https://www.cordulus.com/blog/weather-damage-construction-assessment
- https://www.fema.gov/press-release/20250416/how-document-damages-after-severe-weather-events
- https://repository.library.noaa.gov/view/noaa/26750
- https://www.fema.gov/sites/default/files/2020-07/fema_preliminary-disaster-assessment_guide.pdf
- https://1streporting.com/templates/storm-damage-report-template/
- https://www.amazon.com/Storm-Damage-Assessment-practical-assessing-ebook/dp/B0GSSG9P4C
- https://glossary.mwrestoration.com/environmental-assessments-for-storm-recovery/