To photograph waterspouts like a pro, you’ll need to distinguish between fair-weather and tornadic spouts before positioning yourself. Use Doppler radar and satellite data to anticipate formation windows, and arrive early to secure your angle. Shoot at 1/500s or faster, keep ISO below 800, and use telephoto lenses from 300+ meters minimum. Target golden hour for dramatic light and texture. There’s far more strategy involved than most photographers realize.
Key Takeaways
- Distinguish between fair-weather and tornadic waterspouts to plan safe positioning, maintaining 300+ meters distance from dangerous tornadic varieties.
- Use Doppler radar and satellite data, checking every 15–30 minutes, to predict formation windows and pre-position early.
- Set shutter speed above 1/250s, aperture between f/4–f/8, and ISO below 800 for sharp, noise-free images.
- Shoot perpendicular to the spout’s path using 200–400mm telephoto lenses, incorporating foreground elements for depth and scale.
- Target golden hour lighting and post-rain environments for enhanced contrast, saturated tones, and dramatically sculpted funnel textures.
Know Your Spout: Fair-Weather vs. Tornadic Waterspouts
Before you pack your gear and head out, you’ve got to understand the fundamental distinction between the two types of waterspouts you’ll encounter: fair-weather and tornadic. Each demands different tracking strategies, so misidentifying one could compromise both your safety and your shots.
Fair-weather spouts form from the water surface upward, typically under cumulus clouds in calm conditions. They’re weaker, more predictable, and far easier to photograph safely.
Fair-weather waterspouts build from the surface up — predictable, photogenic, and far less dangerous than their storm-born counterparts.
Tornadic spouts, however, descend from severe thunderstorms and carry considerably greater destructive force.
Recognizing spout formation patterns lets you position yourself strategically. Fair-weather spouts offer controlled shooting windows; tornadic spouts demand immediate reassessment of your location.
Study the cloud base, wind behavior, and atmospheric instability before committing to any position. Your differentiation skills directly determine how effectively you capture either type.
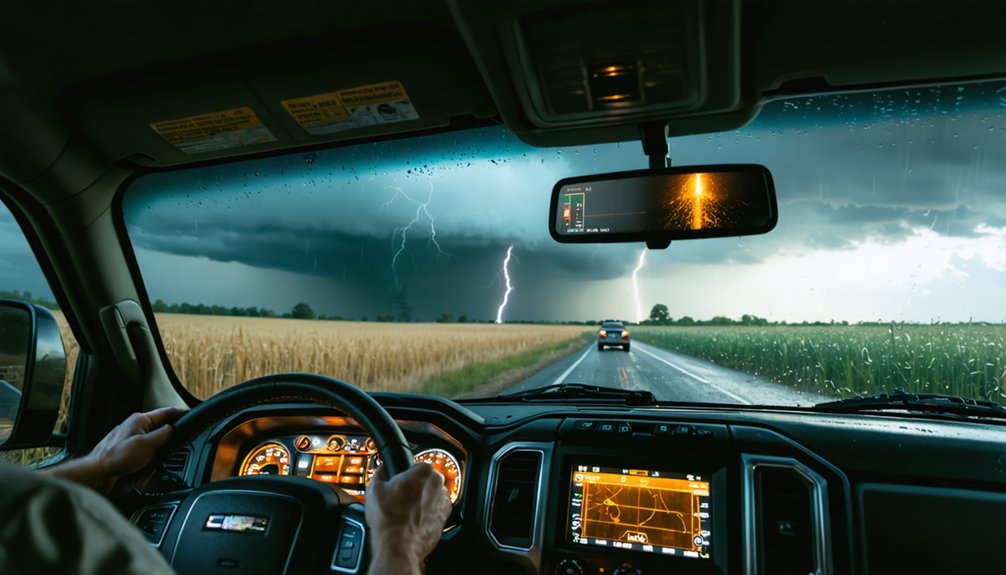
Read Radar and Satellite Data for Waterspout Activity
Once you’ve identified which spout type you’re dealing with, your next move is confirming atmospheric conditions through radar and satellite data before you ever leave shore.
Doppler tracking reveals wind shear patterns and rotation signatures critical for spout forecasting. Layer that with satellite analysis to spot developing convective cells and moisture convergence zones driving atmospheric patterns.
Don’t rely on a single data source. Data integration across weather modeling platforms sharpens your spout prediction accuracy markedly.
Cross-reference short-range radar interpretation with mesoscale satellite loops to confirm whether conditions support fair-weather or tornadic development.
Check updates every 15 to 30 minutes as conditions shift rapidly over open water.
Real-time atmospheric pattern monitoring keeps you positioned advantageously while maintaining the situational awareness needed to retreat safely when dynamics escalate beyond your planned risk threshold.
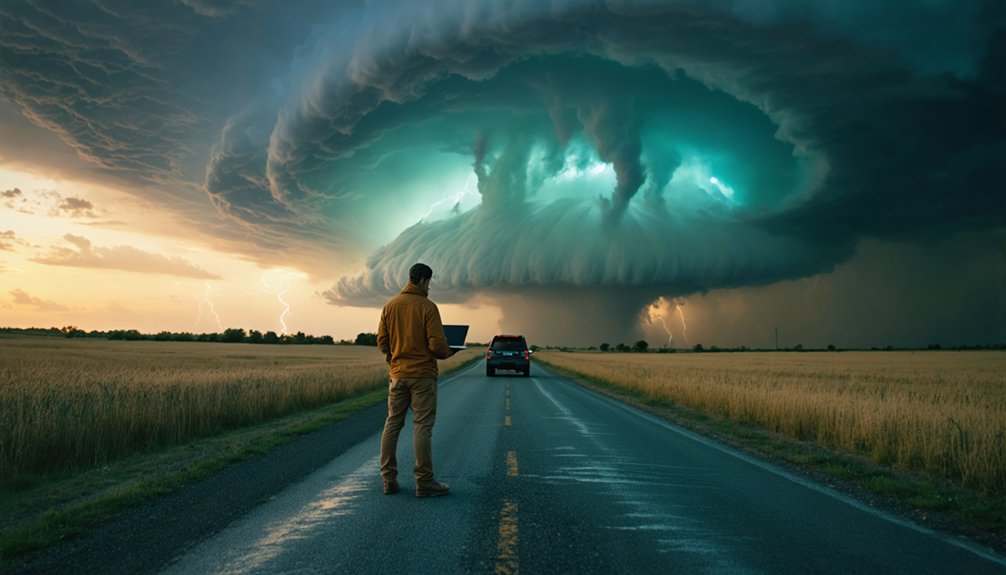
Plan Your Safety Before Tracking Waterspouts on Open Water
Tracking waterspouts on open water demands a structured safety plan before you commit to any expedition.
Start with a thorough risk assessment, identifying hazards specific to your target zone, including shifting wind patterns, vessel traffic, and rapid spout intensification.
Establish clear communication protocols among all team members, designating check-in intervals and emergency contacts onshore.
Map evacuation routes before departure so you’re never improvising under pressure.
Verify that all PFDs are functional, emergency communication tools are fully charged, and weather-resistant gear is packed.
Integrate your safety protocols directly into your pre-departure checklist rather than treating them as afterthoughts.
Freedom on open water comes from disciplined preparation — knowing your exit strategy lets you focus confidently on capturing extraordinary waterspout imagery without compromising your team’s safety.
Choose the Right Gear for Waterspout Photography
Everything you bring into the field should be chosen with the marine environment in mind. Salt spray, humidity, and wind will challenge your equipment constantly, so gear maintenance isn’t optional—it’s essential.
The marine environment doesn’t forgive unprepared gear—salt, humidity, and wind demand equipment chosen and maintained with intention.
Prioritize lens selection based on reach and weather resistance. A telephoto zoom between 100–400mm keeps you safely distanced while capturing tight detail.
Here’s your core gear checklist:
- Waterproof containers for cameras and spare lenses
- Weighted tripod legs to resist strong wind displacement
- Electronic shutter release for precise, vibration-free timing
- Weather-sealed camera body rated for marine conditions
- Charged emergency communication devices before every departure
Inspect lens coatings after each session—spray residue degrades sharpness fast.
You’re operating in a hostile environment, so your gear should match that reality.
Position Yourself for Maximum Waterspout Impact
Position yourself at a safe distance that keeps the waterspout fully within your frame while avoiding dangerous proximity to the vortex.
Drop your camera to water level or slightly above to accentuate the spout’s vertical scale against the horizon.
Incorporate foreground elements like rocks or shoreline features to establish depth and give viewers a concrete sense of the spout’s true magnitude.
Optimal Shooting Distance Selection
Selecting the right shooting distance dramatically shapes your final waterspout image, balancing safety with compositional impact. Your spout distance determines both subject detail and environmental context, so choose deliberately.
Key considerations for ideal shooting distance:
- Stay 300+ meters minimum from active tornadic spouts; fair-weather spouts allow closer positioning.
- Use telephoto lenses (200-400mm) to compress distance while maintaining safe separation.
- Anchor reference points like shorelines or vessels to establish visual scale.
- Adjust distance dynamically as spout intensity shifts—monitor wind speed continuously.
- Position yourself perpendicular to the spout’s tracked movement path for maximum compositional clarity.
Ideal shooting requires constant reassessment. As atmospheric conditions evolve, reposition deliberately rather than reactively. Your freedom to capture compelling imagery depends entirely on disciplined distance management paired with technical precision.
Water Level Camera Angles
Nothing transforms a waterspout photograph more dramatically than dropping your camera to water level. You’ll immediately reveal perspective angles that compress the distance between the churning base and towering funnel, creating a sense of scale that eye-level shots simply can’t deliver.
Position your camera just inches above the surface, letting dynamic reflections mirror the spout’s rotation across the water beneath it.
Use a tripod with weighted legs to maintain stability against surface currents, and tilt your lens slightly upward to capture the full vertical structure. Electronic shutter releases eliminate camera shake at this vulnerable height.
Keep your lens coating clear of spray to preserve sharpness. This low vantage point forces viewers directly into the scene, making them feel the raw, untamed energy of the formation.
Foreground Elements For Depth
While water-level angles pull viewers into the scene vertically, foreground elements anchor them horizontally, adding layers of depth that transform a flat seascape into a three-dimensional composition.
Strategic foreground interest creates scale variation, giving your waterspout context and visual weight.
Position these elements deliberately:
- Rocks and boulders establish immediate scale variation against a distant spout column.
- Wet shoreline textures create leading lines that guide eyes toward the formation.
- Shallow tide pools introduce reflective surfaces, doubling compositional complexity.
- Coastal vegetation frames the spout naturally without dominating the scene.
- Wave foam patterns add organic foreground movement, contrasting the spout’s vertical energy.
You’ll notice how each element serves a structural purpose.
Don’t place foreground objects randomly — they must actively direct attention toward your primary subject.
Camera Settings That Freeze a Waterspout in Motion

To freeze a waterspout’s rapid rotation, you’ll need a shutter speed of at least 1/250s, though faster speeds yield sharper results.
Balance your aperture between f/4 and f/8 while keeping ISO below 800 to maintain image clarity without introducing noise.
When capturing fine water droplet detail, engage high-speed flash sync to supplement natural light and expose the spout’s intricate structure precisely.
Optimal Shutter Speed Settings
Capturing a waterspout’s rapid rotation and cascading water column demands a shutter speed of at least 1/250s.
Though you’ll often need to push to 1/500s or faster when tracking an intense, fast-moving spout.
Matching your shutter speed to spout movement guarantees sharp, detailed frames without motion blur compromising critical structural data.
Key shutter speed considerations:
- 1/250s – baseline for moderate spout movement in stable conditions
- 1/500s – recommended for faster rotation and visible condensation funnel activity
- 1/1000s – ideal for capturing fine water droplet detail at peak intensity
- Continuous burst mode – maximizes frame coverage during unpredictable spout behavior
- Electronic shutter release – eliminates camera shake, preserving image sharpness
Adjust exposure compensation accordingly, keeping ISO below 800 to maintain clean, noise-free imagery throughout your session.
Aperture And ISO Balance
Shutter speed handles motion freeze, but aperture and ISO together determine whether your frozen waterspout frame holds sharpness, detail, and tonal accuracy.
Your aperture settings should fall between f/4 and f/8—wide enough to gather sufficient light, tight enough to maintain focus across the spout’s full vertical structure. Push beyond f/8 and diffraction softens fine detail. Drop below f/4 and depth of field becomes dangerously shallow against a moving target.
For ISO adjustments, keep values below 800 whenever conditions allow. Higher ISOs introduce noise that erases subtle tonal gradations within the spout’s condensation funnel.
When light drops, raise ISO incrementally rather than aggressively. Pair each ISO increase against your available aperture range before committing. Controlling both variables independently gives you genuine flexibility in the field.
High-Speed Flash Sync
When light levels drop during overcast or stormy conditions, high-speed flash sync becomes your most effective tool for freezing fine water droplet detail within a waterspout’s condensation column.
Flash synchronization at speeds exceeding your camera’s native sync threshold lets you override ambient exposure constraints entirely.
Deploy these high speed techniques strategically:
- Sync flash at 1/500s or faster to isolate individual droplets mid-air
- Match flash output to ambient light ratio at approximately 1:2
- Position flash units at 45-degree angles to reveal droplet texture
- Enable HSS mode on compatible speedlights before shooting begins
- Bracket flash power in half-stop increments to refine exposure accuracy
You’ll retain full creative control over depth and motion simultaneously, producing technically sharp imagery that standard sync speeds simply can’t deliver.
How Golden Hour and Storm Light Transform Waterspout Shots
Golden hour light—occurring in the first and last hour of sunlight—transforms waterspout photography by casting warm, directional rays that define the column’s rotating structure with dramatic shadow and texture.
You’ll notice how low-angle golden hour illumination separates the spout from surrounding cloud mass, revealing internal motion you’d otherwise miss.
Storm light operates differently—it’s diffused, high-contrast, and unpredictable.
Pre-storm skies generate greenish or amber casts that intensify the waterspout’s visual weight against turbulent backgrounds.
You should position yourself to shoot toward these colorful sky sections, maximizing reflected light across the water’s surface.
Both conditions demand fast shutter speeds above 1/250s to freeze rotational movement.
Utilize golden hour and storm light deliberately—they’re not passive conditions but active compositional tools that define professional waterspout imagery.
Compose Your Waterspout Frame for Scale and Depth
Scale transforms a waterspout photograph from a dramatic snapshot into a compelling visual narrative. You control scale perception and depth enhancement through deliberate compositional choices that anchor the viewer’s eye and communicate raw atmospheric power.
Apply these framing strategies immediately:
- Position your camera at water level or slightly above for a dominant perspective.
- Include foreground rocks or shoreline elements to establish measurable scale perception.
- Remove cluttered background objects that dilute the spout’s visual intensity.
- Shoot toward colorful sky sections to maximize reflected light and depth enhancement.
- Frame upward splash or outward rippling effects to reinforce the spout’s dynamic energy.
Every element you include or exclude shapes viewer perception. Choose deliberately, frame tightly, and let the waterspout command its rightful visual authority within your composition.
Mistakes That Ruin Waterspout Photography in the Field
Even minor oversights in the field can collapse an otherwise well-planned waterspout shoot. Neglecting lens maintenance ranks among the costliest errors—salt spray accumulates fast, degrading coatings and softening critical detail. Wipe elements frequently between shots, not just before departure.
Underestimating weather resilience requirements is equally damaging. Inadequate clothing and unprotected gear invite moisture intrusion, forcing early retreats precisely when conditions peak. Seal your camera bodies, charge communication tools fully, and verify PFDs before launching.
Operationally, slow shutter speeds blur fast-moving spout columns into unrecognizable smears. Stay above 1/250s.
Cluttered framing, poor evacuation planning, and overlooked tripod stabilization compound these failures. Each mistake compounds the next. Treat every variable as controllable—because in waterspout photography, discipline separates compelling documentation from wasted opportunity.
What Separates Memorable Waterspout Shots From Average Ones
You’ll notice that memorable waterspout shots consistently leverage foreground elements like rocks or shoreline structures to establish scale and spatial depth, pulling the viewer’s eye directly into the scene.
Pairing that compositional discipline with precise timing during golden hour or pre-sunset windows lets you exploit warm, directional light that reveals the spout’s texture and motion with far greater visual impact.
Master both variables together, and you transform a technically adequate frame into one that communicates the raw atmospheric power of the event.
Compositional Depth And Scale
When you frame a waterspout without foreground context, the column of rotating water loses its sense of scale and reads as flat.
Anchoring foreground interest—rocks, shoreline debris, or wave breaks—immediately establishes spatial relationships that pull viewers into the scene. Atmospheric elements like storm-lit skies or low cloud layers add dimensional layering behind the spout itself.
Use these compositional strategies to build depth:
- Position low foreground objects within 3–5 feet of your lens
- Align the spout against contrasting sky tones for tonal separation
- Include a recognizable reference object to communicate true scale
- Layer mid-ground wave action between foreground and the spout
- Shoot slightly upward to emphasize the spout’s vertical dominance
These decisions transform a document shot into a technically compelling image.
Lighting And Timing Mastery
Composition locks in your spatial relationships, but light determines whether the image breathes or falls flat. Golden hour delivers directional warmth that sculpts the spout’s funnel structure, revealing texture that flat midday light destroys.
Your lighting techniques must account for rapid atmospheric shifts—waterspouts don’t wait for ideal conditions, so you adapt or miss the shot.
Timing strategies require pre-positioning before peak activity. Consult Doppler radar and satellite imagery to anticipate formation windows, then arrive early.
Pre-sunset minutes offer compressed, saturated sky tones that reflect dramatically across disturbed water surfaces. Shoot toward colorful sky sections to exploit that reflected light.
Target post-rain environments where darkened surfaces intensify contrast. Fast shutter speeds above 1/250s freeze motion while preserving the light’s precise quality at the decisive moment.
Frequently Asked Questions
How Do I Legally Obtain Permits for Photographing Waterspouts Near Restricted Areas?
Like Odysseus traversing uncharted waters, you’ll need to research local authorities’ permit application processes and follow legal guidelines specific to restricted zones, contacting coastal management agencies directly to secure proper authorization before photographing waterspouts.
Can Waterspout Photography Footage Be Sold to News Agencies or Weather Organizations?
You can sell waterspout footage to news agencies or weather organizations, but you’ll need to weigh legal considerations like copyright ownership and licensing agreements to maximize your footage’s commercial value effectively.
What Insurance Coverage Do Professional Waterspout Photographers Typically Carry for Expeditions?
You’ll typically carry liability coverage and expedition insurance to protect against equipment loss, bodily injury, and third-party claims. These policies cover emergency evacuations, gear replacement, and weather-related cancellations, ensuring you’re financially protected during high-risk waterspout tracking operations.
How Do Waterspout Photographers Collaborate With Meteorologists for Exclusive Storm Access?
Radar pulses painting storm cells across screens — you’ll forge partnerships with meteorologists by sharing storm tracking data, aligning on safety protocols, and gaining exclusive access to developing waterspout systems before they’re publicly forecasted.
Are There Waterspout Photography Workshops or Courses Available for Beginners to Join?
You’ll find beginner workshops and online courses tailored to waterspout photography, teaching you Doppler radar analysis, safe tracking protocols, and precise camera settings like 1/250s shutter speeds to confidently capture nature’s most dynamic atmospheric phenomena independently.
References
- https://www.canon-europe.com/get-inspired/tips-and-techniques/how-to-photograph-water/
- https://www.adobe.com/creativecloud/photography/hub/guides/photographing-water-drops.html
- https://digital-photography-school.com/9-top-tips-for-shooting-waterfalls-creeks-and-streams/
- https://www.adorama.com/alc/how-to-photograph-water-splashes/
- https://www.thephotoforum.com/threads/high-speed-water-photography-5-tips.144549/
- https://www.digitalphotomentor.com/capture-water-splash-image-tips/
- https://crazystormchasers.com/the-science-behind-chasing-waterspouts/
- https://www.youtube.com/watch?v=2sVCzVh-CT4
- https://amateurphotographer.com/technique/expert_advice/top-tips-for-photographing-water/
- https://rockynook.com/article/how-to-photograph-water-droplets/