Converting your van into a rugged storm chasing platform starts with choosing a full-size van with strong payload capacity and proven powertrain support. You’ll need to track every pound added, build a reliable auxiliary power system, and organize a centralized command area for radar and navigation. Secure all gear so nothing becomes a projectile, and prioritize tires, suspension, and lighting that support fast repositioning. Keep exploring to master every critical build decision.
Key Takeaways
- Select a full-size van with high payload capacity, proven powertrain reliability, and wide parts availability for demanding storm chasing conditions.
- Always calculate true payload by subtracting curb weight from GVWR, documenting every modification’s weight to avoid dangerous overloading.
- Build a centralized command area with radar, GPS, and communication tools mounted at eye level for quick, efficient access.
- Install reinforced debris barriers and program emergency evacuation routes while ensuring all protective additions allow for rapid exits.
- Secure all interior gear using bolted bins and dedicated mounts, treating storage as a critical safety system against projectiles.
Choose the Right Van Platform for Storm Chasing
When selecting a van platform for storm chasing, you’ll want to prioritize interior volume, payload capacity, and long-haul durability over raw off-road capability. Full-size vans deliver the van features you need most: generous cabin space, strong payload ratings, and mechanical reliability across punishing driving conditions.
Evaluate your gross vehicle weight rating carefully before adding seating, electronics, batteries, and protective materials. Exceeding payload limits compromises braking, handling, and tire integrity — all critical factors when you’re repositioning under a rotating supercell.
Moderate ground clearance handles gravel county roads effectively without the fuel penalties and handling trade-offs of extreme suspension lifts.
Prioritize a platform with proven powertrain support, wide parts availability, and strong towing capacity. A dependable, well-matched van platform gives you the operational freedom to chase confidently across varied terrain.
Don’t Let Your Build Exceed Safe Payload and GVWR Limits
Before you finalize your build, you need to locate your van’s Gross Vehicle Weight Rating (GVWR) and calculate exactly how much payload capacity remains after accounting for passengers, fuel, and the stock curb weight.
Armor panels, auxiliary battery systems, roof racks, reinforced seating, electronics, and onboard supplies each carry measurable weight, and those figures stack against your payload budget faster than most builders anticipate.
Exceeding your GVWR compromises braking performance, suspension integrity, tire load ratings, and legal roadworthiness — any one of which can become a critical failure point during a high-speed chase exit.
Understanding GVWR Limits
Every van conversion starts with a hard number you can’t ignore: the Gross Vehicle Weight Rating (GVWR). This manufacturer-set limit defines the maximum your van can safely carry, including its own curb weight, passengers, fuel, gear, and every modification you’ve added.
GVWR regulations exist for critical reasons: exceeding them compromises braking performance, suspension integrity, and tire load ratings.
Before adding seating, battery banks, armor panels, or electronics, calculate your baseline curb weight and subtract it from your GVWR. That remainder is your true payload capacity.
Poor weight distribution compounds the problem further, shifting load unevenly across axles and reducing handling predictability during high-speed repositioning.
Weigh your completed build at a certified scale, verify axle ratings independently, and never assume your conversion stays within limits without confirmation.
Weight Adds Up Fast
Storm-chasing van builds accumulate weight faster than most converters anticipate, and the cumulative effect of individually modest additions—steel armor panels, auxiliary battery banks, roof racks, seating platforms, electronics arrays—can push your build dangerously close to or beyond its GVWR before you’ve even loaded passengers and gear.
Track every pound during your build phase. Start with your van’s published curb weight, then document each addition incrementally.
Poor weight distribution compounds the problem—rear-heavy or roof-heavy builds degrade braking response, handling, and tire wear precisely when you need reliable vehicle control. Keep heavy components low and centered.
Before your first chase day, weigh your loaded vehicle at a certified scale with full fuel, all gear, and a full crew. Your freedom on open roads depends on a build that stays within safe operational limits.
Protect the Cab Against Debris Without Blocking Your View
When violent weather closes in, cab protection becomes one of the most critical decisions in your entire conversion build. You’ll want debris barriers that shield glass and critical cab areas without sacrificing outward sightlines.
Steel overlays, ballistic panels, and reinforced window frames add meaningful protection, but poorly placed materials can eliminate your situational awareness instantly.
Choose visibility solutions that preserve your driver’s forward view and side scanning capability. Avoid mounting protective panels across window zones where storm structure or escape routes need monitoring.
Keep rear sightlines clear so repositioning stays fast and deliberate.
Every protective addition should allow quick exit access. Don’t trap yourself inside reinforced walls that block doors or emergency egress.
Smart protection means staying mobile, aware, and ready to move the moment conditions demand it.
Build a Power System That Survives Full Chase Days
A chase day that stretches eight to ten hours will drain a poorly planned electrical system long before you’re done, leaving radar feeds, navigation displays, and communication gear dead at the worst possible moment.
Smart power management starts with a dedicated auxiliary battery isolated from your starter battery using a quality isolator or DC-to-DC charger. Size your auxiliary bank based on actual load calculations, not guesswork.
Install multiple 12V, USB-A, USB-C, and 120V outlets throughout the cabin so every device stays charged without adapters scrambling the crew. Fuse every circuit individually, and run organized wiring to prevent shorts.
Prioritize energy efficiency by powering only active devices and cutting idle draws. A well-engineered system keeps your entire electronics suite running reliably from first intercept to final documentation.

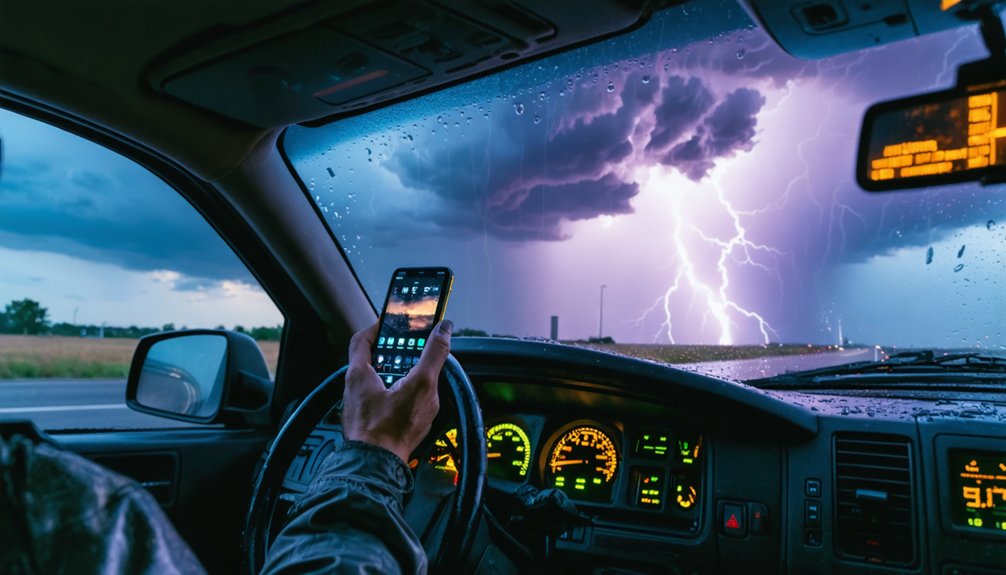
Once you’ve locked in your power system, you’ll want to channel that capacity into a centralized command area where weather monitoring and navigation tools live within arm’s reach of the driver or a dedicated co-pilot.
Mount your radar display, mapping tablet, and cellular booster controls in a single console zone that keeps your sightlines clear while minimizing head movement during fast-developing situations.
Integrating these systems into one accessible hub reduces task saturation, speeds up decision-making, and keeps your escape-route planning sharp when storm structure changes quickly.
Centralized Command Area Layout
Three core tools define an effective storm-chasing command area: a weather radar display, a GPS navigation system, and a communications hub. Mount all three within arm’s reach of the driver and co-pilot without blocking forward sightlines.
Command center ergonomics demand that you position screens at eye level, angle controls toward the operator, and secure every cable along routed channels to eliminate tangles.
Equipment accessibility means you can grab a radio, adjust radar zoom, or reroute navigation within seconds during rapidly changing conditions. Use a low-profile dash console or co-pilot workstation rather than stacking devices randomly.
Label each input port, power switch, and antenna connection clearly. Prioritize mounting stability — loose gear becomes a projectile.
Keep your command area disciplined, and your decision-making stays fast and accurate when it matters most.
Building that command area into a functional weather and navigation hub means integrating your radar displays, GPS mapping, and real-time data feeds so they work as a unified system rather than separate tools.
Mount your primary weather tools and navigation apps at eye level, keeping inputs within easy reach without breaking your sightlines.
Run your data connectivity through a cellular booster and backup satellite system so radar updates never drop during critical positioning.
Sync your mapping software with storm-relative motion overlays to support faster situational awareness decisions.
Keep communication devices secured but instantly accessible for coordinating with other chasers or relaying position data.
Program emergency protocols directly into your navigation system so evacuation routes load immediately when conditions escalate.
Every integrated layer should reduce your cognitive load, not increase it.
Design Every Interior Addition Around Fast Exit Access
When you’re converting a full-size van for storm chasing, every interior addition—seating, gear bins, battery systems, camera mounts—must be evaluated against one critical question: can everyone exit within seconds if conditions turn violent?
Interior layout decisions directly control your survival margin.
Interior layout decisions aren’t cosmetic choices—they’re survival calculations made before the storm ever appears on radar.
Prioritize these safety features:
- Clear door corridors — Never block sliding or rear doors with gear organization systems, even partially. Fast access to emergency exits overrides storage convenience.
- Secured loose equipment — Clutter reduction isn’t aesthetic preference; unsecured gear becomes projectiles during violent maneuvers, blocking quick deployment and injuring occupants.
- Visibility enhancement positioning — Mount cameras and displays without obstructing sightlines toward exit points or windows.
Every bolt you add should make egress faster, never slower.
Pick Tires and Suspension for Chase Roads and Fast Repositioning
Your tire selection directly impacts how well your van handles chip-seal county roads, wet highway shoulders, and loose gravel turnoffs that define most chase routes. So, choose an all-terrain tire rated for your van’s load range rather than a standard highway touring option.
Prioritize tires with reinforced sidewalls to resist pinch flats on rough road edges and guarantee the load index matches your converted van’s actual gross weight after seating, batteries, and gear are added.
On the suspension side, upgrade to heavy-duty shocks and load-leveling components that keep the van stable and predictable during hard, fast repositioning maneuvers. This will help avoid introducing the body roll that compromises steering response when you need to move quickly ahead of a rotating storm.
Tire Selection For Chase Roads
Tire selection comes down to three competing demands on a storm-chase vehicle: highway speed stability, gravel road traction, and rapid repositioning when a storm shifts direction.
Choosing wrong costs you control when conditions deteriorate fast.
Prioritize these three specifications:
1. Tire tread pattern — Select an all-terrain tread that handles wet asphalt, loose gravel, and muddy shoulders without sacrificing highway stability above 70 mph.
2. Load rating — Match your tire’s Load rating to your van’s gross vehicle weight after accounting for passengers, electronics, and gear.
Underrated tires fail under sustained high-speed loads.
3. Speed rating — Confirm your tire carries at least an H-rating (130 mph) to handle aggressive repositioning safely.
Never compromise load rating for cost savings; a blowout during evasion eliminates every other safety measure you’ve built in.
Suspension For Fast Repositioning
Good tires grip the road, but suspension determines whether your van stays composed when you’re pushing hard through a fast lane change or absorbing a rough gravel shoulder at highway speed.
Upgraded shock absorbers rated for heavier loads handle the added weight of batteries, electronics, and reinforced panels without bottoming out or wallowing through corners.
Suspension tuning should prioritize responsive handling on paved roads first, since most repositioning happens at highway speeds, not on rugged terrain.
Consider progressive-rate springs that stay compliant at light loads but stiffen under stress.
Avoid lifting the van excessively, as higher center of gravity increases rollover risk during emergency maneuvers.
A well-tuned suspension gives you faster, safer repositioning when storm dynamics shift and every second of decision-making counts.
Add Chase Vehicle Lighting Without Creating Cockpit Glare
When adding lighting to a chase vehicle, you’ll want to separate exterior utility from interior interference from the start.
Poor lighting angles push reflected light directly into your field of vision, compromising both night driving and storm structure observation.
Bad lighting angles send glare straight into your eyes, degrading visibility and your ability to read storm structure.
Prioritize these three glare reduction strategies:
- Mount forward light bars low on the bumper rather than the roof to direct beam spread away from windshield reflection points.
- Use amber fog lighting along lower rocker panels for improved contrast without washing out your instrument cluster.
- Install dimmable interior work lights on independent switches so you control brightness relative to outside conditions.
Every lighting decision should preserve your sightlines, protect your escape-route awareness, and keep your cockpit operationally clean under pressure.
Store Gear So Nothing Becomes a Projectile
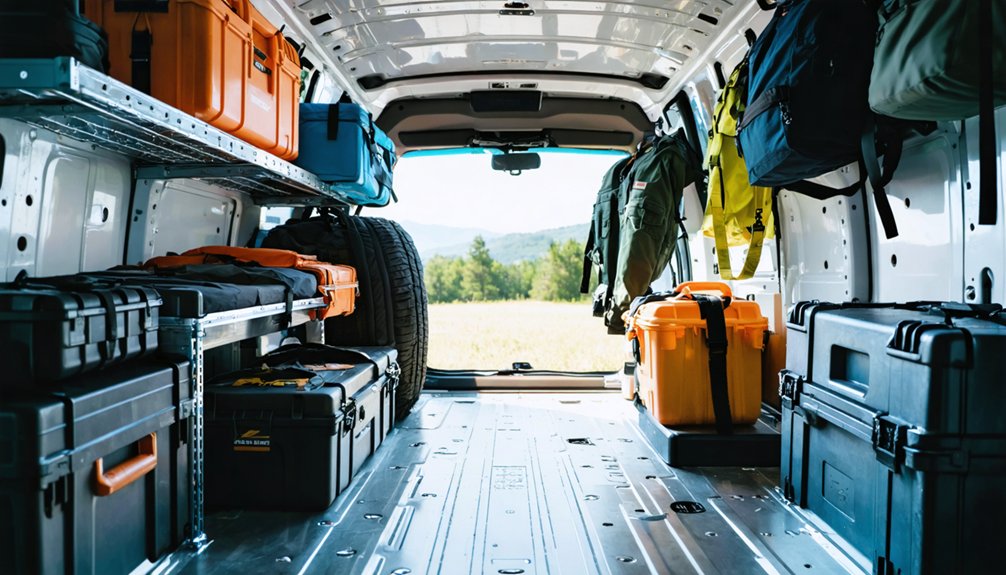
Every unsecured item inside your chase van becomes a ballistic hazard the moment you make a sharp evasion or catch a debris strike, so treat interior storage as a safety system, not an afterthought.
Gear securing starts with bolted bins, latching drawers, and dedicated mounts for every piece of field equipment.
Don’t stack loose cameras, tripods, or water bottles on seats or floors. Use net dividers, cargo straps, and Velcro panels to lock smaller items in place.
Projectile prevention requires thinking through inertia, not just convenience. Heavy batteries, tool kits, and hard cases need rigid containment anchored directly to the vehicle structure.
Label everything, assign fixed positions, and enforce that system with every crew member before each chase day.
Choose Reliability Over Armor When Finalizing Your Build
The temptation to add more armor, heavier plating, and elaborate protective systems is real, but excessive weight works directly against the core mission.
Prioritize reliable components and essential upgrades that directly support performance tuning, safety features, and driver visibility.
Focus your final build decisions on:
- Weight distribution — Keep mass centered and low to maintain handling, braking response, and tire integrity.
- Maintenance planning — Choose systems you can service quickly in the field without specialized tools or dealership support.
- Comfort enhancements — Ergonomic seating, organized controls, and adequate climate management reduce fatigue during long chase days.
Your van doesn’t need to be invincible. It needs to start every morning, respond predictably under pressure, and get your crew home safely.
Frequently Asked Questions
How Much Does a Full Storm Chasing Van Conversion Typically Cost?
You’ll typically spend $15,000–$80,000+ on a full conversion. Use a cost breakdown to prioritize safety, electronics, and storage. Follow budget tips like phasing upgrades to maintain financial freedom without compromising reliability or critical systems.
Do Storm Chasing Van Conversions Require Any Special Licensing or Permits?
Rolling through open plains, you don’t typically need special licensing for storm chasing, but your vehicle modifications may require inspection certifications, and always check local storm safety regulations, as permits vary by region.
Can a Converted Storm Chasing Van Be Used for Everyday Personal Driving?
You can drive your converted van daily, but you’ll notice trade-offs. The added weight and gear affect fuel economy. Balancing daily usability with weather preparedness means keeping modifications practical, reliable, and safe for routine driving conditions.
How Many Passengers Can a Converted Storm Chasing Tour Van Safely Carry?
You’ll typically fit 8–12 passengers safely, but your seating arrangements must stay within the van’s payload limits. Always prioritize passenger safety by ensuring every seat has proper restraints and clear exit access.
Are Storm Chasing Van Conversions Eligible for Specialized Commercial Vehicle Insurance?
Like ye olde specialized trades, you’ll find storm chasing van conversions can qualify for specialized commercial vehicle insurance. Explore policy types covering custom builds, liability, and equipment — ensuring your insurance coverage protects both crew safety and freedom.
References
- https://www.reddit.com/r/stormchasing/comments/1fyp45a/storm_chasing_vehicle_advice/
- https://www.steelsoldiers.com/threads/storm-chasing-rv-5-ton-conversion-questions.171303/
- https://www.stormchasingusa.com/blog/what-all-storm-chasing-tour-companies-should-consider-doing/
- https://www.youtube.com/watch?v=2bzlkru8fCU
- https://www.facebook.com/groups/1192397555555539/posts/1206363444158950/
- https://www.youtube.com/watch?v=nxPSFg2R8YY
- https://www.stormchase.us/Articles/WhatsTheIdeal.html
- https://www.youtube.com/watch?v=Sr2lz72ZYwM
- https://stormtrack.org/threads/storm-chasing-vehicle-project-and-suggestions.27826/
- https://www.youtube.com/watch?v=qi8ffPqDkFE