To capture lightning with a drone, you’ll need to prioritize frame rate, sensor size, and wind resistance above everything else. Shoot at 60fps in 1080p, lock your ISO at 100, and set an 8-second shutter speed in full manual mode. Top performers include the DJI Mavic 4 Pro, Mavic 3 Pro, Air 3S, and Ruko U11MINI — each built for the split-second demands of storm photography. The full breakdown ahead will sharpen your edge considerably.
Key Takeaways
- The DJI Mavic 4 Pro leads with a 50MP sensor, 6K/60fps HDR video, 51-minute battery life, and a 30km transmission range.
- Shooting at 60fps in 1080p doubles lightning capture chances compared to standard 30fps recording.
- The DJI Mini 5 Pro offers quick deployment under 250 grams, a 1-inch sensor, and 42GB built-in storage.
- Manual mode with ISO 100, an 8-second shutter speed, and RAW format maximizes lightning image quality.
- Use Blitzortung.org and Windy to track storms, positioning your drone at the leading edge for optimal coverage.
Frame Rate, Sensor Size, and Wind Resistance: What Actually Matters
When chasing lightning with a drone, three technical factors separate a successful shot from a missed opportunity: frame rate, sensor size, and wind resistance.
Frame rate impact is immediate — shooting at 60fps in 1080p doubles your chances of freezing a strike compared to 30fps. You can’t outreact lightning, so let your frame rate do it.
At 60fps, your camera catches what your eyes never could — lightning doesn’t wait for slow frame rates.
Sensor technology determines how much your footage survives the dark. A 1-inch sensor, like those found on the DJI Mini 5 Pro and Mavic 3 Pro, pulls usable detail from near-black skies where smaller sensors fail completely.
Wind resistance keeps you positioned. Heavier drones handle gusts that would drift a lightweight model off-target.
During storm approaches, stability isn’t comfort — it’s the difference between capturing the strike and missing it entirely.
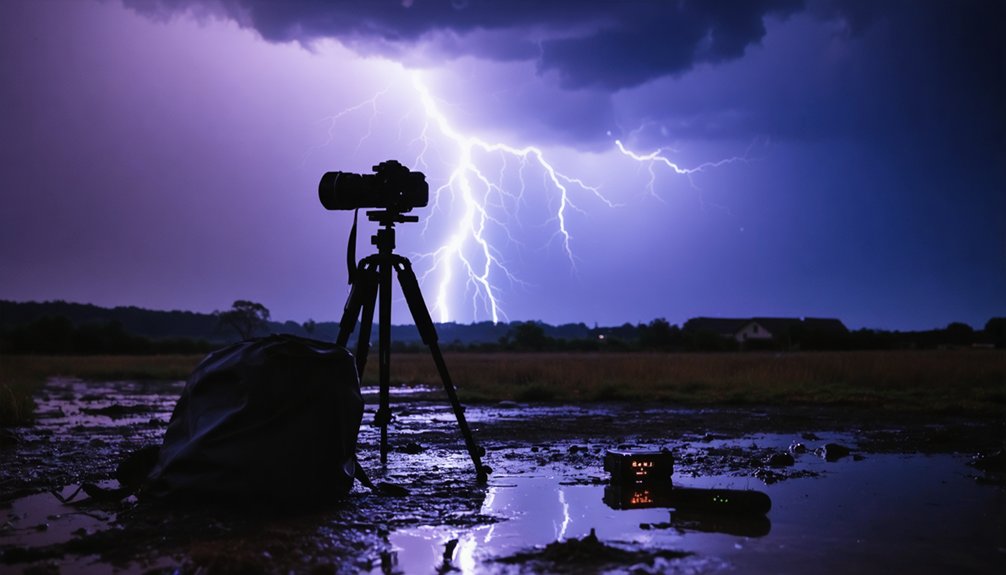
The Exact Camera Settings for Capturing Lightning Strikes
To catch a lightning strike on camera, you’ll want to shoot in 1080p at 60fps — the highest frame rate available on most drones — giving you the best chance of landing a frame during a strike that lasts mere milliseconds.
Switch your camera to full manual mode, lock your ISO at 100, and set an 8-second shutter speed to expose long enough for a strike to register while keeping noise minimal.
Pair this with continuous shooting in near-total darkness, and you’ll stack the odds in your favor without sacrificing image quality.
Optimal Frame Rate Settings
Nailing the right camera settings can mean the difference between capturing a dramatic lightning bolt and missing it entirely.
In lightning photography, your ideal frame rate is your greatest ally. Set your drone to 1080p at 60fps — that’s the sweet spot for maximizing frames per second without sacrificing image clarity.
Higher frame rates dramatically reduce the window you’ll miss a strike. Lightning moves faster than most people realize, vanishing in milliseconds.
At 60fps, you’re giving yourself the best statistical chance of freezing that bolt mid-flash.
Avoid shooting in 4K if your drone struggles to maintain 60fps at that resolution. Speed matters more than raw resolution here.
Your priority is frames, not pixels. Capture the strike first — you can refine quality later.
Manual Exposure Configuration
Once you’ve locked in your frame rate, manual exposure becomes your next critical lever.
Switch your drone’s camera fully to manual settings—auto exposure will fight you when darkness shifts unexpectedly.
Set your ISO to 100 to minimize noise across long exposures. Then push your shutter speed to 8 seconds, giving lightning enough window to burn itself into the frame.
Shoot RAW exclusively; compressed formats destroy the fine detail that makes a strike image worth keeping.
These exposure techniques work because lightning illuminates its own scene. You’re not lighting the subject—the subject lights itself.
Keep aperture consistent, disable any automatic adjustments, and let the sensor patiently wait in near-darkness. Every 8-second window is another opportunity for something extraordinary to happen.
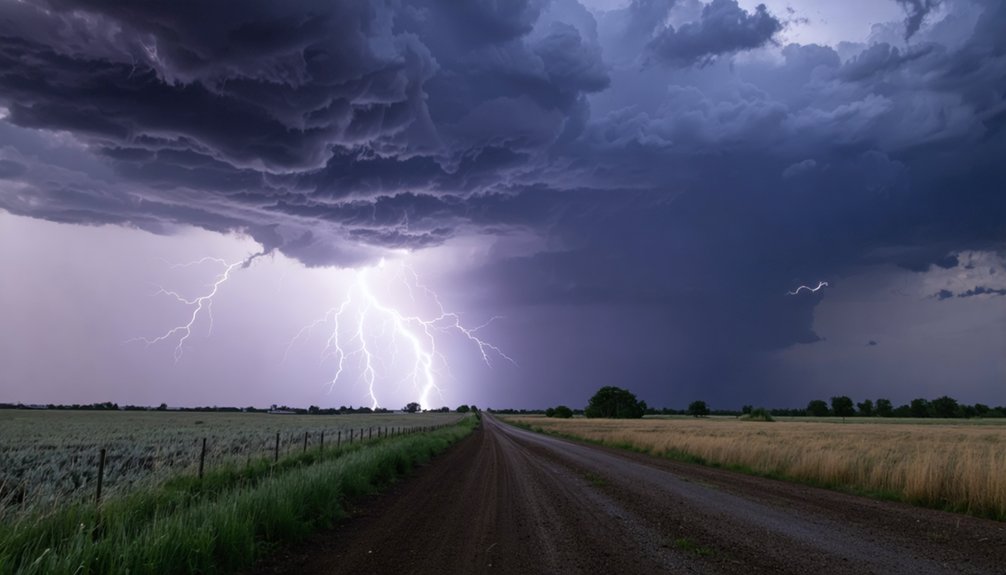
Pre-Storm Drone Positioning for Maximum Strike Coverage
Positioning your drone ahead of an approaching storm is one of the most critical steps in capturing a lightning strike. Track weather patterns using Blitzortung.org, identifying the storm’s trajectory before launch.
Strategic drone positioning means placing your aircraft at the storm’s leading edge — not beneath it. Strike anticipation requires reading the sky’s behavior, spotting anvil clouds and dark curtains of precipitation.
Your flight strategies should account for rapid storm acceleration. Deploy early, establish your frame, then lock your settings.
Safety protocols aren’t optional — if the storm shifts overhead, bring your drone down immediately. You’re chasing light, not risking equipment.
Smart storm approach planning separates a stunning lightning capture from a catastrophic, avoidable loss.
DJI Mavic 4 Pro: Best Overall Drone for Lightning Photography
When you’re chasing lightning with the best tool available, the DJI Mavic 4 Pro delivers a 50MP sensor, 6K/60fps HDR video, and a 30km transmission range that keeps your feed stable even as storms close in.
Its 51-minute battery lets you hold position through long storm cycles without forcing a premature retrieval, while Ocusync 4’s reliable signal guarantees you won’t lose control during electromagnetic interference from nearby strikes.
Set your shutter to 8 seconds, lock ISO at 100, shoot full manual RAW, and let the Mavic 4 Pro’s superior dynamic range pull every volt of detail from the darkness.
Superior Camera Specs
The DJI Mavic 4 Pro stands as the benchmark drone for lightning photography, and its camera specs explain why. Its 50MP sensor delivers razor-sharp resolution, capturing every electrical detail in a single frame.
You’ll also benefit from 6K/60fps HDR video, giving you the frame rate necessary to freeze fast-moving strikes with precision.
Low light performance is where this drone truly separates itself. When you’re positioned ahead of an approaching storm in near-total darkness, the Mavic 4 Pro’s sensor handles the extreme contrast between pitch-black skies and intense lightning bursts exceptionally well.
Combined with its three-axis camera stabilization system, your footage stays locked and steady even as wind conditions intensify. These specs aren’t just impressive on paper — they perform when conditions demand the most.
Exceptional Flight Performance
Camera specs mean nothing if the drone can’t hold position when a storm rolls in.
With the DJI Mavic 4 Pro, you’re getting drone stability engineered for demanding weather conditions. Its 51-minute battery keeps you airborne long enough to wait out unpredictable storm patterns, while the 30km transmitter range means you’re maintaining control from a safe distance.
Ocusync 4 transmission delivers smooth, uninterrupted signal feeds even as atmospheric interference intensifies around you. The omnidirectional obstacle sensing works actively as visibility drops, protecting your investment when light disappears entirely.
You’re not just flying—you’re holding precise position while nature unfolds on your terms. That combination of endurance, range, and intelligent sensing makes the Mavic 4 Pro the definitive platform for serious lightning photography.
Lightning Photography Settings
Three settings define the difference between missing a lightning strike and owning it. Set your drone to full manual mode, shoot RAW, and lock your ISO at 100. Then push your shutter speed to eight seconds — long enough to capture whatever the storm clouds release.
Frame rate matters equally. Shoot at 1080p/60fps to maximize your chances of catching a fast-moving strike mid-frame. Higher frame rates mean fewer missed moments.
Position your drone ahead of the approaching storm using live radar data from Blitzortung.org. Enable continuous shooting so you’re always capturing, not reacting.
The DJI Mavic 4 Pro‘s 50MP sensor and 6K/60fps HDR video give you extraordinary detail in near-darkness, turning raw atmospheric chaos into images you’ll actually own.
DJI Mavic 3 Pro: Top Pick for Low-Light Storm Shooting
When storm-chasing demands the best low-light performance, the DJI Mavic 3 Pro delivers. Its 1-inch main sensor captures stunning detail in near-darkness, while the 4/3 wide-angle 25MP sensor provides superb dynamic range—critical when storm lighting shifts dramatically between lightning bursts and ambient darkness.
The DJI Mavic 3 Pro thrives in near-darkness, delivering stunning low-light detail when storm conditions demand it most.
You’ll appreciate the Ocusync 4 transmission system, keeping your signal stable even as conditions deteriorate around you. With 45+ minutes of flight time, you’re not rushing decisions; you’re waiting patiently for the perfect strike.
Pair the Mavic 3 Pro with full manual RAW settings, ISO 100, and an 8-second shutter, and you’ve built a reliable lightning-capture setup.
Its excellent wind resistance means turbulent storm edges won’t compromise your shot before the sky ignites.
DJI Mini 5 Pro: Best Lightweight Drone for Lightning Capture
Weighing under 250 grams, the DJI Mini 5 Pro punches well above its class when storm conditions demand a nimble, deployable platform.
Its 1-inch sensor captures critical low-light detail, letting you shoot full manual RAW at ISO 100 with extended shutter speeds to isolate lightning strikes against dark skies.
Drone stability gets a meaningful upgrade here — the Mini 5 Pro delivers 10% better wind resistance than its predecessor, keeping your frame locked during turbulent leading-edge gusts.
LiDAR front sensing operates in near-darkness, protecting your equipment when visibility collapses.
With 42GB of built-in storage, you won’t scramble for cards mid-session.
For lightning photography, you’re getting a legally unrestricted, sub-250g aircraft that doesn’t compromise on sensor performance or situational awareness when it matters most.
DJI Air 3S: Best Budget-Friendly Drone for Lightning Photography
If you’re seeking serious lightning photography without the Mavic 3 Pro’s price tag, the DJI Air 3S delivers dual high-quality cameras at half the cost, letting you simultaneously frame wide establishing shots and tighter compositions as a storm rolls in.
Its automated obstacle avoidance actively protects the drone in the chaotic, low-visibility conditions that surround lightning events, keeping your aircraft clear of hazards you can’t see in the dark.
You get professional-grade capture capability at a budget-conscious entry point, making the Air 3S a compelling choice when storms don’t wait for premium budgets.
Dual Camera Lightning Advantage
Priced at half the cost of the Mavic 3 Pro, the DJI Air 3S delivers a dual-camera system that gives you a serious tactical edge when hunting lightning.
Two calibrated lenses mean you’re covering wider focal perspectives simultaneously, dramatically improving your lightning strike detection across a broader storm front. Rather than repositioning a single camera, you’re holding two compositions at once — wide and telephoto — letting the storm dictate which frame delivers the decisive shot.
The automated obstacle avoidance works quietly in the background, keeping your drone stable while you focus entirely on the electrical activity overhead.
You’re not managing survival; you’re managing artistry. The dual camera advantages here aren’t marketing language — they’re genuine operational freedom that separates reactive shooting from deliberate, controlled lightning capture.
Obstacle Avoidance In Storms
Storm environments punish inattentive pilots, but the DJI Air 3S’s automated obstacle avoidance quietly neutralizes that pressure.
When you’re chasing unpredictable storm dynamics, shifting winds and poor visibility create hazards that demand split-second responses. The Air 3S handles those threats autonomously, letting you concentrate on framing the shot rather than managing collision risks.
Its obstacle avoidance system actively reads the environment, adjusting flight paths without interrupting your control.
That drone agility means you’re repositioning fluidly as storm cells evolve, never losing your window for the perfect strike capture. You’re not wrestling the aircraft — you’re directing it.
At half the price of the Mavic 3 Pro, the Air 3S delivers serious protective technology without locking you out of storm photography due to budget constraints.
Budget-Friendly Photography Value
When budget shapes your gear decisions, the DJI Air 3S delivers professional storm photography capability at half the cost of the Mavic 3 Pro. You’re not sacrificing critical performance by choosing affordable options — you’re making a strategic decision.
This drone’s dual high-quality cameras and automated obstacle avoidance make it genuinely capable during unpredictable storm conditions.
Budget gear doesn’t mean compromised results when the hardware supports serious low-light imaging and reliable transmission. You’ll capture dramatic lightning sequences without draining your finances, leaving resources for additional batteries, storage, or travel to prime storm locations.
The Air 3S proves that chasing extraordinary atmospheric moments doesn’t require top-tier investment. Smart photographers recognize value when performance meets accessibility, and this drone consistently delivers both.
Ruko U11MINI 4K: Best Drone for Extended Storm-Chasing Sessions
For storm-chasing sessions that demand endurance over aesthetics, the Ruko U11MINI 4K punches well above its price point. Its dual-battery system delivers 64 combined minutes of flight stability, giving you genuine operational freedom when positioning ahead of incoming storm cells.
The camera versatility surprises at this price tier — 8K/32.2MP stills paired with 4K/30fps video. That’s impressive cost efficiency considering comparable sensor specs on premium models.
Battery longevity defines your Ruko advantages here. While sensor comparison against DJI’s 1-inch offerings reveals expected limitations in low-light performance, the 6km range and 1080P touchscreen controller keep you informed and in control during extended deployments.
User experiences confirm: when storms linger, you’ll stay airborne longer than competitors allow.
Lightning Photography Safety Rules Every Drone Pilot Must Know
Chasing lightning with a drone demands respect for a force that can kill in milliseconds.
You’re operating expensive equipment in conditions that can turn lethal instantly, so lightning safety isn’t optional — it’s foundational.
Follow these non-negotiable rules:
- Never fly directly beneath an active thunderstorm — position yourself at a safe lateral distance
- Monitor Blitzortung.org continuously for real-time strike tracking and storm movement
- Land immediately if storms shift overhead unexpectedly
- Verify your drone insurance covers weather-related incidents before every session
- Avoid wet, conductive surfaces when handling equipment post-flight
Your freedom to chase these extraordinary atmospheric events depends entirely on surviving them.
Drone insurance protects your financial investment; disciplined decision-making protects your life.
No single photograph justifies compromising either.
Patience and calculated positioning separate serious storm photographers from reckless ones.
Storm-Tracking Apps That Tell You When and Where to Fly
Three apps separate disciplined lightning photographers from those flying blind into dangerous airspace. Blitzortung.org delivers real-time lightning strike maps, letting you watch storm cells develop before committing to a launch location.
You’ll see exactly where strikes are hitting and track movement patterns with precision.
Windy.com layers wind speed, storm trajectories, and precipitation forecasts into a single visual interface — critical for predicting when a cell will position itself at your ideal shooting distance.
RadarScope gives you professional-grade NEXRAD radar data, so you’re reading the same storm tracking information meteorologists use.
Together, these tools transform reactive guesswork into deliberate positioning.
Set lightning alerts on Blitzortung, cross-reference Windy’s trajectory data, then confirm timing with RadarScope.
You’re not chasing storms blindly — you’re intercepting them on your terms.
Frequently Asked Questions
Can Lightning Strikes Permanently Damage or Destroy My Drone Mid-Flight?
Yes, a direct lightning strike can instantly destroy your drone mid-flight. You’ll want to prioritize storm safety, keeping your distance from active cells. Regular drone maintenance won’t protect against strikes—your best defense is smart positioning.
Does Drone Insurance Cover Lightning-Related Damage or Loss?
Like a medieval scribe decoding ancient texts, you’ll need to carefully examine your drone protection fine print — most insurance policies don’t automatically cover lightning damage, so you’ve got to specifically add weather-related loss coverage.
Are There Legal Restrictions on Flying Drones Near Active Storm Areas?
Yes, drone regulations vary by region, but you’ll typically need to check local airspace restrictions near active storms. Storm safety laws may ground flights if authorities deem conditions hazardous, so always verify before you launch.
How Far Should I Stand From My Drone During a Lightning Storm?
During a lightning storm, you shouldn’t be near your drone at all. Prioritize drone safety by staying indoors. Storm preparedness means you’ve already positioned your drone remotely, keeping yourself completely sheltered while it captures the action autonomously.
Can Lightning Electromagnetic Pulses Interfere With Drone Control Signals?
Yes, lightning’s electromagnetic pulses can disrupt your drone’s control signals, causing loss of connection or erratic behavior. You’ll want to prioritize drone safety by using lightning detection tools and maintaining safe distances before interference strikes.
References
- https://jvn.photo/best-drone-photography-2026/
- https://www.youtube.com/watch?v=DgRGehhaG88
- https://www.nytimes.com/wirecutter/reviews/best-drones/
- https://www.youtube.com/watch?v=Y2wtp7B0w-U
- https://www.journalofnomads.com/best-drones-for-travel/
- https://www.wired.com/gallery/best-drones/
- https://www.techradar.com/cameras/drones/best-drone
- https://mavicpilots.com/threads/lightning-photos-best-methods.138496/
- https://www.reddit.com/r/drones/comments/1cfq2fr/best_drone_settings_for_lightning_shots_at_night/
- https://www.digitalcameraworld.com/buying-guides/the-10-best-camera-drones