To capture lightning strikes, you’ll need to position yourself 6–10 miles from the active cell, on elevated terrain with unobstructed sightlines. Use a sturdy tripod, wide-angle lens, and remote shutter release. At night, start at f/5.6–f/8, ISO 100, with 5–30 second exposures. Monitor radar apps to track storm behavior and identify high-frequency strike zones. Master these foundational techniques, and the more advanced strategies ahead will sharpen every frame you capture.
Key Takeaways
- Position yourself 6–10 miles from the active storm cell, choosing elevated, unobstructed vantage points for maximum sky coverage and safety.
- Use a sturdy tripod and remote shutter release to ensure stability during long exposures and minimize camera shake.
- For nighttime shooting, start with f/5.6–f/8, ISO 100, and exposures between 5–30 seconds to capture strikes effectively.
- Frame your shot with the horizon low, dedicating 60–80% of the frame to sky for greater bolt visibility.
- Monitor radar apps in real time to track storm cells, estimate arrival windows, and reposition as needed.
When and Where to Shoot Lightning Photography
Timing your shoot around verified forecast data dramatically increases your chances of capturing a usable strike. Monitor radar actively, tracking storm behavior to estimate cell direction, intensity, and strike frequency. Apps that flag predicted lightning events give you a measurable edge over guessing.
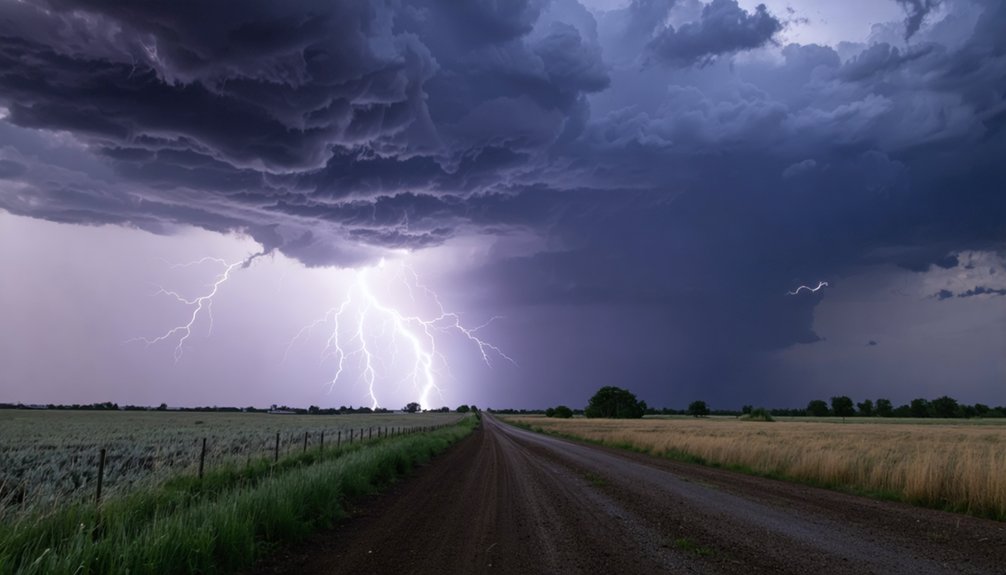
For safety measures, position yourself 6–10 miles from the active cell, away from open fields, tall trees, and bodies of water. Choose elevated vantage points—hills, flat plains, or high-rise locations—that offer wide, unobstructed sky coverage.
Arrive roughly 30 minutes before the storm reaches your position. That window lets you lock in composition, run test exposures, and confirm your setup is stable.
You’ll shoot more confidently knowing your location balances clear sightlines with a defensible safety margin.
How Far Should You Stand From a Lightning Storm?
Avoid open fields, isolated trees, hilltops, and water bodies when the storm closes within that buffer zone.
If you’re shooting from an elevated vantage point, identify your shelter exit before setup begins.
Build in roughly 30 minutes of preparation time before the storm arrives. That window lets you dial in composition, test exposures, and assess escape routes without rushing.
Distance isn’t optional—it’s the variable that keeps you shooting next time.
What Vantage Points Give You the Best Strike Coverage?
Once you’ve established a safe shooting distance, your vantage point determines how much of the storm’s active strike zone you can frame.
Elevated terrain—hills, parking structures, or high-rise rooftops—gives you a lower horizon line and expands your visible sky coverage considerably.
Open, unobstructed locations on flat plains or wide clearings work equally well, provided you keep a clear sightline across the horizon with minimal foreground interference.
Elevated Terrain and Heights
Elevated terrain and high-rise vantage points dramatically expand your effective sky coverage, increasing the angular field of storm structure you can capture within a single frame.
Storm elevation removes obstructions that would otherwise block lower bolt segments, giving you a height advantage that flatter terrain simply can’t provide.
Mountain perspectives reveal full cloud formations from base to anvil, exposing the complete electrical discharge path rather than fragmented sections.
Position yourself on ridgelines, elevated plateaus, or urban rooftops to maximize unobstructed sightlines across the storm’s active cell.
Keep your back toward stable air and frame toward the advancing system.
The wider your unbroken horizon, the greater your strike probability per exposure cycle, compounding your compositional options as the storm’s intensity evolves.
Open Horizon Locations
Flat plains, open coastlines, and wide valley floors give you the highest strike coverage per exposure cycle because they eliminate vertical obstructions that compress your effective sky angle.
Position yourself 6–10 miles from the active cell, maximizing storm safety while preserving a clean sightline across the full discharge zone. Wide horizons let you apply composition techniques that allocate 60–80% sky in your frame, increasing the probability that a bolt falls within your captured field.
Avoid locations near tall trees, water bodies, or elevated infrastructure that introduce both hazard and visual clutter. A flat foreground with a distant skyline also provides natural depth cues, anchoring the bolt’s scale without competing for frame real estate.
Scout and set up at least 30 minutes before the cell arrives.
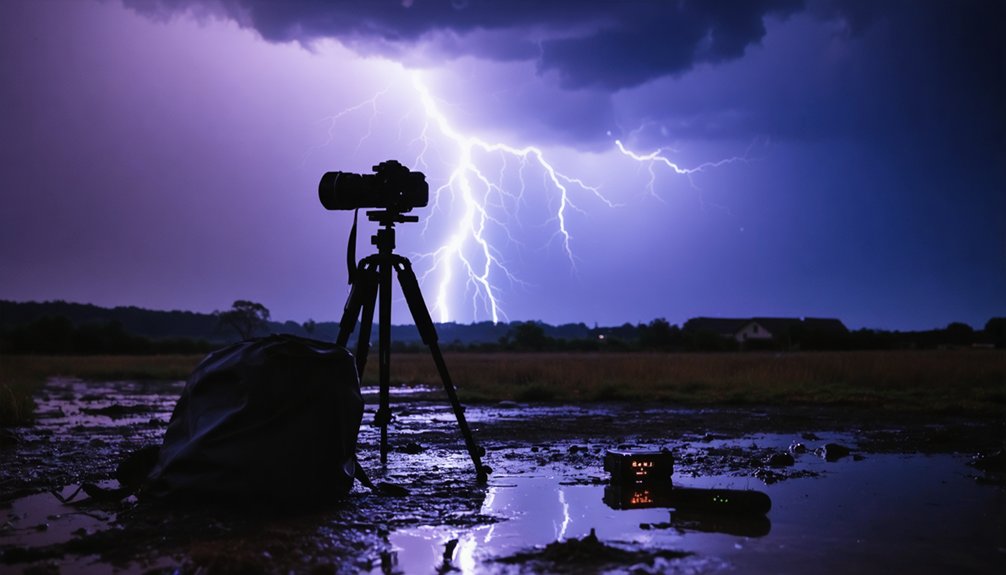
Tripods, Triggers, and Lenses You Actually Need
Three pieces of gear determine whether your lightning session produces sharp, well-exposed frames or a blurry, missed-opportunity card dump: a sturdy tripod, a remote shutter release or intervalometer, and the right lens for your target distance.
Tripod stability is non-negotiable during long exposure captures lasting 5–30 seconds. Any vibration destroys bolt sharpness. Once mounted, disable image stabilization entirely.
For trigger options, a cable release eliminates hand-induced shake, while a dedicated lightning trigger automates capture by detecting electromagnetic discharge, maximizing strike probability without manual intervention.
Lens recommendations depend on distance. Use a wide-angle lens to frame broad storm structures, or a 70–200mm for isolated distant bolts.
These gear essentials give you full mechanical control, letting you chase storms on your own terms without missing critical frames.
What Exposure Settings Work for Day and Night Lightning?

Nailing the right exposure values separates a correctly lit bolt from a blown-out white streak or an underexposed ghost. For nighttime settings, start at f/5.6–f/8, ISO 100, and exposures between 5–30 seconds. Narrower apertures like f/10–f/16 help when ambient light increases.
Keep ISO at your camera’s base value to suppress noise and retain dynamic range across the bolt’s luminance spike.
Daytime settings demand a different approach since you can’t stretch exposures freely. Push aperture to f/22 or smaller, lock ISO at its lowest native value, and shoot continuously to intercept brief strikes.
A neutral density filter extends your shutter speed further, increasing strike probability. In both conditions, review histograms immediately and adjust aperture or shutter speed when highlights clip or shadows crush.
How to Focus and Compose for Sharper Lightning Bolts
Sharp focus locks in the bolt’s fine structure—branching channels, corona discharge, and edge detail—so switching to manual focus before shooting is essential. Set your lens to infinity for distant strikes, then lock it there.
Manual focus is non-negotiable—set your lens to infinity, lock it, and never let autofocus steal your sharpness mid-storm.
Autofocus briefly on distant city lights or the moon when available, then disengage AF entirely to prevent refocusing between frames.
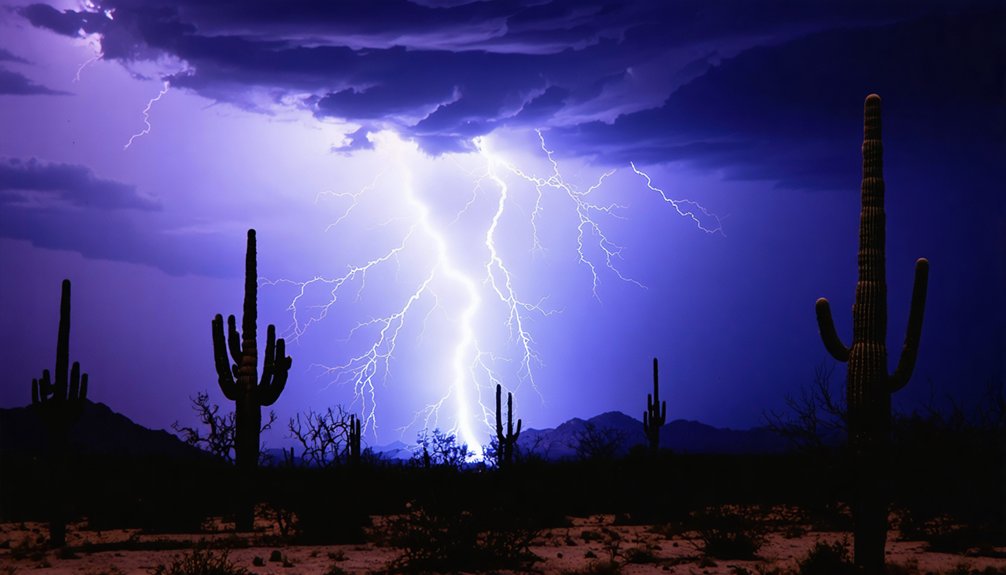
These focus techniques combine with deliberate composition tips to strengthen your final image. Position the horizon low, allocating roughly 60–80% of the frame to sky and 20–40% to foreground, giving bolts room to develop vertically.
Use a wider focal length to capture broad storm structure, or a longer lens to isolate distant, individual strikes. Minimize obstructions along the horizon to preserve clean bolt visibility and maximize spatial context within the frame.
Bulb Mode, Burst Shooting, and Strike Zone Anticipation
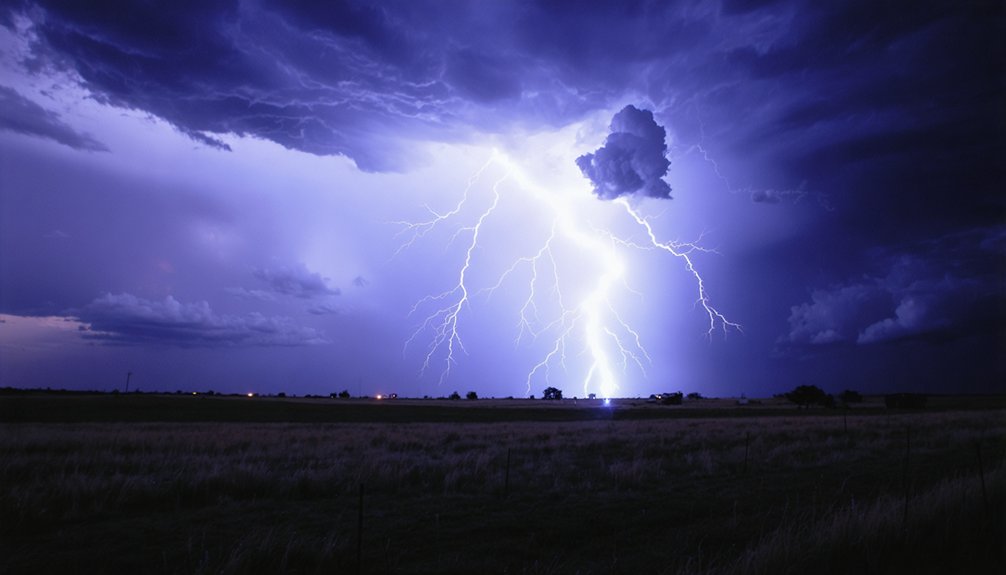
With focus locked and composition set, your next variable is time—specifically, how you structure your exposures to intercept an unpredictable event. Bulb mode gives you direct control, letting you hold the shutter open across multiple strike opportunities within a single frame.
Alternatively, continuous 30-second exposures in burst shooting keep your sensor active with minimal gaps between frames.
Strike zones aren’t random—watch the storm’s structure, identify where cells are most active, and position your frame there. Anticipation techniques include reading cloud-to-ground discharge patterns and tracking repeating bolt paths, since lightning frequently revisits the same corridors.
Review exposures regularly. If bolts are overexposed or cloud ghosting appears, tighten your aperture or reduce exposure duration.
Stay adaptive; strike frequency shifts fast, and your settings must shift with it.
Lightning Photography Mistakes That Kill Your Shots
Two mistakes consistently ruin lightning shots: wrong exposure settings and poor storm timing.
If you’re shooting at f/2.8 with ISO 800 at night, you’ll blow out every bolt and flood frames with noise; instead, lock in f/5.6–f/8 at ISO 100 with exposures between 5–30 seconds.
You also can’t afford to ignore radar — if you’re not tracking the storm‘s movement and active cell development, you’ll miss peak strike windows entirely.
Wrong Exposure Settings
Even a perfectly composed shot falls apart when your exposure settings are off, turning a potential keeper into a blown-out or barely visible disappointment.
Overexposed images result from wide apertures during bright storm activity, so dial to f/5.6–f/8 at night and f/16–f/22 during daylight.
Underexposed shots typically stem from incorrect ISO or shutter speeds that are too short to capture multiple strikes. Keep ISO near 100 to control noise, and run 5–30 second exposures to widen your capture window.
Aperture mistakes compound focus errors, degrading bolt sharpness even when composition pitfalls are avoided. Lock manual focus to infinity, disable autofocus, and fire continuous frames.
Missed strikes almost always trace back to rushed test exposures—verify brightness and sharpness before the storm peaks.
Ignoring Storm Timing
Storm timing is one of the most controllable variables in lightning photography, yet many shooters ignore it entirely. Storm misjudgment costs you shots before you’ve even pressed the shutter. If you’re arriving late, leaving early, or guessing strike windows without data, you’re operating blind.
Forecast negligence compounds the problem. You’ve got radar apps, storm-cell tracking tools, and real-time lightning detection at your fingertips—use them. Monitor storm direction, estimate arrival windows, and identify active cells with consistent strike frequency before committing to a location.
Give yourself roughly 30 minutes of setup time before the cell reaches your vantage point. Strike frequency shifts fast, so stay locked in as the storm evolves.
Timing isn’t luck—it’s data-driven preparation that separates missed frames from captured bolts.
Frequently Asked Questions
Can a Lightning Trigger Work With Any Camera Brand or Model?
Like a universal key, most lightning triggers aren’t brand-locked—you’ll find models compatible with major manufacturers. Always verify your camera settings and connector type first, and prioritize lightning safety by keeping your distance while shooting.
How Do You Protect Your Camera Gear From Rain During Storms?
Use rain covers and dedicated camera housings for moisture protection during active storm shoots. You’ll want to seal lens joints with weather tape, keep silica gel nearby, and shield your tripod head from direct precipitation.
Is a Full-Frame Camera Better Than Crop Sensor for Lightning Photography?
Full-frame advantages include wider dynamic range and better low-light performance, but crop sensor limitations won’t stop you from capturing stunning strikes. You’ll succeed with either system if you’ve mastered manual exposure, focus, and composition fundamentals.
What Post-Processing Edits Improve Lightning Bolt Images After Shooting?
Your bolts can blaze like a thousand suns—boost them further with lightning color correction to intensify electric blues and whites, apply contrast adjustments to separate bolts from dark skies, and reduce noise at base ISO levels.
How Do You Legally Access Private Land for Storm Photography Sessions?
You’ll need landowner permissions before accessing private property. Contact the owner directly, explain your intent, and practice proper photography etiquette by respecting boundaries, minimizing disturbance, and leaving the land exactly as you’ve found it.
References
- https://digital-photography-school.com/how-to-photograph-lightning-the-ultimate-guide/
- https://www.digitalcameraworld.com/tutorials/how-to-photograph-lightning
- https://www.rmets.org/metmatters/lightning-photography-advice-award-winning-photographer
- https://www.youtube.com/watch?v=b6es2b_3LYM
- https://photographylife.com/how-to-photograph-lightning
- https://www.jasonrweingart.com/blog/2014/12/20/how-to-photograph-lightning
- https://www.youtube.com/watch?v=9Gza0W82lzg
- https://www.nickulivieriphotography.com/blog/lightning/
- https://www.slrphotographyguide.com/how-to-photograph-lightning-and-storms/
- https://www.youtube.com/watch?v=uvDQKMQTJMw