Capturing storms demands that you manage mechanical, cognitive, and physical variables simultaneously. You’ll need weather-resistant gear, the right focal length for each storm feature, and preconfigured camera settings before conditions deteriorate. Use ISO 100 at f/16 for close lightning, ISO 200 at f/8 for distant strikes, and lock manual focus at infinity. Back up every chase day, log GPS metadata, and document events in real time. The full technical framework goes much deeper.
Key Takeaways
- Use wide-angle lenses (24–35mm) for storm structure and telephoto lenses (70–200mm) for distant tornado details and debris clouds.
- Preconfigure camera settings—ISO 100, f/16, bulb mode—for close lightning and adjust to ISO 200, f/8 for distant strikes.
- Identify multiple escape routes, keep your vehicle pointed outbound, and prioritize survivability over capturing the perfect shot.
- Record real-time voice logs noting GPS location, compass direction, lightning strikes, hail conditions, and tornado features as they develop.
- Back up all chase data immediately via DVD, external drive, and cloud storage, verifying geo-tagged metadata transfers correctly.
What Storm Photography Actually Demands of Your Gear and Nerves
Storm photography doesn’t just test your equipment—it stress-tests your decision-making under rapidly evolving atmospheric conditions. You’re managing ISO, aperture, and shutter speed simultaneously while scanning for escape routes and tracking storm movement. That’s not multitasking—that’s operational pressure.
Equipment maintenance directly determines your capture success. Wind-driven debris degrades lens coatings, moisture infiltrates camera bodies, and vibration from gusts destabilizes tripod-mounted rigs. You can’t afford mechanical failure when a condensation funnel drops.
Storm chaser safety governs every positioning decision. You’ll select locations offering unobstructed sightlines to the storm’s base while keeping multiple exit vectors clear. A clean composition means nothing if you’ve compromised your egress. Discipline your instincts—prioritize survivability first, then execute your technical settings with precision.
Pick the Right Lens for the Storm in Front of You
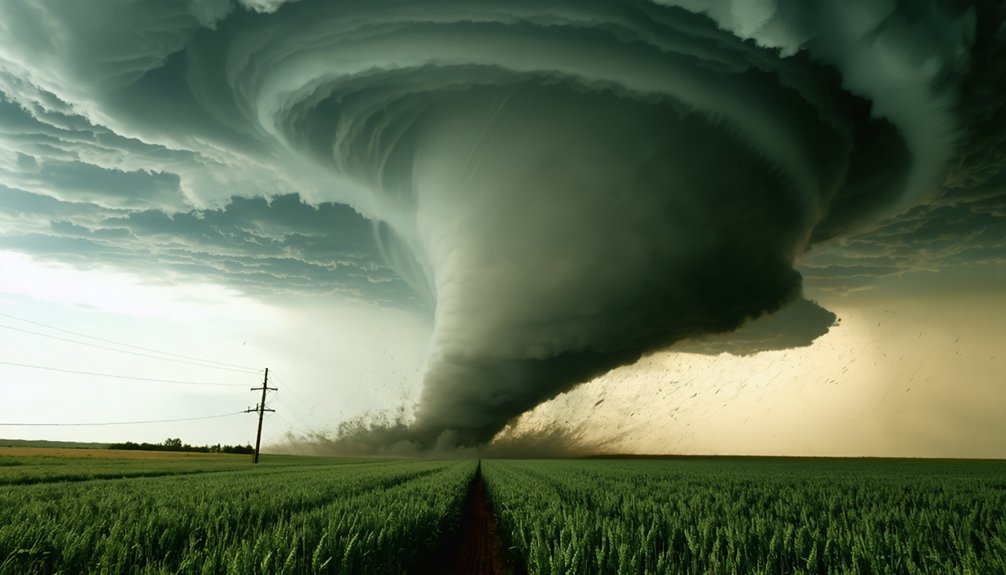
Lens selection determines whether you capture the storm’s full structural context or isolate a specific violent feature—so match focal length to what’s actually in front of you. For broad supercell structure, wall clouds, or inflow bands, a 24mm–35mm wide-angle gives you full storm architecture without repositioning. Lens compatibility matters here—confirm your glass covers that range cleanly without vignetting under field conditions.
When targeting tornadoes or distant features, shift to a 70mm–200mm telephoto to compress distance and reveal debris cloud detail. Prioritize focal length selection based on the visible debris cloud width, not just the condensation funnel. If the storm’s close, stay moderate-wide. If it’s distant, zoom in.
Mount everything on a tripod—wind gusts will ruin sharp captures on any focal length without one.
Camera Settings That Capture Lightning Without Guesswork
Lightning doesn’t wait for you to dial in settings, so configure your camera before the storm arrives.
For close strikes within three miles, set ISO 100, f/16, and bulb mode to avoid overexposure.
Push to ISO 200 and f/8 with a 20-second exposure for distant lightning patterns between three and ten miles out.
Manual focus locked at infinity keeps every frame sharp without hunting.
Disable Long Exposure Noise Reduction entirely—that processing delay costs you consecutive captures.
Enable continuous shooting with four to five second exposures to maximize strike probability.
Camera ergonomics matter here: mount your rig on a sturdy tripod before conditions deteriorate, position controls within reach, and keep your escape route clear so you’re never adjusting settings while the storm closes in.
How to Expose for Close vs. Distant Lightning Strikes
Exposure gaps between close and distant strikes are wider than most researchers expect, and getting them wrong means blown highlights or invisible channels.
For strikes within three miles, set ISO 100, f/16, and bulb mode. That tight aperture controls lightning color saturation and prevents channel overexposure.
Beyond three miles, shift to ISO 200, f/8, and a 20-second exposure duration to pull enough photons from dimmer, attenuated channels.
You’re fundamentally solving two separate problems. Close strikes carry intense luminosity that crushes detail at wide apertures.
Distant strikes need longer exposure duration to register faint branching.
Disable Long Exposure Noise Reduction to eliminate processing delays between frames.
Continuous shooting at four to five seconds per frame keeps your sequence uninterrupted and your data capture complete.
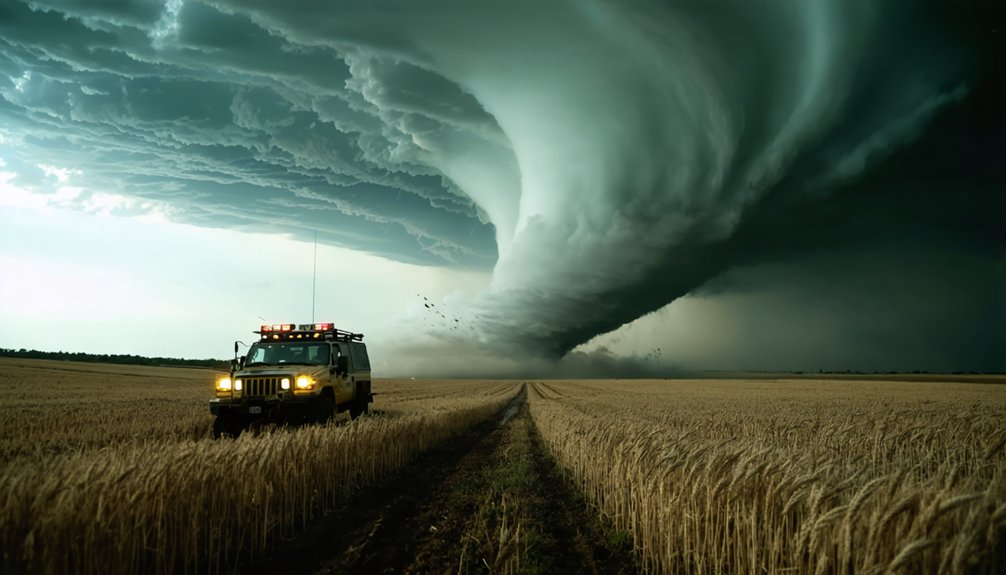
Position Yourself for a Clean Shot and a Fast Exit
When scouting a shooting location, you’ll want an unobstructed sightline toward the storm that keeps the funnel base and debris cloud fully visible while offering strong compositional foreground elements.
Prioritize positions where you can monitor the storm’s movement continuously for several minutes without repositioning, maximizing both video continuity and audio documentation quality.
Before committing to any location, you must identify multiple escape routes and confirm they remain clear of precipitation, hail, and blowing dust so you can execute a rapid departure if conditions deteriorate.
Scouting Safe Shooting Locations
Where you park determines whether you walk away with the shot—or don’t walk away at all. Storm chaser safety begins before the storm arrives, rooted in disciplined weather forecasting and terrain analysis. Scout locations that offer unobstructed sightlines toward the approaching system while keeping the funnel base and debris cloud fully visible.
Prioritize paved intersections over dirt roads that mud out under rain. Identify at least two escape routes before committing to a position—never rely on a single exit. Avoid low-water crossings, box canyons, and tree lines that block your view or trap your vehicle.
Cross-reference your position against the storm’s projected track. If the path shifts, you move. Autonomy in the field depends on maintaining options, never surrendering them to a single fixed plan.
Planning Your Escape Routes
Every position you commit to should serve two functions simultaneously: photographic composition and vehicular egress. Before you set your tripod, map your exit. Identify at minimum two perpendicular escape routes—storms rotate, and a single road parallel to movement becomes a trap.
Keep your vehicle pointed outbound, engine running if conditions allow. Know the nearest storm shelter along each route and incorporate it into your communication planning before deployment. Share your GPS coordinates and planned exits with a remote contact who can escalate if you go silent.
Avoid low-lying roads susceptible to flash flooding and railroad crossings that create hard stops. You’re preserving your freedom to move fast when variables shift.
Compromise neither your shot nor your exit—both demand equal pre-commitment.
Build Your Escape Plan Before the Storm Arrives
Before you position your vehicle or set up any equipment, you need a fully mapped escape plan with multiple viable exit routes identified in advance. Weather unpredictability and storm duration make single-route planning a critical failure point.
- Identify at least two paved exit routes perpendicular to the storm’s projected path.
- Confirm road conditions beforehand — flooded or unpaved routes eliminate viable escape options fast.
- Keep your engine idling only when precipitation, hail, and blowing dust are absent overhead.
- Maintain an unobstructed forward view so the funnel base and debris cloud stay visible without repositioning.
You’re operating in dynamic, high-risk conditions. Your escape plan isn’t optional — it’s the framework that keeps every other decision legitimate.
Back Up Every Chase Day Before You Drive Home
Before you drive home, back up your chase folder by burning a DVD, copying files to an external drive, or uploading to cloud storage.
You’ll want to verify that GPS geo-tags are embedded in all images and video, anchoring each file to its precise capture location for later analysis.
These two steps — redundant backup and accurate location data — protect both your raw media and the scientific integrity of your documentation.
Backup Methods For Chasers
Backing up your chase data before you drive home isn’t optional—it’s a protocol that prevents irreversible loss of documentation that can’t be recreated.
Apply data encryption to protect sensitive GPS-tagged files during transfer. Equipment maintenance extends to your storage drives—verify integrity before each chase day.
Use these four methods:
- Burn a DVD of all image folders, video sequences, and typed route notes.
- Copy to an external drive, confirming file counts match your source directory.
- Upload to cloud storage, ensuring geo-tagged metadata transfers completely.
- Cross-reference oral notes against typed documentation to close any event gaps.
Execute all three physical and digital methods simultaneously when possible. Redundancy isn’t paranoia—it’s precision. Your data has no duplicate if your primary drive fails.
GPS Tagging Your Data
GPS geo-tagging locks every image and video file to an exact coordinate, transforming raw chase footage into spatially verified documentation. You gain GPS accuracy that eliminates guesswork when correlating visual evidence with radar data, storm reports, or published research.
Every tagged file carries embedded latitude, longitude, and timestamp metadata, enabling seamless data integration across GIS platforms, meteorological databases, and damage survey maps.
Enable geo-tagging before your first capture of the day. Verify your device has acquired a strong satellite fix, since a weak signal degrades GPS accuracy and corrupts positional records. Cross-reference coordinates against known landmarks periodically during the chase.
After returning home, confirm all files contain valid metadata before archiving. Spatially anchored documentation gives your footage scientific credibility and operational utility no untagged file can match.
Capture Audio and Oral Notes While the Camera Rolls
While your camera captures continuous footage, your voice becomes a parallel data stream that timestamps events the lens alone can’t fully document. Sound recording and oral documentation run simultaneously, giving you layered evidence no single channel provides alone.
Your voice becomes a parallel data stream, timestamping what the lens alone can never fully document.
Before each sequence, verbally log:
- Current time, GPS location, and compass direction you’re facing
- “CG north” or similar callout the moment cloud-to-ground lightning fires
- Estimated hailstone size and strike frequency as conditions develop
- Chase route updates including road names, repositioning decisions, and storm behavior shifts
Keep your engine idling with windows down only when precipitation and blowing dust are absent. This preserves clean ambient audio—wind roar, inflow surges, and structural storm sounds that raw footage alone won’t isolate.
Log Storm Events on the Fly Like a Pro Chaser
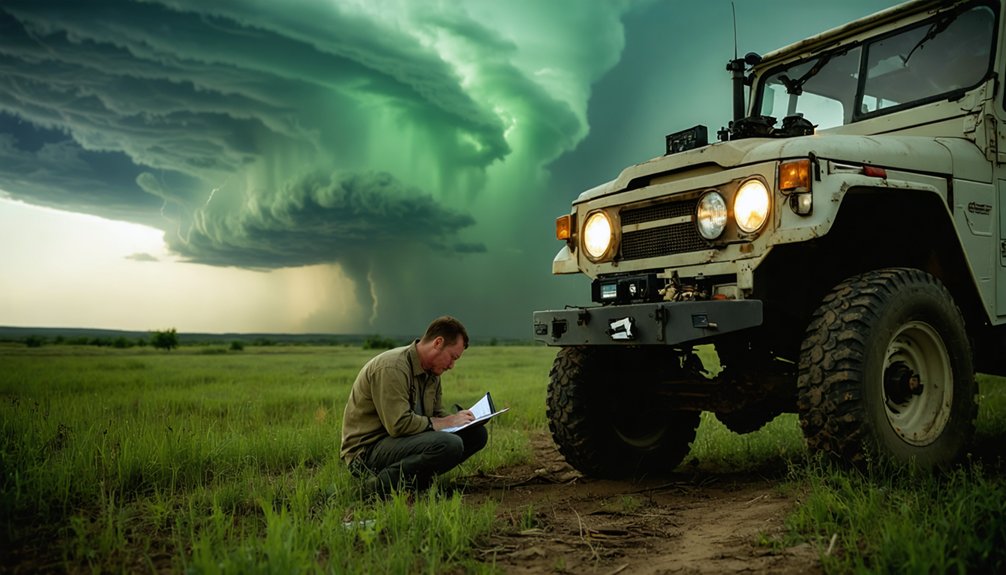
Every second you spend scrambling to reconstruct events from memory is a second of degraded data integrity. Log storm behavior in real time by typing chase route details, road identifiers, stop coordinates, and observed structural changes directly into your notes app as they unfold. Don’t wait until you’ve repositioned.
Call out lightning choreography verbally onto your audio track the moment a CG strike fires, noting direction and approximate distance. Document hail onset immediately, estimating stone size and strike frequency. Record names of anyone encountered and annotate significant tornado features as they develop.
GPS geo-tagging handles spatial anchoring automatically, but temporal and qualitative context depends entirely on your discipline. Accurate, timestamped field logs transform raw footage into defensible research data you can analyze, publish, or archive with full confidence.
Frequently Asked Questions
Can I Use a Smartphone Instead of a DSLR for Storm Photography?
You can use a smartphone, but you’ll sacrifice critical DSLR advantages like manual ISO 100–800 control, f/8–f/11 aperture precision, and bulb mode. Smartphone limitations considerably reduce your exposure flexibility and lightning capture accuracy.
How Do I Protect My Camera Gear From Rain and Moisture Damage?
Stay ahead of the curve—use protective cases and moisture absorbers to shield your gear. You’ll maintain ideal performance by sealing equipment between shots, preventing humidity-related damage that compromises sensor integrity and lens clarity during dynamic storm conditions.
Should I Chase Storms Alone or Always With a Partner?
You shouldn’t chase solo; team coordination dramatically improves solo safety margins. A partner monitors radar, navigates escape routes, and documents data while you drive, maximizing situational awareness and operational efficiency under rapidly evolving storm conditions.
What Weather Apps or Radar Tools Do Storm Chasers Rely on Most?
You’ll rely most on RadarScope for storm tracking and GRLevel3 for radar visualization. These tools give you real-time supercell analysis, velocity data, and tilt scans, letting you make independent, informed positioning decisions without depending on anyone else.
How Do I Legally Access Private Land During an Active Storm Chase?
You can’t access private land without legal permissions. Always prioritize landowner communication before entering—ask directly, explain your purpose, and respect refusals. Public roads and rights-of-way remain your safest, most reliable positioning options during active chases.
References
- https://el-reno-survey.net/data-collection-recommendations/
- https://www.naturettl.com/how-to-photograph-storms-supercells-lightning-tornadoes/
- https://www.youtube.com/watch?v=oPkd3Wdu0OE
- https://www.rgallucciworkshops.com/getting-the-shot/how-to-photogragh-lightning
- https://stormtrack.org/threads/how-to-take-the-perfect-video-for-scientific-research.33158/
- https://www.preventionweb.net/news/what-do-storm-chasers-really-do-two-tornado-scientists-take-us-inside-chase-and-tools-studying
- https://metroskywarn.org/wp-content/uploads/2019/05/SPOTTER-FIELD-TOOLKIT.pdf
- https://www.photographytalk.com/capturing-natures-drama-a-beginners-guide-to-storm-photography/
- https://photzy.com/what-ive-learned-about-storm-chasing-photography/
- https://www.youtube.com/watch?v=dCGFK8JI-mU