To optimize your private storm chasing tour for photography, you’ll need to prioritize vehicles with large, unobstructed windows, verify your guide’s meteorological credentials, and confirm real-time tools like RadarScope and RadarOmega are actively used. Maintain two to three miles from developing cells, establish predefined escape routes, and review liability documentation before departure. Every decision, from vehicle selection to risk assessment, directly impacts your safety and shot quality — and there’s much more to contemplate.
Key Takeaways
- Choose vehicles with large right-side and rear windows, ensuring unobstructed sightlines and interior cleanliness for sharp, high-contrast storm photography.
- Maintain two to three miles from storm cells, with predefined escape routes activating immediately if tornadoes shift or accelerate.
- Use RadarScope, RadarOmega, and NOAA SPC together to cross-reference live storm data and optimize real-time routing decisions.
- Verify guide credentials through meteorological training, documented chasing success rates, client testimonials, and comprehensive liability insurance coverage.
- Confirm operational GPS, communication devices, camera gear policies, and real-time monitoring tools before departure through a thorough booking checklist.
Choose Chase Vehicles Built for Photographer Visibility
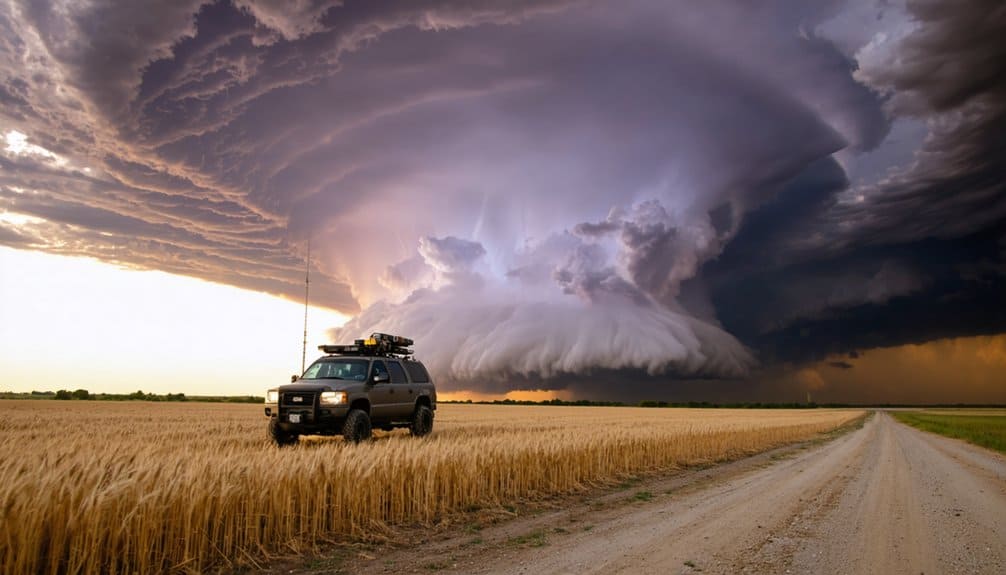
The chase vehicle you select directly shapes every photograph you’ll capture during a storm tour. Prioritize chase vehicle features that maximize your shooting angles — specifically, large windows on the right-hand side and rear of the vehicle. These placements give you unobstructed sightlines toward developing storm structures without fighting limited glass real estate.
Your chase vehicle isn’t just transportation — it’s your shooting platform. Choose wisely; your images depend on it.
Before booking, physically sit in the back seat and assess window clarity yourself. Don’t assume — verify. Avoid any vehicle with cameras or equipment mounted in ways that compromise your side or front visibility.
Photographer accessibility also depends on interior cleanliness. Dirty glass from previous tour cycles will degrade image sharpness and contrast. Confirm guides clean interior surfaces daily.
Your gear deserves a platform that doesn’t fight you when conditions demand speed and precision.
How Close Is Too Close? Storm Distances Private Tours Actually Follow
When you’re positioned two to three miles from a developing storm cell, you’re operating within the standard beginner-safe threshold that reputable private tours enforce. This distance management protocol isn’t arbitrary—it balances photographic access with storm safety by keeping you outside the immediate debris field while maintaining clear sightlines to supercell structure and rotation.
Experienced guides continuously recalibrate positioning as storm cells evolve. If a tornado accelerates beyond 45 mph or path shifts occur, predefined escape routes activate immediately. You’re never locked into a static position.
Distance decisions factor in storm motion vectors, inflow intensity, and outflow dominance. Guides interpreting these variables in real time determine whether closing distance is viable or whether repositioning protects both your safety and your shooting opportunity.
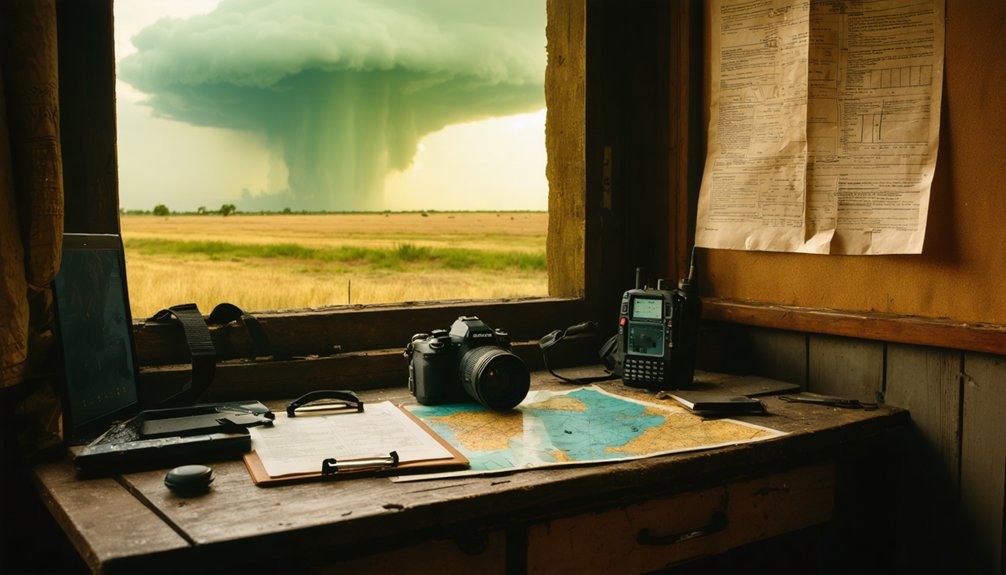
Real-Time Weather Tools That Keep Your Tour on Track
Keeping your tour dynamically positioned requires guides to layer multiple real-time data sources simultaneously. Smart weather app recommendations and radar tool comparisons separate reactive chasers from proactive ones.
- NOAA SPC delivers daily convective outlooks, pinpointing rough storm corridors before your vehicle leaves the staging area.
- RadarScope renders live precipitation intensity and rotation signatures, letting guides anticipate mesocyclone development minutes ahead.
- RadarOmega overlays wind shear data onto storm cells, revealing tornadic potential before visual confirmation exists.
- Cross-referencing tools simultaneously exposes contradictions between models, forcing sharper routing decisions when storm paths shift unexpectedly.
Your guide shouldn’t rely on a single platform. Layering these tools creates a dynamic operational picture, keeping you mobile, informed, and strategically positioned as supercells evolve across open terrain.
How Do You Verify a Storm Chasing Guide’s Credentials?
Verifying a storm chasing guide’s credentials separates a calculated investment from a reckless gamble. Start by confirming meteorological training from reputable institutions, as formal education directly supports accurate storm interpretation and reduces your exposure to preventable risk.
Guide experience matters equally — examine operational longevity and documented chasing success rates to gauge pattern recognition skills developed across multiple seasons.
Seasons of experience build the pattern recognition that keeps storm chasers — and their guests — alive.
Don’t overlook client testimonials; they reveal how guides perform under pressure and communicate critical updates to guests. Credential verification should also include confirming that the tour company carries extensive liability insurance covering unforeseen weather circumstances.
Ask direct questions about escape route protocols and risk assessment procedures before committing. A qualified guide welcomes scrutiny. If a company deflects accountability questions, that’s your clearest signal to walk away.
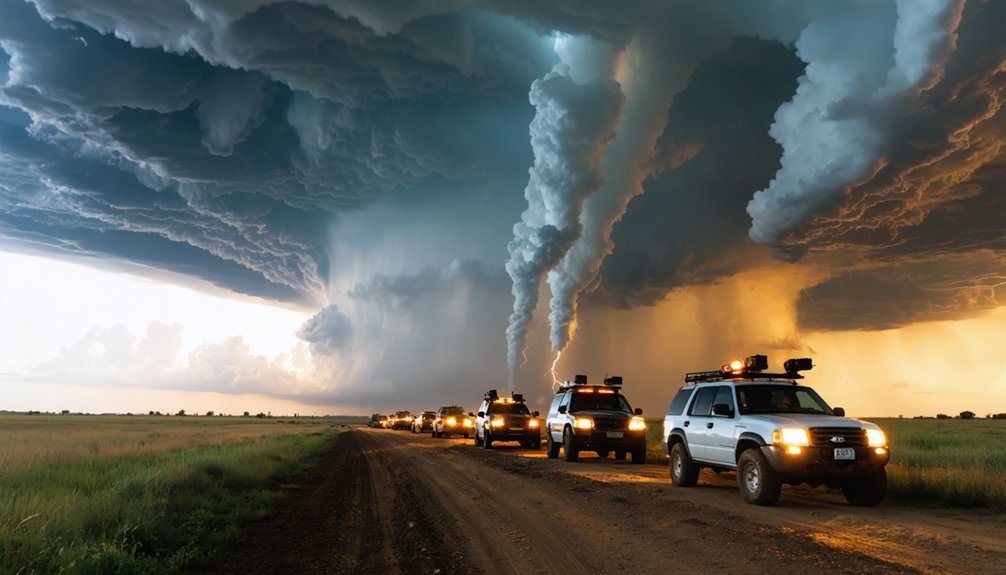
What the Chase Experience Actually Looks Like From Inside the Vehicle
Once you’ve confirmed your guide’s credentials, the next question shifts from who’s driving to what you’ll actually experience inside that vehicle. Chase vehicle comfort directly affects your shooting performance, so know what you’re entering.
- Large right-side and rear windows give you unobstructed sightlines to rotating supercell structures.
- PA systems or shared guide screens stream real-time radar data directly to your phone or tablet.
- Storm photography etiquette means staying seated during rapid repositioning and keeping gear secured between shooting windows.
- Predefined escape routes activate instantly when storm paths shift, meaning sudden direction changes without prior notice.
You’ll monitor RadarScope updates, hear verbal briefings on tornado potential, and adjust your telephoto lens between 200mm and 350mm as conditions evolve.
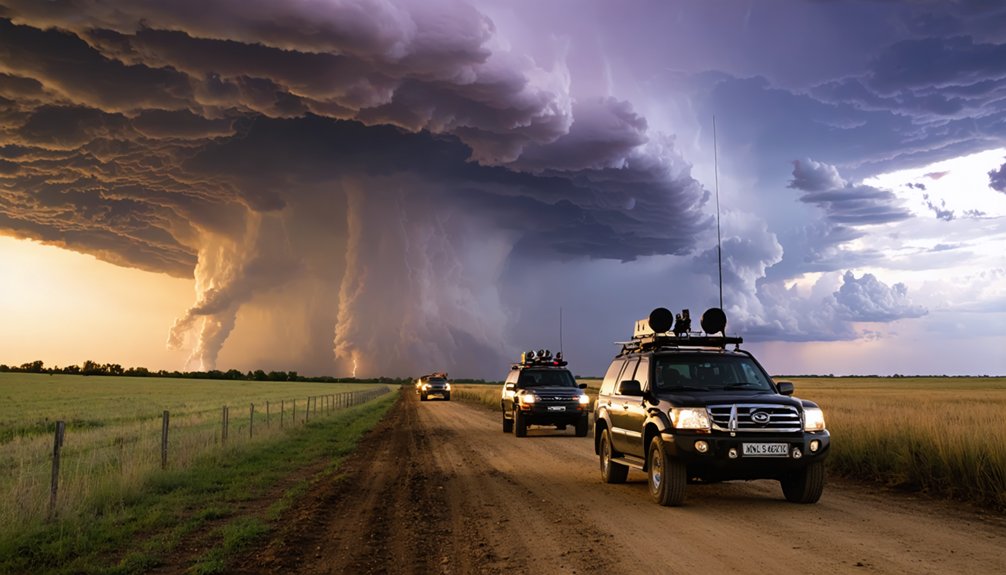
Escape Route Planning for Rapidly Shifting Storm Paths
Before you deploy into the field, you’ll need to identify predefined escape routes that account for multiple storm trajectory scenarios.
Once you’re mobile, you must actively monitor real-time path data through tools like RadarScope to detect rapid directional shifts before they compromise your position.
If a storm’s path changes abruptly, you execute immediate evacuation protocols without hesitation, prioritizing your team’s exit over any remaining photographic opportunities.
Predefined Route Identification
Predefined escape routes aren’t optional in storm chasing—they’re a critical safety framework that can mean the difference between a controlled retreat and a life-threatening situation.
Effective route optimization requires pre-mission planning before you ever encounter a rotating wall cloud. Use storm navigation tools like GPS and NOAA data to map multiple exit corridors.
Before deploying, identify:
- Primary paved roads running perpendicular to the storm’s projected path for rapid lateral exits
- Secondary gravel alternatives when main routes become congested or flooded
- Elevation markers indicating low-lying flood-prone areas you must actively avoid
- Designated rally points at least three miles from active mesocyclones where vehicles can regroup safely
Reviewing these corridors with your entire team before departure eliminates hesitation when seconds matter most.
Real-Time Path Monitoring
Even with escape corridors mapped before deployment, storm paths shift faster than static plans can accommodate—so you’ll need real-time monitoring tools running continuously once you’re in the field.
Use RadarScope and RadarOmega simultaneously for layered storm tracking, cross-referencing precipitation data with wind vectors to anticipate directional changes before they happen. NOAA SPC updates provide broader contextual shifts, while your GPS navigation confirms whether your current position remains viable.
When storm speed exceeds 45 mph, your communication strategies become critical—alert guests immediately, confirm route changes verbally, and push updated visual data to their devices via wifi.
Don’t wait for conditions to deteriorate before redirecting. Continuous monitoring paired with decisive, transparent communication keeps your team mobile, informed, and positioned ahead of the storm rather than reacting to it.
Immediate Evacuation Protocols
Continuous monitoring only protects your team if you’ve already mapped where you’re going when conditions force a retreat.
Predefined escape routes aren’t optional — they’re core emergency protocols that keep you mobile when storm paths shift unexpectedly.
Before deploying, lock in your evacuation procedures using these four checkpoints:
- Identify two perpendicular exit roads away from the storm’s projected forward motion.
- Mark rally points at least 3 miles from the active mesocyclone on your GPS system.
- Designate a lead vehicle responsible for initiating departure signals when rotation tightens.
- Confirm communication devices are operational so every vehicle executes the retreat simultaneously.
Your freedom to chase depends entirely on your discipline to leave.
Hesitation collapses your margin fast.
How Guides Deliver Real-Time Storm Updates While You’re in the Field
When you’re out in the field chasing storms, your guide actively monitors live weather data through tools like RadarScope and RadarOmega, tracking real-time precipitation shifts and wind patterns as conditions evolve.
Effective storm tracking depends on continuous data interpretation, and your guide translates that raw information into actionable updates you can immediately use.
Communication methods vary but typically include PA systems, screen-sharing technology, and direct wifi transmission of radar imagery to your phone or tablet.
When outflow dominance shifts or tornado warnings escalate, your guide verbally briefs you on meteorological changes, explaining concepts like MCS formation clearly and concisely.
If storm speeds exceed 45 mph, making tracking unpredictable, you’ll receive immediate route change confirmations, keeping you informed, mobile, and positioned to capture the best photographic opportunities safely.
Insurance, Liability, and Risk Assessments Every Tour Must Complete
Before any tour vehicle enters a hazardous zone, reputable storm chasing operators must complete mandatory risk assessments that evaluate storm trajectory, vehicle readiness, and communication systems.
Solid risk management protects your freedom to chase confidently without unnecessary exposure to liability gaps.
Every tour you book should verify these non-negotiables:
- Comprehensive insurance coverage that addresses unforeseen weather circumstances and vehicle incidents during active pursuit.
- Pre-deployment risk assessments confirming GPS navigation, communication devices, and escape route viability.
- Documented storm trajectory analysis ensuring guides evaluate shifting supercell paths before positioning vehicles.
- Liability waivers and policy disclosures reviewed transparently so you understand coverage boundaries before departure.
You’re trusting operators with your safety.
Demand proof of insurance documentation and completed risk assessment protocols before your chase day begins.
The Booking Checklist Every Private Storm Chasing Tour Needs
Booking a private storm chasing tour without a structured checklist leaves critical gaps between your expectations and what operators actually deliver. Before committing, verify your guide holds verified meteorological credentials and carries extensive liability insurance.
Confirm vehicles have large rear and right-side windows optimized for storm photography. Ask whether communication devices, GPS systems, and predefined escape routes are operational before deployment.
Review gear essentials policies — clarify whether tripods, ultra-wide lenses, and telephoto equipment are permitted or provided. Confirm real-time monitoring tools like RadarScope are actively used during chases.
Test back-seat visibility before booking to guarantee unobstructed shooting angles. Finally, request client testimonials and chasing success rates to validate the operator’s reliability.
A complete checklist protects your investment, your safety, and your photography outcomes.
Frequently Asked Questions
What Camera Lenses Work Best for Capturing Supercell Structures During Tours?
For supercell structures, you’ll want ultra-wide lenses like 14mm–16mm, maximizing wide angle advantages for expansive coverage. Add lens filters to control highlights, and you’ve got sharp, dramatic storm imagery every time.
How Should Photographers Adjust Camera Settings in Dynamic Storm Lighting?
Set aperture priority to f/5.6 for dynamic exposure control, apply negative exposure compensation to protect highlights, and keep auto ISO active. You’ll capture lightning capture opportunities while maintaining sharp, well-balanced storm imagery throughout rapidly shifting lighting conditions.
Which Editing Software Techniques Enhance Storm Photography Contrast and Saturation?
You’ll enhance storm photography by using color grading to intensify dramatic tones and histogram analysis to balance exposure. Adjust contrast, sharpness, and saturation in editing software to amplify scene intensity without sacrificing highlight detail.
What Tripod Specifications Stabilize Cameras During Long Storm Exposure Shots?
Even lightweight tripods won’t fail you if they’re carbon fiber—you’ll get material durability, vibration reduction, and weather resistance built in. Prioritize leg locks, quick release plates, head stability, and height adjustment for rock-solid long exposures during intense storm sessions.
How Do Telephoto Lenses Improve Detailed Tornado Funnel Image Quality?
You’ll capture sharper tornado photography by using telephoto lenses between 200mm and 350mm. Your lens selection compresses distance, isolates funnel details, and reveals intricate condensation structures that wider lenses can’t resolve from your safe observation distance.
References
- https://www.stormchasingusa.com/blog/what-all-storm-chasing-tour-companies-should-consider-doing/
- https://stormchasing.com/capturing-the-perfect-tornado-photography-tips-for-your-tornado-tour/
- https://www.opticweather.com/blog/weather-aware-travel-and-adventure/storm-chasing-tours-safely-pursue-extreme-weather
- https://www.jasonrweingart.com/go-storm-chasing
- https://www.youtube.com/watch?v=Jc272RCNIJA
- https://www.melaniemetzstormchasing.com
- https://www.stormtours.com/information/questions/
- https://www.mikemezphotography.com/tornado-alley-2024-touri
- http://www.stormeyes.org/tornado/chasing/FAQ/
- https://www.timelapseworkshops.com/storm-chasing-timelapse-tour