For storm chasing photography, you’ll want to shoot in full manual mode with your aperture set between f/8 and f/11 for most conditions. At night, use shutter speeds of 10–30 seconds and keep your ISO between 100 and 200 to minimize noise. During twilight, drop to 5–10 seconds to avoid overexposure. For daylight storms, pair an ND filter with f/8 and ISO 100. There’s plenty more technique ahead to sharpen your storm game.
Key Takeaways
- For night lightning, use shutter speeds of 10–30 seconds, reducing to 5–8 seconds during intense, rapid-fire storms.
- Start with an aperture of f/8 to f/11, adjusting based on lightning distance and intensity.
- Tighten aperture to f/13 or f/16 for close strikes; open to f/5.6 for distant, faint lightning.
- Daylight storm photography requires ND filters, pairing a six-stop filter with f/8 and ISO 100.
- Keep ISO between 100–200 for night shooting, increasing to 200–400 only during twilight conditions.
Night Lightning Photography: How Long Should Your Exposure Be?
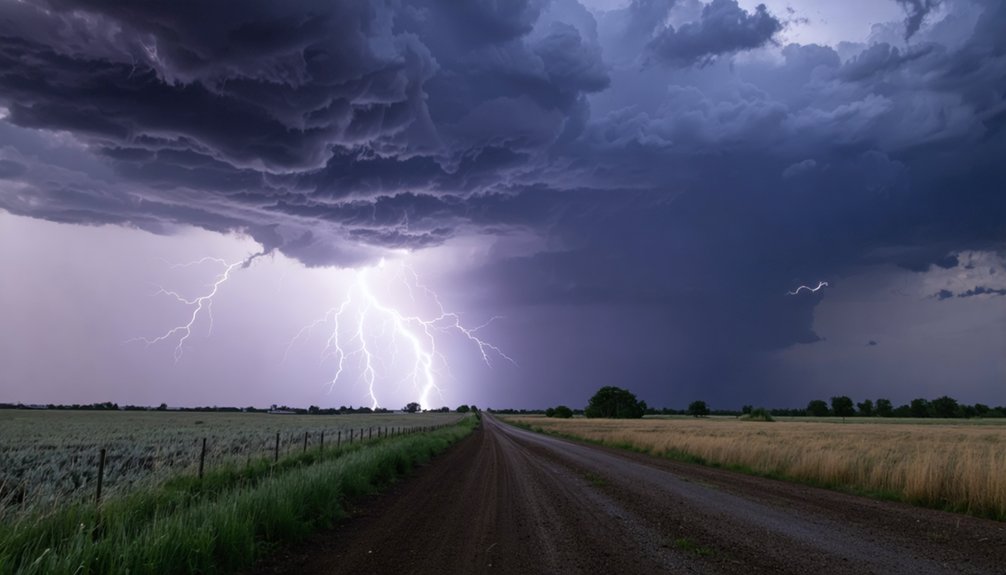
When you’re shooting lightning at night, exposure length directly determines your odds of capturing a bolt. Longer exposures increase your chances, so start with 10 to 30 seconds as your baseline for standard night conditions.
Your lightning timing strategy shifts depending on storm activity — dial back to 5 to 8 seconds during intense, rapid-fire storms to isolate individual bolts cleanly. For distant storms, push your exposure techniques toward 20 to 30 seconds and pull multiple strikes into a single dramatic frame.
Use bulb mode for complete manual control, triggering and closing the shutter on your own terms. Keep ISO between 100 and 200 to minimize noise, and shoot RAW to preserve every recoverable detail when you’re editing in post.
Shutter Speed for Twilight and Active Storm Conditions
Twilight and active storm conditions pull you away from those longer night exposures and demand tighter timing. When ambient light still lingers on the horizon, your twilight exposure needs to drop to 5–10 seconds to prevent overexposure from competing light sources. You’re balancing the sky’s residual brightness against the bolt’s intensity, so precision matters.
For active storm settings, tighten that window further. Rapid-fire lightning in a volatile cell calls for 5–8 second exposures, letting you isolate individual bolts without blending multiple strikes into a muddy frame. Shorter windows give you cleaner, sharper captures.
Keep manual mode locked in, stay responsive, and adjust as storm intensity shifts. These conditions reward photographers who adapt fast and commit to disciplined timing over guesswork.
How to Shoot Lightning in Daylight Using ND Filters
When shooting lightning during daylight, you’ll need a neutral density filter to block excess light and allow longer shutter speeds without overexposure.
Start with a three-stop ND filter before sunset, pairing it with an aperture of f/8 and ISO 100 to maintain proper exposure balance.
From there, you can experiment with wider or narrower aperture settings to fine-tune brightness while keeping your shutter speed long enough to capture a strike.
Choosing the Right Filter
Shooting lightning in daylight throws one major obstacle at you: too much light for a long enough exposure. That’s where ND filters become your essential tool. Among available filter types, the three-stop ND filter hits the sweet spot for pre-sunset storm shooting, letting you stretch your shutter speed without blowing out the frame.
The filter advantages are straightforward: you maintain a low ISO of 100, keep your aperture around f/8, and still run exposures long enough to catch a bolt.
A six-stop ND pushes that flexibility further during peak daylight hours. Screw-on filters work well for fixed focal lengths, while square system filters give you faster swaps between intensities.
Match your filter strength to the ambient light, and you’ll stop fighting the sun.
Balancing Exposure Settings
With your ND filter locked on, the real work begins: dialing in a balanced exposure that captures lightning without destroying the frame. Start at f/8, ISO 100, and let your light meter guide your shutter speed adjustments.
You’re working the exposure triangle deliberately here — every variable affects the next.
Before sunset, a three-stop ND filter lets you push shutter speeds long enough to catch a bolt without blowing highlights. As light drops, reassess. If bolts appear faint, open to f/5.6. If the sky burns bright, tighten to f/11. Keep ISO anchored at 100 to suppress noise.
Manual mode gives you full command. Trust your meter, make precise adjustments, and shoot with intention. Daylight storm photography rewards discipline, not guesswork.
Manual Mode and Infinity Focus for Storm Photography
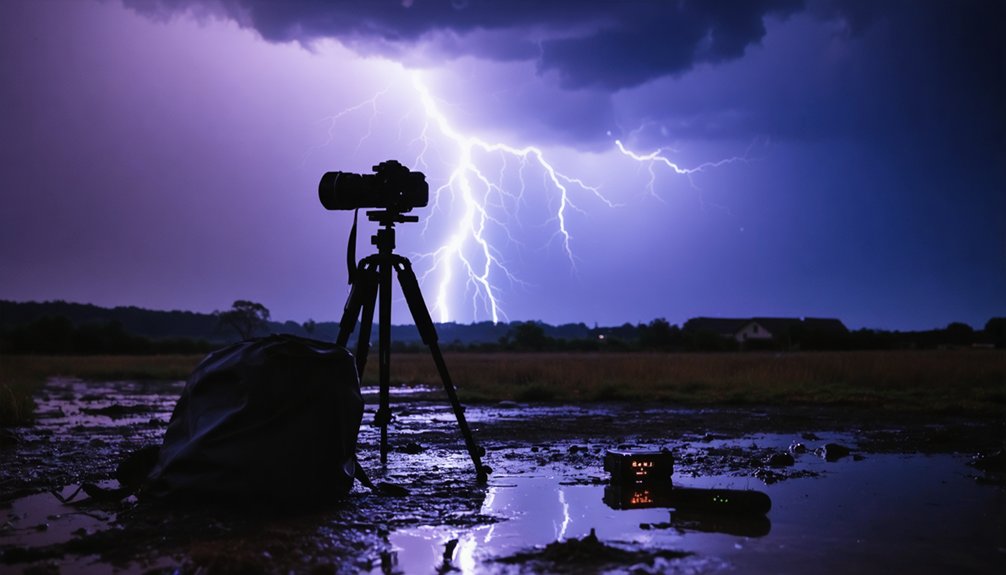
Capturing storm photography demands complete control, so you’ll want to shoot in full manual exposure mode for every session. Manual mode lets you dial in precise exposure adjustments without the camera second-guessing your creative decisions during rapidly changing storm conditions.
For focus techniques, switch your lens to manual focus and set it to infinity. Autofocus struggles in low-contrast storm environments, hunting endlessly while you miss critical strikes. Locking infinity focus guarantees every distant bolt renders sharp and defined.
Turn off optical stabilization on both your lens and camera body — it creates micro-movements during tripod-mounted long exposures, degrading image sharpness.
Shoot RAW format exclusively to preserve maximum dynamic range for post-processing. These foundational settings give you the freedom to chase storms confidently without technical failures costing you the shot.
Aperture Settings That Control Depth of Field and Highlights
Aperture directly shapes how your storm images balance depth of field against highlight control, so starting at f/8 to f/11 gives you a reliable foundation for most conditions.
When lightning strikes close, tighten your aperture control to f/13 or f/16 for effective highlight management that prevents blown-out bolts from wrecking your frame.
Tighten your aperture to f/13 or f/16 when lightning strikes close to prevent blown-out bolts.
Distant or faint strikes demand the opposite approach — open up to f/5.6 or f/8 to pull in more light and reveal detail you’d otherwise lose.
Daylight storm work typically anchors at f/8, then shifts based on scene brightness.
Avoid ultra-wide apertures like f/2.8, since sharpness suffers across your frame.
Every aperture decision you make directly determines how much creative control you hold over the final image.
How to Match ISO to Your Aperture for Clean Storm Shots
ISO is your noise floor — set it wrong and even a perfectly exposed lightning shot falls apart in post. Mastering ISO adjustments locks in the final corner of the exposure triangle.
- Daylight storms: Use ISO 100 paired with an ND filter and f/8 for clean, noise-free frames.
- Twilight conditions: Push to ISO 200–400 while stopping down to f/11 to balance fading ambient light.
- Full darkness: Stay at ISO 100–200 with f/8 to f/11, letting longer shutter speeds do the heavy lifting.
- Faint or distant bolts: Widen to f/5.6 before raising ISO to preserve image quality.
Keep ISO as low as your aperture allows. Noise is permanent; missed sharpness is unforgivable.
Using Bulb Mode to Capture Lightning on Your Own Schedule
Bulb mode hands you the shutter — you open it, you close it, and lightning fires on your terms. Rather than committing to a fixed exposure, you’re gaining full exposure flexibility, holding the shutter open precisely as long as the scene demands.
Spot a promising storm cell building on the horizon? Open the shutter, watch the sky, and close it the moment a bolt discharges.
Lightning timing becomes intentional rather than accidental. You’re not gambling on a 25-second preset capturing something useful — you’re reading the storm, anticipating the strike, and responding in real time.
Pair bulb mode with a remote shutter release to eliminate camera shake. Set aperture between f/8 and f/11, keep ISO at 100, and let your instincts drive every exposure decision.
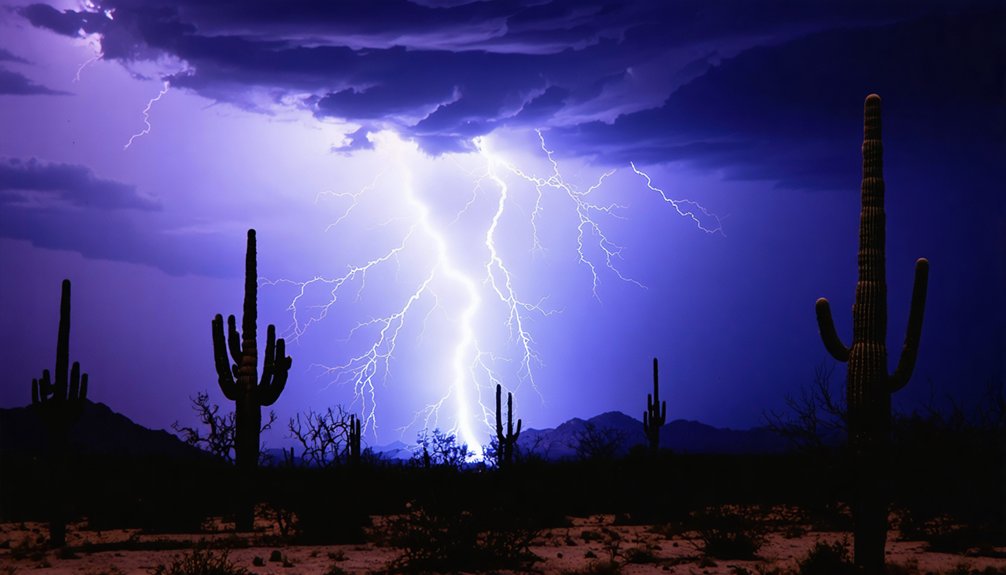
Safe Distance and Positioning for Storm Photography
Maintaining several miles of separation between you and the storm isn’t timidity — it’s tactical. Smart storm positioning keeps you shooting longer and safer.
Apply these safety measures before every chase:
- Track radar actively — use weather bureau apps to monitor storm direction and adjust your position accordingly.
- Shelter in your vehicle — never stand under trees; your car becomes your mobile command center.
- Ditch the umbrella — metal conducts electricity, making umbrellas a genuine hazard during active strikes.
- Use zoom lenses — longer focal lengths let you capture dramatic detail without closing the distance.
Distance gives you creative control, not limitations.
Distance isn’t a creative limitation — it’s your greatest compositional advantage when chasing storms.
You’ll frame wider compositions, capture multiple bolts, and stay free to reposition as the storm evolves.
Frequently Asked Questions
What Camera Brands Are Best Suited for Storm Photography Beginners?
The knowledge doesn’t cover camera brands, but you’ll want reliable camera features and solid beginner tips over brand loyalty. Choose what fits your budget, master manual mode, and you’re ready to chase.
Can Mirrorless Cameras Perform as Well as DSLRS for Lightning Shots?
Yes, mirrorless cameras perform just as well as DSLRs for lightning exposure. You’ll need to disable stabilization for camera stability, shoot in RAW, use manual mode, and control your aperture and shutter settings precisely.
How Do Weather-Sealed Camera Bodies Protect Against Rain During Storms?
Rain hammers your lens as weather-sealed bodies lock out moisture through tight gaskets and seals. They shield critical internals during brutal weather conditions, letting you focus on the shot while simplifying gear maintenance after the storm.
What Memory Card Speed Is Recommended for Continuous RAW Burst Shooting?
You’ll want a UHS-II memory card rated at V60 or V90 for continuous RAW burst shooting techniques. These memory card types handle high-speed writes effortlessly, ensuring you never miss a dramatic lightning strike during your wildest storm-chasing adventures.
How Does Lens Focal Length Choice Affect Lightning Composition and Framing?
Shooting a wide 24mm focal length lets you frame an entire storm cell dramatically. Your focal length drives composition techniques — go wide for sweeping skies, or zoom to 200mm to isolate a single bolt’s detail precisely.
References
- https://www.youtube.com/watch?v=dytc3vWIcmg
- https://photzy.com/what-ive-learned-about-storm-chasing-photography/
- https://photographyreference.com/weather-and-storm-chasing-photography/
- https://www.canon.com.au/get-inspired/storm-photography-tips-camera-settings
- https://www.reddit.com/r/photocritique/comments/8jx1j1/im_getting_into_storm_chasing_a_little_and/
- https://www.reddit.com/r/stormchasing/comments/w2htxo/video_camera_settings/
- https://www.kuhl.com/borninthemountains/guide-to-storm-and-lightning-photography
- https://www.youtube.com/watch?v=PfRnKwtTTyo
- https://camerasettings.com/settings/lightning/
- https://crazystormchasers.com/best-camera-settings-for-capturing-storm-clouds/