To document storm damage effectively, you’ll need to confirm structural safety before entering the property, then capture dated photos and narrated videos from all angles using size references like coins or rulers. You’ll want to maintain written logs organized by location, cross-referenced with timestamped photo filenames. Back everything up to cloud storage same-day, collect professional assessments, and track every repair receipt. The sections below break each method down into actionable steps.
Key Takeaways
- Confirm structural safety and obtain official clearance before entering the property to conduct a thorough exterior and interior damage assessment.
- Capture exterior photos from all four sides using angled lighting, with rulers or coins placed next to damage for size reference.
- Record narrated walkthrough videos documenting leaks, debris, and water intrusion, then organize and back up all files to cloud storage immediately.
- Log every insurance interaction with dates, contact details, claim numbers, and summaries of statements, promises, and agreed next steps.
- Collect contractor evaluations, adjuster reports, weather data, and pre-storm maintenance records to support a comprehensive, well-documented insurance claim.
Confirm Property Safety Before Documenting Storm Damage
Before you grab your camera or start taking notes, you’ve got to confirm the property is structurally safe to enter. Skipping this step puts you at serious property risk and can turn documentation into a dangerous mistake. Wait for official safety clearance from local authorities before crossing any threshold.
Once cleared, conduct a basic structural assessment from the outside first. Look for compromised load-bearing walls, sagging rooflines, or foundation shifts that signal interior instability. Note immediate storm observations—fallen trees, visible hail impact zones, or downed power lines—before stepping inside.
Record the date and approximate time the storm passed through. This timestamps your entire documentation effort and establishes a factual baseline that supports every subsequent photo, video, and written record you’ll produce.
Capture Photo and Video Evidence That Adjusters Cannot Dismiss
Once the property’s cleared and your baseline observations are logged, your next move is building a visual record strong enough to hold up against adjuster scrutiny. Visual consistency and smart lighting techniques eliminate ambiguity and make your documentation impossible to dismiss.
- Shoot all four exterior sides in sequence, using angled lighting to reveal hail depth and surface dents
- Place a ruler or coin next to every damage point for undeniable size reference
- Record a slow, narrated video walkthrough covering active leaks, debris patterns, and interior water intrusion
- Sort every file into labeled folders by location immediately, then back everything up to cloud storage the same day
This structured approach keeps your evidence organized, verifiable, and ready to counter any adjuster challenge without hesitation.
Build a Written Damage Log With Dates, Locations, and Photo References
After you’ve captured your photo and video evidence, organize your written damage log by grouping entries under specific locations like “Exterior North,” “Interior Kitchen,” or “Attic.”
Timestamp each entry with the date and time of your observation. Cross-reference every log entry to its corresponding photo file name so adjusters can move directly from your written description to the supporting image without ambiguity.
You’ll also want to maintain a separate running contact log that records every insurance interaction by date, representative name, and key details discussed, creating a verifiable paper trail throughout the claims process.
Log Damage By Location
While photos and videos capture the visual record, a written damage log ties everything together into a structured, claims-ready document.
Organize entries by physical location using damage mapping so every affected area has a dedicated section. Site annotation keeps your documentation precise and cross-referenceable.
Structure each location entry to include:
- Area name and position — specify “Exterior North Wall, upper left corner” rather than vague descriptions
- Damage type and severity — note cracking, staining, punctures, or structural compromise
- Corresponding photo file names — link each entry directly to its visual evidence
- Date and time of observation — establish a clear timeline for the insurance adjuster
This location-based structure eliminates guesswork, accelerates claim reviews, and keeps your documentation independent and verifiable.
Cross-Reference Photos To Notes
Cross-referencing your photos to your written notes transforms isolated images into a cohesive, verifiable record that adjusters can follow without ambiguity.
Assign each photo a file name that includes the date, location, and sequence number—for example, “2024-05-10_ExteriorNorth_003.jpg.” In your written log, list that exact file name beside the corresponding damage description, noting storm severity indicators like hail size or wind direction observed at that location.
This structured pairing protects your insurance coverage by eliminating guesswork about what each image depicts. Adjusters won’t need to interpret unlabeled photos or reconcile conflicting accounts.
Keep your log in a dedicated folder alongside your digital files, and back everything up to cloud storage immediately. You control the narrative when your documentation is precise, organized, and independently verifiable.
Track Insurance Contact Records
Every interaction you have with your insurance company becomes part of the official claims record, so document each contact in a dedicated written log the moment it occurs. Your insurance claim depends on accurate contact records that prove timelines, commitments, and conversations.
- Log the date, time, representative’s name, and direct phone number for every call or meeting.
- Summarize what each representative stated, including any promised deadlines or next steps.
- Record claim numbers, policy references, and any case identifiers mentioned during contact.
- Note whether follow-up documentation was requested and cross-reference those requests to specific photo files.
This log becomes your control mechanism, protecting your position if disputes arise over what was communicated, when it was said, and who authorized specific actions throughout the process.
Get Professional Reports That Validate Your Storm Damage Claim
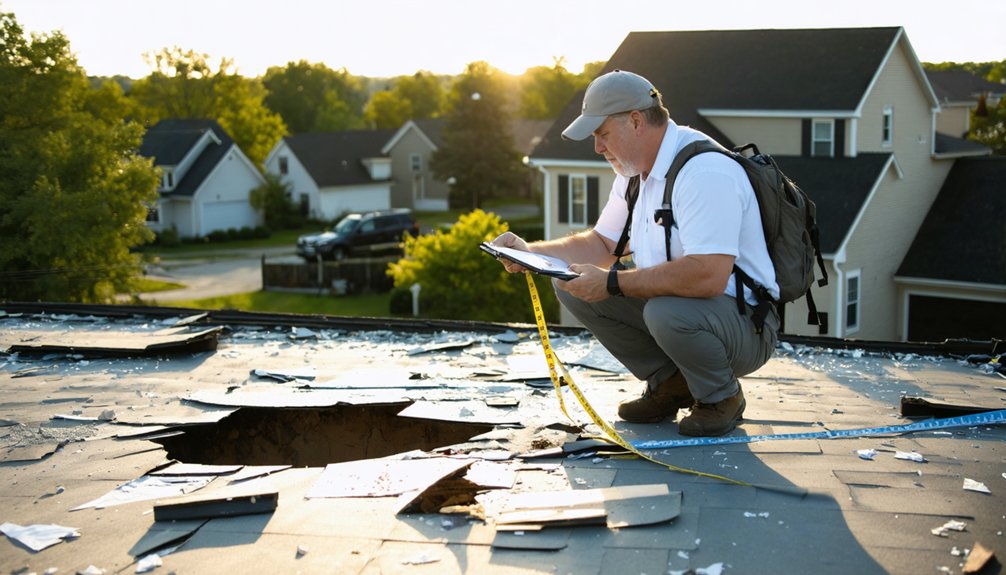
Professional reports from qualified third parties strengthen your storm damage claim in ways that personal photos and written logs cannot. Hire a licensed contractor to conduct a formal contractor evaluation of your roof, siding, and structural components. Their written assessment documents specific damage points, materials affected, and recommended repairs, giving your insurance claim measurable, defensible data.
Request a copy of the insurance adjuster’s inspection findings immediately after their visit. Secure weather reports confirming the storm’s date, location, and intensity from verified meteorological sources.
If structural concerns exist, commission an independent licensed engineer or IICRC-credentialed restorer to assess moisture intrusion or load-bearing damage.
Gather pre-storm maintenance records to establish baseline condition. These combined professional reports create an evidence framework that withstands scrutiny and protects your right to a fair settlement.
Track Every Emergency Expense and Repair Receipt From Day One
From the moment the storm passes, you should collect and organize every receipt for emergency tarping, water extraction, debris removal, and temporary repairs into a dedicated folder labeled with the storm date.
Sort your financial records by category—materials, labor, inspections—so you can cross-reference each expense against your damage log without confusion.
Back up all invoices, estimates, and receipts to cloud storage the same day you receive them to guarantee nothing gets lost before your claim is settled.
Organizing Emergency Repair Receipts
When a storm strikes, you’ll want to start tracking every emergency expense from the moment you take action—don’t wait until the claim process begins. Organized records strengthen insurance claims and prevent disputes over contractor estimates.
- Save every receipt for tarping, water extraction, debris removal, and temporary materials immediately after purchase.
- Create a dedicated digital folder labeled with the storm date and sort documents by category.
- Photograph physical receipts the same day to prevent fading or loss before submission.
- Log each expense with the vendor name, service performed, date, and corresponding photo file name.
Back up everything to cloud storage daily. A structured system keeps you in control of your claim, guarantees no reimbursable cost gets overlooked, and eliminates dependency on any single party’s records.
Backing Up Financial Records
Backing up your financial records the same day you generate them eliminates the risk of losing reimbursable expenses to hardware failure, physical receipt fading, or disorganized files.
Create a dedicated cloud folder labeled with the storm date and sort documents into subfolders: insurance claims, contractor estimates, emergency repairs, and materials purchased.
Photograph paper receipts immediately using your phone and upload them before the day ends. Don’t rely solely on physical copies since thermal paper fades within weeks.
Store duplicates across at least two platforms, such as Google Drive and an external hard drive, so you’re never dependent on a single system. This redundancy keeps your financial documentation complete, accessible, and defensible throughout every stage of the claims process.
Organize and Back Up All Storm Damage Documentation Immediately

Once you’ve finished capturing photos, videos, and written logs, organize everything into a dedicated folder on your phone or computer labeled with the storm’s date.
Subfolders sorted by location keep your insurance claims process efficient and stress-free during storm recovery.
- Sort files into subfolders labeled by area: Exterior North, Interior Kitchen, Attic
- Back up all documentation to cloud storage on the same day as the storm
- Cross-reference photo file names with your written damage log entries
- Store copies across at least two platforms, such as Google Drive and an external hard drive
Disorganized files slow down adjuster reviews and delay settlements. Taking thirty minutes to structure your documentation immediately after the storm protects your ability to control the claims process independently.
Frequently Asked Questions
Can Storm Damage Documentation Help Dispute a Denied Insurance Claim Later?
Your documentation is a shield—yes, it can dispute denials. You’ll strengthen insurance disputes through evidence preservation: photos, videos, professional reports, and written logs all empower you to challenge unjust decisions and reclaim what’s yours.
How Long Should Homeowners Retain Storm Damage Records After Settlement?
You should retain storm damage records for at least seven years after settlement. Strong record keeping protects your freedom if disputes arise. Always verify your state’s insurance requirements, as they’ll dictate specific retention timelines for claims documentation.
Does Documenting Neighbor Damage Strengthen Your Individual Insurance Claim?
Yes, neighbor cooperation strengthens your claim. Collect their contact information and damage assessment details to corroborate storm intensity across multiple properties. This independent evidence supports your position, giving you freedom from sole reliance on adjuster opinions.
Should Renters Document Storm Damage the Same Way Property Owners Do?
Over 40% of renters lack proper coverage awareness. You should document storm damage identically to owners — photograph, video, and log everything. Rental policies and tenant responsibilities require your thorough evidence to protect personal property claims effectively.
Can Social Media Posts Showing Storm Damage Be Used as Evidence?
Yes, you can use social media posts as evidence. They’ll timestamp your storm damage visually. Pair them with weather apps confirming conditions and drone footage capturing property scope to strengthen your documentation package considerably.
References
- https://www.crownexteriorsllc.com/how-to-document-storm-property-damage/
- https://cmslawgroup.com/how-to-document-storm-damage-at-your-home/
- https://www.youtube.com/watch?v=O5q7Smm8uhY
- https://torocontractingrllc.com/which-documents-prove-roof-storm-damage/
- https://midweststormtracker.com/documenting-storm-damage-a-step-by-step-photo-and-video-guide/
- https://northwestroofingnc.com/blog/how-to-document-storm-damage-for-insurance-claims-a-homeowners-complete-guide
- https://nationalstormrepair.com/storm-damage-documentation-best-practices
- https://stormdamageauthority.com/storm-damage-documentation-best-practices
- https://www.youtube.com/watch?v=QkhJ1nWJm2I